2 • HP Photosmart C7280 All-in-One series
5
3
4
Periksa isi kemasan. Isi kemasan Anda mungkin
berbeda.
*Dapat disertakan
Jika pelat muka panel kontrol belum ditempelkan,
posisikan pelat tersebut tepat di atas tombol-
tombol pada perangkat.
Tekan ke bawah kuat-kuat pada semua tepi pelat
muka sampai terkunci di tempatnya. Pastikan
semua tombol terlihat dan tidak tertutupi.
a.
b.
Pasang kabel daya dan adaptor.
Tekan
untuk menghidupkan HP All-in-One.
CATATAN: Perhatikan pesan dan animasi
yang membantu pada layar selama proses
pemasangan.
a.
b.
ตรวจสอบอุปกรณ์ต่างๆ ภายในกล่อง อุปกรณ์ภายใน
กล่องบรรจุอาจแตกต่างกัน
*อาจรวมอยู่ด้วย
หากยังไม่ได้ติดแผ่นหน้าของแผงควบคุม ให้จัดตำแหน่ง
แผ่นดังกล่าวไว้เหนือปุ่มของเครื่องพิมพ์
กดขอบทุกด้านของแผ่นหน้าแผงควบคุม ให้แน่น
จนกว่าจะมีเสียง คลิ
ก ซึ่งแสดงว่าแผ่นเข้าที่แล้ว ตรวจส
อบว่าสามารถมองเห็นปุ่มทั้งหมดและไม่มีสิ่งใดบังไว้
a.
b.
ต่อสายไฟและอะแดปเตอร์
กด
เพื่อเปิด HP All-in-One
หมายเหตุ: ดูข้อความและภาพเคลื่อนไหวที่เป็น
ประโยชน์ในหน้าจอระหว่างขั้นตอนการตั้งค่า
a.
b.
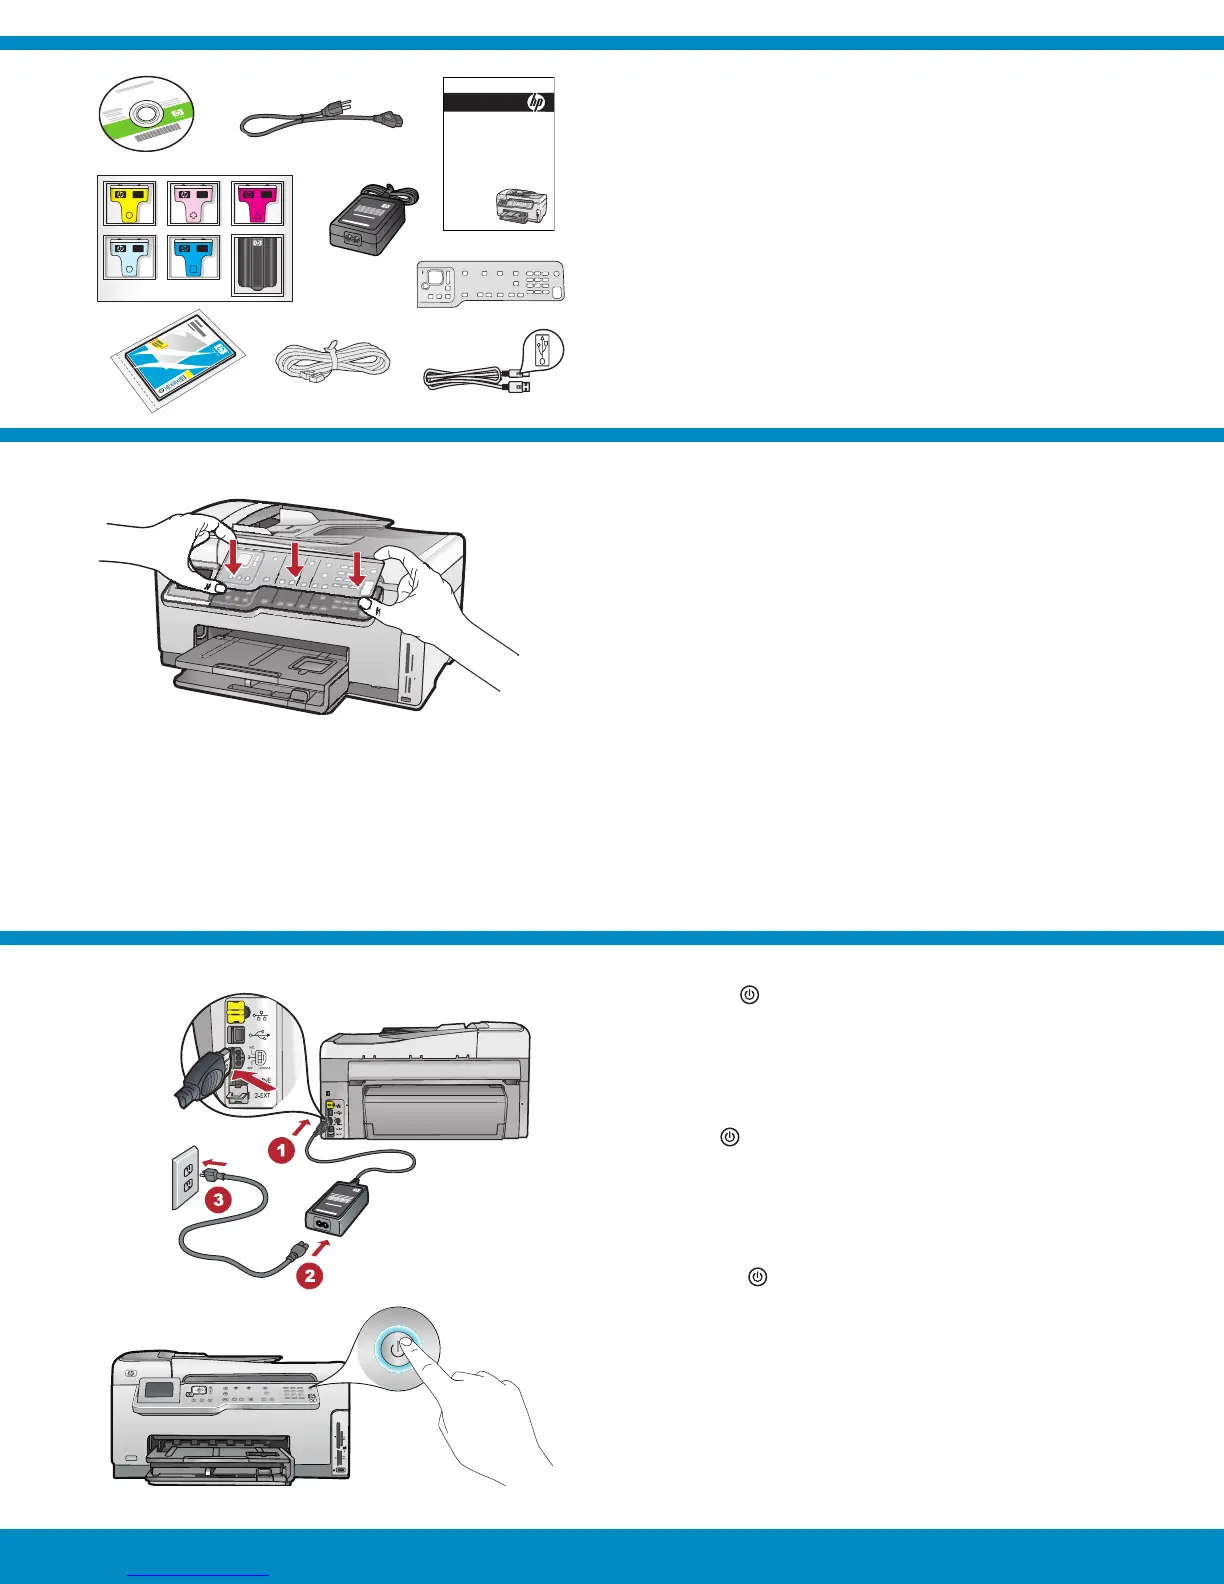
Verify the box contents. The contents of your box
may differ.
*May be included
If the control panel faceplate is not already
attached, position it over the buttons on the device.
Press down fi rmly on all edges of the faceplate
until it snaps into place. Make sure all buttons are
visible and not blocked.
a.
b.
Connect the power cord and adapter.
Press
to turn on the HP All-in-One.
NOTE: Pay attention to the helpful messages and
animations in the display during the setup process.
a.
b.
HP Photosmart C7200 All-in-One series
Basics Guide
*
*
*
 Loading...