15
What paper and le types are supported?
The printer supports the following paper and le types:
• 7.6 x 5 cm (3 x 2 in) HP ZINK® photo paper
• BMP, GIF, JPEG, PNG, and TIFF (iOS only) le types
Can I send multiple print jobs at the same time?
No. The printer can only process one print job at a time. When you send a print job while the printer is processing
another print job, a “Printer in Use. Sprocket is already processing a job. Please wait to resend photo.” message
displays on your mobile device. Wait until the current print job completes and then send the next print job.
Can I print to more than one printer?
Yes. You can connect and print to more than one printer, but you cannot connect to multiple printers at the same
time.
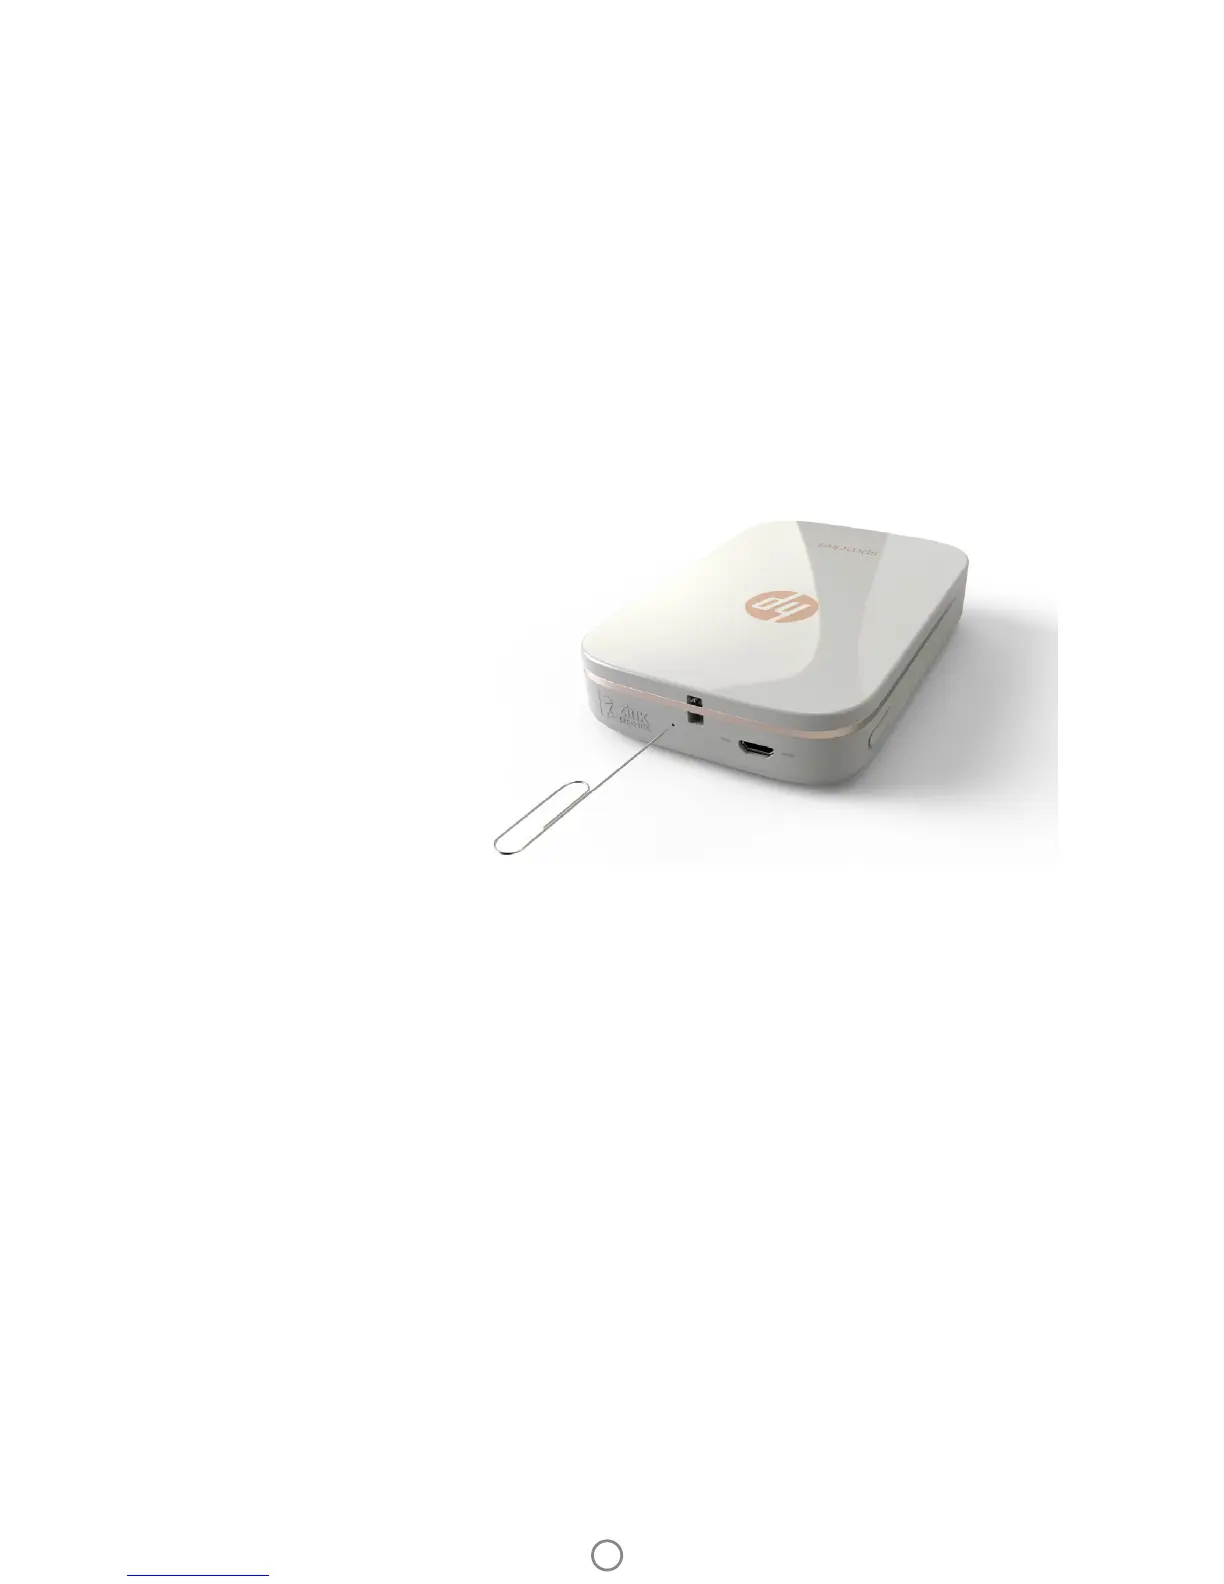
How do I reset my printer?
If the printer does not print when you send a print job or turn on when you press the power button, reset the printer
with a straight pin to clear any errors.
1. Turn on the printer.
2. Locate the reset pin-hole near
the charging port.
3. Gently insert a straight pin
into the hole to press the reset
button inside.
4. The printer resets and turns
o.
5. Turn on the printer.
How do I attach a lanyard to my printer?
Attach a lanyard (sold separately) to your printer to secure the printer to your wrist, carabiner, etc.
NOTE: Make sure the lanyard contains a strap small enough to thread through the lanyard attachment point of your printer.
1. Turn o the printer.
2. Remove the top cover by sliding it away from the output slot and then set it aside.
3. Remove any loose photo paper from the input tray and then set aside if necessary.
4. Locate the lanyard attachment point at the top of the printer.
5. With the lanyard in one hand, thread the smaller lanyard loop through the hole in the printer until
approximately half of the lanyard is through the hole.
6. Thread one end through the opposite end of the lanyard.
7. Tighten the lanyard by pulling the opposite end.
8. Reload the remaining photo paper with the print side facing up.
9. Align the top cover with the tracks on the outside of the printer and then slide the top cover toward the
output slot until it is rmly seated.
10. Turn on the printer.
What is the warranty of my printer?
The printer has a one-year limited hardware warranty from the date of purchase.
 Loading...