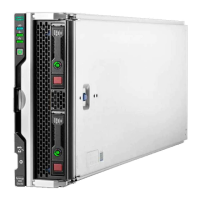
Installing an NVDIMMInstalling an NVDIMM
CAUTION:CAUTION:
To avoid damage to the hard drives, memory, and other system components, the air baffle, drive blanks, and access
panel must be installed when the server is powered up.
CAUTION:CAUTION:
To avoid damage to the hard drives, memory, and other system components, be sure to install the correct DIMM baffles
for your server model.
CAUTION:CAUTION:
DIMMs are keyed for proper alignment. Align notches in the DIMM with the corresponding notches in the DIMM slot
before inserting the DIMM. Do not force the DIMM into the slot. When installed properly, not all DIMMs will face in the
same direction.
CAUTION:CAUTION:
Electrostatic discharge can damage electronic components. Be sure you are properly grounded before beginning this
procedure.
CAUTION:CAUTION:
Failure to properly handle DIMMs can damage the DIMM components and the system board connector. For more
information, see the DIMM handling guidelines in the troubleshooting guide for your product on the Hewlett Packard
Enterprise website:
HPE ProLiant Gen10 (https://www.hpe.com/info/gen10-troubleshootinghttps://www.hpe.com/info/gen10-troubleshooting)
HPE Synergy (https://www.hpe.com/info/synergy-troubleshootinghttps://www.hpe.com/info/synergy-troubleshooting)
CAUTION:CAUTION:
Unlike traditional storage devices, NVDIMMs are fully integrated in with the ProLiant compute module. Data loss can
occur when system components, such as the processor or HPE Smart Storage Battery, fails. HPE Smart Storage battery
is a critical component required to perform the backup functionality of NVDIMMs. It is important to act when HPE Smart
Storage Battery related failures occur. Always follow best practices for ensuring data protection.
PrerequisitesPrerequisites
Before installing an NVDIMM, be sure the compute module meets the Server requirements for NVDIMM support.
ProcedureProcedure
1. Power down the compute module.
2. Remove the compute module.
3. Place the compute module on a flat, level work surface.
4. Remove the access panel .
5. Locate any NVDIMMs already installed in the compute module.
6. Verify that all LEDs on any installed NVDIMMs are off.
7. Install the NVDIMM.

 Loading...