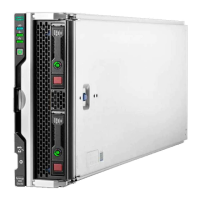
Installing the processor heatsink optionInstalling the processor heatsink option
The server supports installation of 1–4 processors.
IMPORTANT:IMPORTANT:
Existing HPE ProLiant and HPE Synergy Gen10 server products containing first-generation Intel Xeon Scalable
processors may not be upgraded to second-generation Intel Xeon Scalable processors at this time.
For more information, see the product QuickSpecs on the Hewlett Packard Enterprise website
(https://www.hpe.com/info/qshttps://www.hpe.com/info/qs).
PrerequisitesPrerequisites
To complete this procedure, you need a T-30 Torx screwdriver.
ProcedureProcedure
1. Observe the following cautions and warnings:
WARNING: WARNING: To reduce the risk of personal injury from hot surfaces, allow the drives and the
internal system components to cool before touching them.
CAUTION: CAUTION: To prevent possible compute module malfunction and damage to the equipment, multiprocessor
configurations must contain processors with the same part number.
CAUTION: CAUTION: The heatsink thermal interface media is not reusable and must be replaced if the heatsink is removed
from the processor after it has been installed.
CAUTION: CAUTION: To prevent possible compute module overheating, always populate processor socket 2 with a processor
and a heatsink or a processor socket cover and a heatsink blank.
CAUTION: CAUTION: To prevent damage to electrical components, properly ground the compute module before beginning any
installation procedure. Improper grounding can cause ESD.
IMPORTANT: IMPORTANT: Processor socket 1 must be populated at all times or the compute module does not function.
2. Update the system ROM.
Locate and download the latest ROM version from the Hewlett Packard Enterprise website ( http://www.hpe.com/supporthttp://www.hpe.com/support). Follow
the instructions on the website to update the system ROM.
3. Power down the compute module.
4. Remove the compute module.
5. Remove the access panel .
6. Remove all DIMM baffles .
7. Remove the heatsink blank. Retain the heatsink blank for future use.
 Loading...