EasyManua.ls Logo

HPM MPES181BP - User Manual

HPM MPES181BP
4 pages
Print Icon
To Next Page IconTo Next Page
Loading...
Introduction
This floodlight incorporates an automatic PIR sensor with two PAR38
lamps. The sensor continuously scans a preset operating zone and
immediately switches the floodlight on when it detects movement
from people and animals. It can be used to illuminate pathways, steps,
patios, porches or other areas that require lighting for reasons of safety,
convenience or security. Whilst there is movement within the scanning
area the floodlight will remain on.
Where to fit your floodlight
Before selecting a place to install your floodlight you should note that
movement across the scan area is more effective than movement directly
toward or away from the sensor (refer FIG. 1B). If movement is made
walking directly towards or away from the sensor and not across, the
apparent detection range will be substantially reduced (refer FIG. 1A).
Always mount the MPES181BP sensor light in a sheltered position, i.e.
under the eaves of the house.
Ideally the floodlight should be mounted 1.8-2.5m above the area to be
scanned (refer to Fig. 3).
Installation
For installation of the floodlight, please refer to Fig. 2.
1. This product must be installed by a licensed electrician according to
AS/NZS 3000.
2. Switch power off at the meter box to isolate circuit.
3. Unscrew the Fixing Cover Screws then remove the cover and
Cable Gasket.
4. Remove the Cable Anchorage and Terminal Block.
5. Use the plastic back plate to mark the position of screw holes onto
mounting surface. Drill the wall to depth of about 4cm and fit the
wall plugs (supplied). Be aware of drilling or screwing into concealed
electrical wiring.
6. Ensure the cable passes through the Cable Gasket and connect cable
to Terminal Block.
7. Affix the back plate to the mounting surface with Mounting Wall
Screws (supplied).
8. Re-fit the Terminal Block and Cable Anchorage.
9. Re-fit the cover.
10. Insert the PAR38 lamps (supplied). Please ensure the sealing rubber
(supplied), is placed on the lamp holder prior to installation of
PAR38 lamps.
Important: loosen all lock nuts and screws on sensor and lamp holders
before making any adjustments.
DO NOT MEGGER TEST.
Instruction Manual
Twin Floodlight with Sensor
Cat. No. MPES181BP
Fig. 1B Highest SensitivityFig. 1A Lowest Sensitivity
2.5 Metres
4M 8M
approx.120
0
12M
Fig. 3
Fig. 4
1 Terminal Block
2 Cable Anchorage
3 Cable Gasket
4 Power Cable
5 Fixing Cover Screw x 2
6 Gasket Piece
7 Mounting Wall Screw x 2
Fig. 2
Question and Answer IconNeed help?

Do you have a question about the HPM MPES181BP and is the answer not in the manual?

Overview

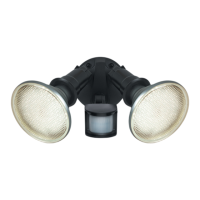
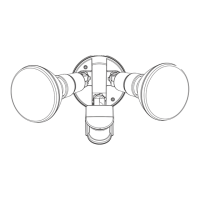
The HPM Twin Floodlight with Sensor (Cat. No. MPES181BP) is an outdoor lighting solution designed for safety, convenience, and security. It features an automatic Passive Infrared (PIR) sensor that continuously scans a preset operating zone and immediately switches on the floodlight when it detects movement from people or animals. The floodlight remains on as long as movement is detected within the scanning area.

Function Description:

The device integrates two PAR38 lamps with a PIR sensor. The sensor's primary function is to detect movement, triggering the floodlights to illuminate the area. This makes it suitable for pathways, steps, patios, porches, or any other area requiring temporary lighting. The sensor is designed to be more effective when movement occurs across its scan area rather than directly toward or away from it. If movement is made directly toward or away from the sensor, the apparent detection range is substantially reduced. For optimal performance, the unit should be mounted in a sheltered position, such as under the eaves of a house, and ideally 1.8-2.5 meters above the area to be scanned.

Important Technical Specifications:

  • Voltage Supply: 230-240Va.c. 50Hz
  • Power Consumption: 300W
  • Standby Power: <1W
  • Total Lumen Output: 2000lm (1000lm per lamp)
  • Maximum Load: 2 x 150W PAR38 lamps
  • Weatherproof Rating: IP44 (suitable for external walls with supplementary protection like overhanging eaves; valid when installed on flat, non-porous surfaces; additional sealing may be required for irregular surfaces)
  • Operating Temperature: -10°C to 50°C
  • Detection Circuitry: PIR (Passive Infrared)
  • Detection Range: 12M (max), 120° scan
  • Time Adjustment: 10±5 seconds to 4±1 minutes
  • Adjustable LUX: Yes
  • Switching Function: Auto mode only
  • Replacement HPM Lamp: LPAR38013K (non-dimmable)
  • Fixing Screws Torque: Maximum 0.8Nm (over-tightening may damage the product)

Usage Features:

Installation:

Installation must be performed by a licensed electrician in accordance with AS/NZS 3000.

  1. Switch off power at the meter box.
  2. Unscrew Fixing Cover Screws, remove the cover and Cable Gasket.
  3. Remove the Cable Anchorage and Terminal Block.
  4. Use the plastic back plate to mark screw hole positions on the mounting surface. Drill holes to a depth of approximately 4cm and fit the supplied wall plugs, being cautious of concealed electrical wiring.
  5. Ensure the cable passes through the Cable Gasket and connect it to the Terminal Block.
  6. Affix the back plate to the mounting surface using the supplied Mounting Wall Screws.
  7. Re-fit the Terminal Block and Cable Anchorage.
  8. Re-fit the cover.
  9. Insert the supplied PAR38 lamps, ensuring the sealing rubber is placed on the lamp holder prior to installation. Important: Loosen all lock nuts and screws on the sensor and lamp holders before making any adjustments. The device should not be megger tested.

Controls (TIME, SENS, LUX):

The device features three control knobs: TIME, SENS (Sensitivity), and LUX (Light Level).

  • TIME Control: Adjusts the duration the floodlight remains on after activation, from 10±5 seconds to 4±1 minutes. Rotating the knob anticlockwise reduces the duration. Each subsequent detection by the PIR sensor restarts the timed period.
  • LUX Control: Adjusts the ambient light level at which the floodlight operates. The LUX control module includes a photocell that detects daylight and darkness.
    • Light (*) position: Allows the floodlight to work day and night.
    • Dark () position: Allows the floodlight to work only at night.
    • The unit can be set to operate at a desired light level by adjusting the LUX knob.
  • SENS Control: Adjusts the sensitivity of the PIR sensor.

Setting the Controls (with sensor fully installed and power on):

  1. Turn the LUX control knob to the light (*) position, and the TIME control knob to minimum (-). Turn on the wall switch and wait 30 seconds for the control circuit to stabilise. The floodlights will switch on and remain on for approximately 10 seconds. This initial state is considered "TEST MODE."
  2. Direct the sensor toward the desired scanning area by adjusting the elbow joint and swivel joint on the sensor arm. Remember to loosen all lock nuts and screws on the sensor arm and lamp holders before making adjustments.
  3. Have someone move across the center of the area to be scanned. Slowly adjust the angle of the sensor arm until the unit senses the moving person, causing the floodlights to switch on (refer to Fig. 1B for highest sensitivity).
  4. Adjust the TIME control to the required setting.
  5. To set the light level for automatic "On" switching, turn the LUX control knob from daylight to night. If earlier activation (e.g., dusk) is desired, wait for the desired light level, then slowly turn the LUX control knob toward daylight while someone walks across the center of the detection area. Release the LUX knob when the floodlights switch on. Further adjustments may be needed to achieve the ideal light level.

Important Considerations during Adjustment:

  • When adjusting lamp holders, ensure that the PAR38 lamps do not touch or come into close proximity with the sensor head, as heat from the lamps can distort the unit.
  • The IP44 rating is only valid when installed on flat and non-porous surfaces. Additional sealing may be required for irregular surfaces.
  • The product contains no serviceable parts and should not be repaired. If faulty, it should be discarded.
  • Not suitable for installation in hazardous and/or corrosive areas.
  • Designed to minimize the effect of transient over-voltages, but may not provide full protection for extreme events like close lightning strikes.

Maintenance Features:

  • To avoid dust build-up and ensure proper functioning of the sensor light, wipe the sensor lens lightly with a damp cloth every 3 months.
  • Never modify the unit, as there are no user-serviceable parts inside.

Troubleshooting:

  • Light does not switch on: Check mains voltage, lamps, nearby lighting, control settings, and sensor position.
  • Light switches on for no apparent reason (False triggering): Check for heat sources (lamps, air con, vents, barbecues, moving cars), animals/birds, electrical interference from other devices on the same circuit, or reflections from swimming pools/surfaces. In colder months, the unit may be more sensitive and detect moving trees. Adjust lamp holders to allow a minimum 40mm gap between PAR38 lamp and sensor head. Redirect the sensor head away from heat sources. If false triggering persists, consider replacing faulty switches/fluorescent tubes, or connecting the floodlight to a separate circuit. Reduce sensitivity using the SENS dial.
  • Light remains on: Check for continuous false triggering, time setting (if set too long), or increased sensitivity in colder months (detecting moving trees). Redirect sensor head, reduce time setting, or reduce sensitivity.
  • Light switches on during daylight: The LUX control knob is likely set to the daylight position. Adjust the LUX control knob to the desired light setting.
  • Detection distance shorter in daylight: Interference by sunlight may be the cause. Re-test at night.

Warranty and Customer Service:

HPM Legrand honors all statutory guarantees under Australian and New Zealand Consumer Laws, including a guarantee of acceptable quality. For customer service and technical support, contact HPM Legrand Australia (1300 369 777, www.hpm.com.au) or HPM Legrand New Zealand (0800 476 009, www.hpm.co.nz) Monday to Friday during business hours.

HPM MPES181BP Specifications

General IconGeneral
BrandHPM
ModelMPES181BP
CategoryFlood Light
LanguageEnglish

Related product manuals