EN - 10
A1
B1
C1
I2
H2
G2
F2
D1
G1
E1
A2
F1
B2
C2
C2
D2
E2
J2
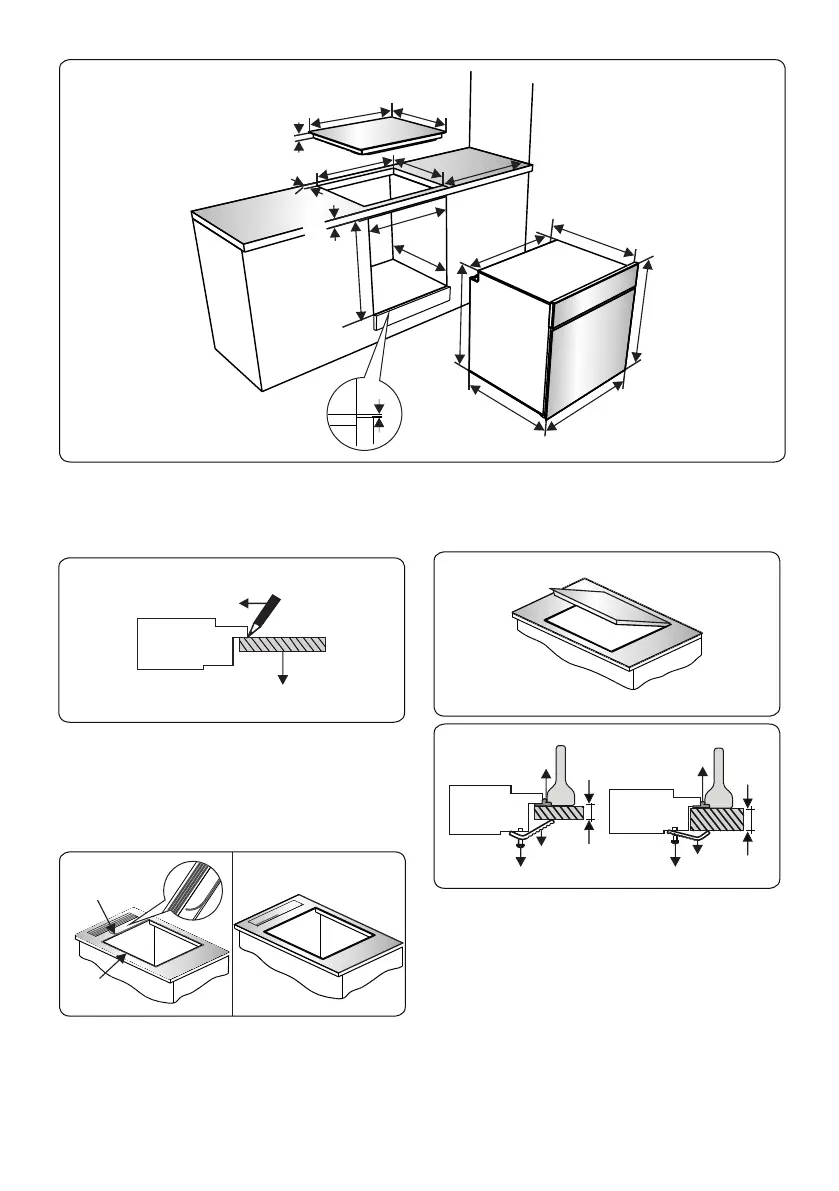
Installation of the Hotplate Hob
• Place the hob in the cut out. Mark the
location of the hob on the cooktop.
Worktop
Hob
Marker
• Remove the hob. Place the gasket on
the line you marked. Make sure that the
line centres the gasket. Ensure that the
junctions overlap at the corners and no
gap is left along the sealing material.
Line
you
marked
Gasket
• Insert the appliance into the aperture
and fix in position using the brackets
(A) and screws (B). Adjust the position
of the brackets depending on the
thickness of the worktop and tighten the
screws evenly. Carefully trim away any
excess sealing material (C) from around
the appliance.
Hob
Hob
C
C
A
A
t<25 mm
t>25 mm
B
B
Installation of the Vitroceramic Hob
• Apply the supplied one-sided self-
adhesive sealing tape all the way
around the lower edge of the cooktop.
Do not stretch it.