3. After the preceding procedure is complete, check services on the host for any storage-
related error.
----End
Follow-up Procedure
After the system subrack is replaced, label it to facilitate subsequent operations.
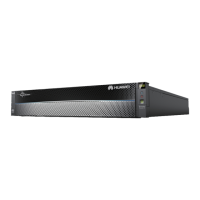
5.3 Replacing the System Subrack of a Disk Enclosure
This section describes how to replace the system subrack of a disk enclosure.
Impact on the System
Replacing a system subrack interrupts services running on the system subrack. Perform this
operation with caution and under the guidance of technical support engineers.
Prerequisites
l The spare part of the system subrack is ready.
l The system subrack that you want to replace has been located.
NOTE
You can locate a component in either of the following ways:
l Locating a component based on alarms in DeviceManager: On the Alarms and Events page of
DeviceManager, view the help information and locate the component to be replaced.
l Locating a component based on the status of its alarm indicator: For details about the indicators on
different components, see indicator introduction in the Product Description specific to your product.
l The cable connection positions of the system subrack that you want to replace are
labeled on the cables.
l Services running on the system subrack that you want to replace have been stopped.
l The power cables have been disconnected from the system subrack that you want to
replace.
Precautions
l Before replacing the system subrack, confirm that cascading cables are properly
connected.
l Remove and insert a system subrack with even force. Excessive force may damage the
appearance or connectors of the system subrack.
l To prevent personal injury, arrange three persons to move a fully configured system
subrack.
Tools and Materials
l Phillips screwdriver (M3 to M6)
l ESD wrist strap
l ESD bag
l ESD table
OceanStor Dorado V3 Series
Parts Replacement
5 Replacing FRUs
Issue 05 (2019-01-30) Copyright © Huawei Technologies Co., Ltd. 96
 Loading...

