56
Sonar (2D)
A
djust Beam Sensitivity
Your control head model may allow you to adjust the sensitivity of individual frequencies. The available frequencies are determined
by your control head model and the installed transducer. Use the following instructions to adjust a single beam.
1. Main Menu (Advanced User Mode): Press the MENU key twice. Select the Sonar tab.
2. Select 83 kHz Sensitivity or 455 kHz Sensitivity.
CHIRP Models: Select Medium Sensitivity Offset or High (455 kHz) Sensitivity Offset (HELIX CHIRP DI GPS G2 only).
3. Press the RIGHT or LEFT Cursor keys to increase or decrease the sensitivity.
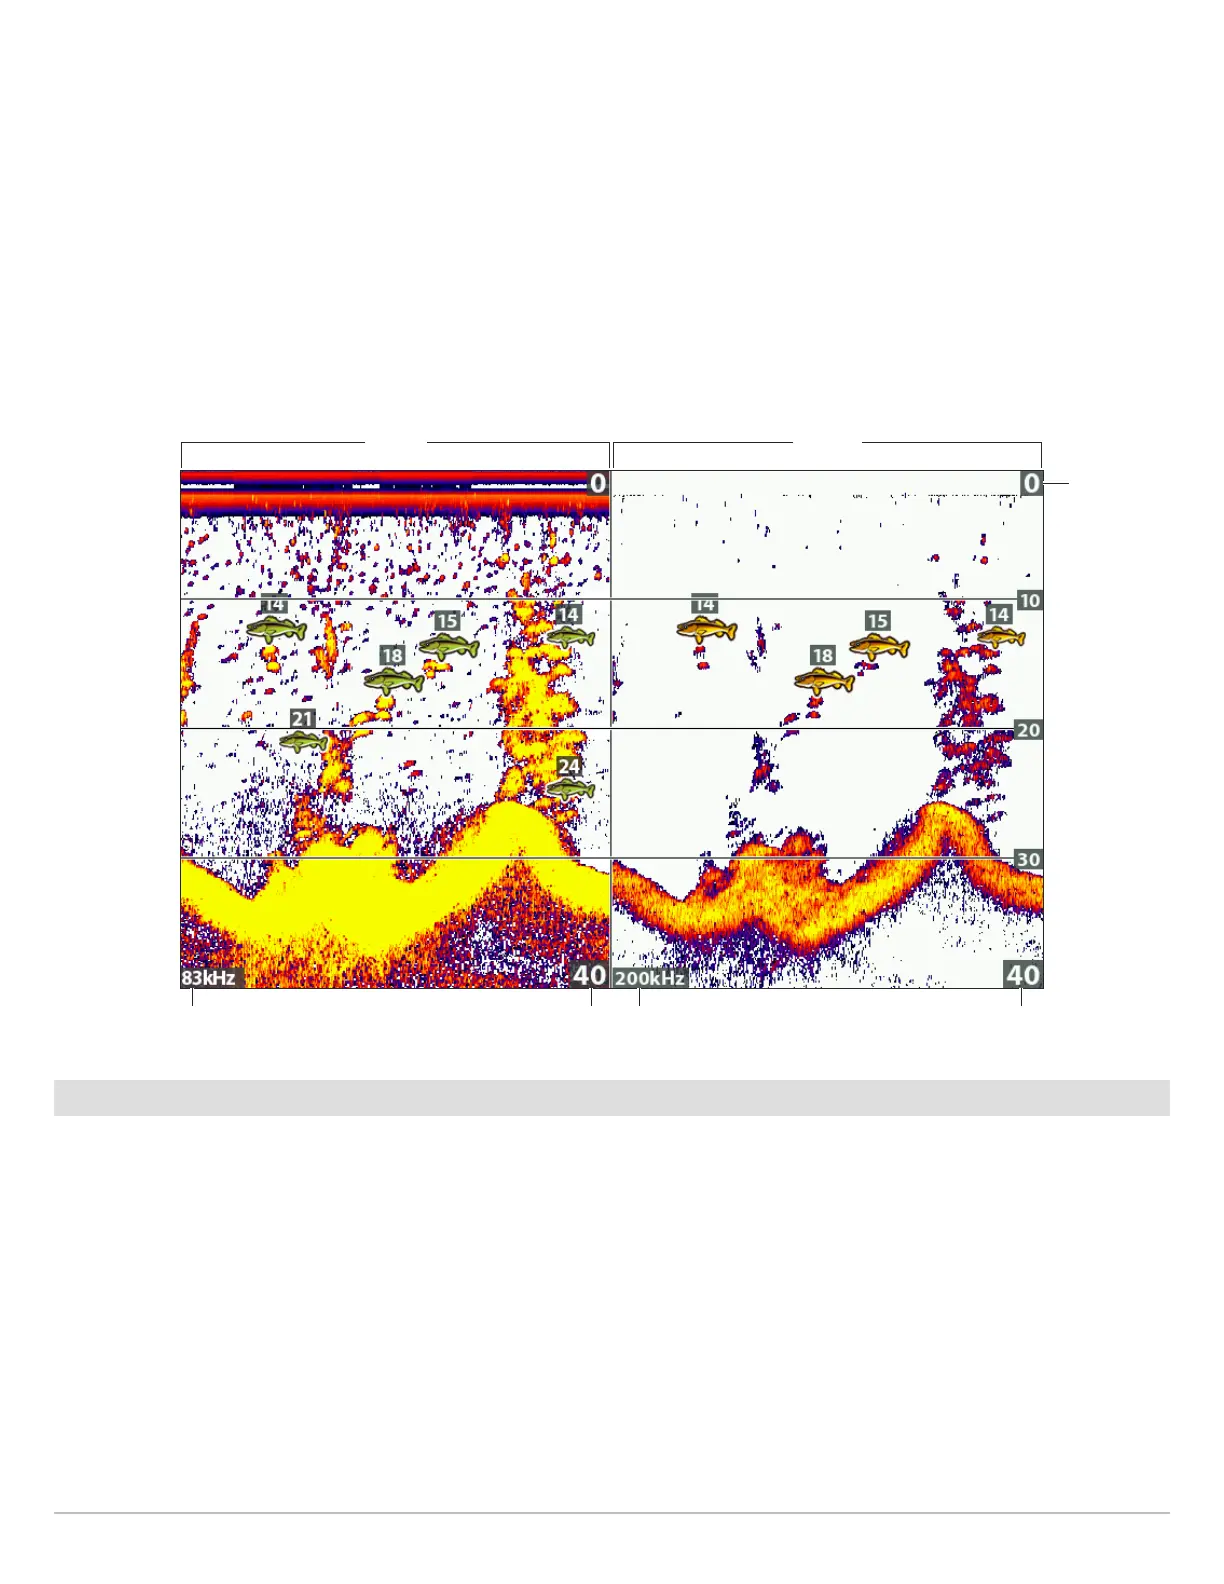
For example, in the illustration shown below, the sensitivity of the 83 kHz beam in the Split Sonar View can be adjusted without
affecting the sensitivity of the 200 kHz sonar returns. For more information about this view, see Compare Sonar Beams.
Select a Range of the Palette (Contrast)
Contrast allows you to choose a range of the Sonar Colors palette to display sonar returns. To see the current palette, display the
Color Bar on the Sonar View. For details, see Customize the Sonar View: Change the View Colors and Show/Hide Data on the Sonar
View.
When Contrast is set to 20 (default), the entire Sonar Colors palette (represented by the Color Bar) is used to display weak and strong
sonar returns. As you increase the Contrast, the top range of the Color Bar is used to display all sonar returns (whether weak or
strong). As you decrease the Contrast, the bottom range of the Color Bar is used to display all sonar returns (whether weak or
strong).
1. Sonar X-Press Menu: With a Sonar View displayed on-screen, press the MENU key once.
2. Select Contrast.
3. Press the RIGHT or LEFT Cursor keys to move the selection higher or lower on the color bar.
Increasing the Sensitivity of the 83 kHz Beam (83 kHz/200 kHz)
lower range
83 kHZ
lower rangefrequency frequency
200 kHZ
upper range
 Loading...