7 HUSKYTOOLS.COM
Please contact 1-888-43-HUSKY for further assistance.
Operation
3
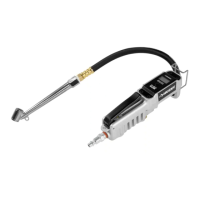
Loading the grease gun - Option 2
Filler Pump
□ Pull the plunger handle completely back and lock into
place.
□ Insert the bulk ll valve into the ller pump socket.
□ Fill the container tube and disconnect the grease gun from
the ller.
□ Press the plunger release to release the plunger handle rod
and push the plunger handle back into the container tube.
4
Loading the grease gun - Option 3
Bulk Filling
□ Unscrew the gun head from the container tube.
□ Pull the plunger handle back approximately 2 to 3 inches
and ll this section of the container tube.
□ Repeat this process until the entire container tube is lled.
Be careful to pack without air pockets.
□ Screw the gun head and container tube back together.
□ Press the plunger release to release the plunger handle rod
and push the plunger handle back into the container tube.
5
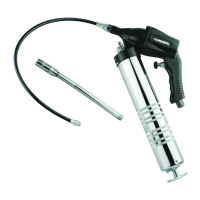
Installing the exible or rigid nozzle
WARNING: Disconnect the the grease gun from the air
supply before servicing or changing accessories.
□ Fit the exible nozzle (included) or the rigid nozzle (not
included) to the oil screw in the front of the nose piece. Use
the suitable size open end wrench to tighten the exible or
rigid nozzle.
To remove the exible nozzle or rigid nozzle:
□ Disconnect the tool from the air source.
□ Remove the exible nozzle or the rigid nozzle with the open
end wrench.
6
Inserting grease
□ Afx the nozzle to the desired tting and pull the trigger
until the tting is full.
(continued)
 Loading...