English - 85
5. REPAIR INSTRUCTIONS
5.1 Dismantling and assembling the
Automower™
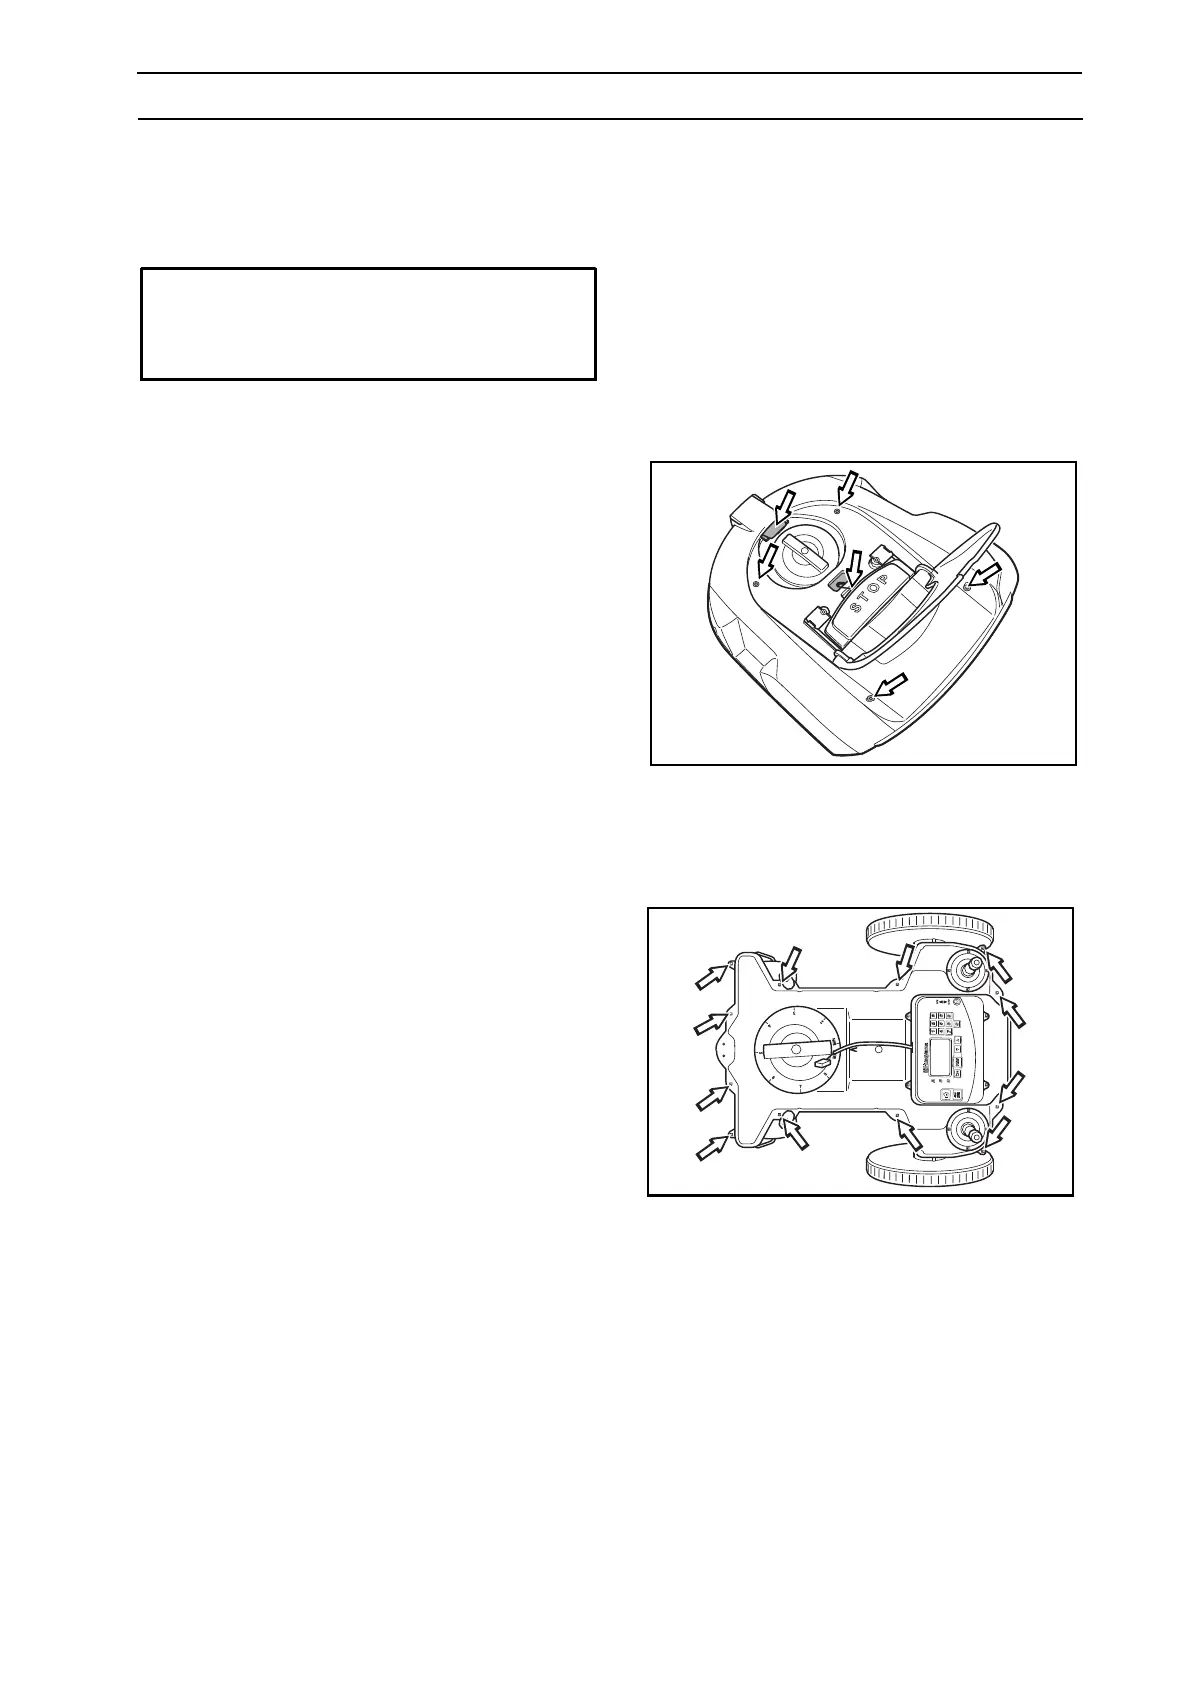
5.1.1 Dismantling the body
The body is screwed to the chassis with four screws,
hex 4.
Tip! Only loosen the rear screws two turns, so that
the rear part of the body is not loosened.
1. First clean the area around the grommet.
2. Pull out the rubber grommet on the charging
cable located at the front under the mower and
carefully loosen the connector (210 C has no
charger cable).
3. In order to completely lift off the body, the
microswitch for the stop button must also be
removed.
5.1.2 Dismantling the chassis
The chassis consists of upper and lower sections.
These are screwed together using twelve screws,
torx 20. The top part of the cabling must be removed
from the control box to completely separate the parts.
Clean any grass and dirt from the Automower
before you begin dismantling.

 Loading...