A. Launch your browser (Internet Explorer or Netscape).
B. In the URL window, type 192.168.1.5 (this is the default factory IP settings for the Web
Server Module), then hit Enter.
C. One of two Warning-Security dialog boxes will appear. Click Run/Yes to continue. (If
after 30 seconds neither of these windows appear, close your browser and repeat
step 3A again.)
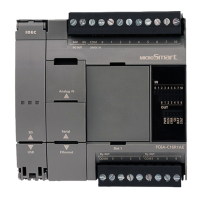
Step 3: Confi gure the Web Server Module
E. Change your Web Server Module setup as below.
• Using a standard RJ45 Ethernet cable, connect one end to the Web Server Module
and the other end to your network hub.
• Using a second standard RJ45 Ethernet cable, connect one end to the PC Ethernet
port and the other end to your network hub.
• Connect one end of the interface cable to the Web Server Module and the other
end to the PLC.
• Make sure both the Web Server Module and PLC are connected to power.
F. Launch WindLDR software. Make sure you are running WindLDR version 4.7 or above.
G. Select Confi gure ➡ Communications.
H. Select Ethernet and click on the Setting Web Server Unit button.
Step 4: Confi gure the WindLDR software
In this step, you will revert your PC network settings to their original settings, put the
Web Server Module onto the Ethernet network and confi gure the WindLDR software to
remotely communicate with the Web Server Module.
A. Open the Internet Protocol (TCP/IP) Properties dialog box (Please refer to Step 2 if you
have forgotten how to do this).
B. Select Obtain an IP address automatically*.
* This is assuming your network is using a DHCP server. If your PC was
predefi ned with a static IP address (refer to Step 2), then fi ll-in the PC IP
Address here.
C. Click the OK button to close the Internet Protocol (TCP/IP) Properties dialog box.
D. Click the Close button to close the Local Area Connection Properties dialog box.
I. The Web Server Unit Settings dialog box will appear. Click the Search button.
J. WindLDR will search for the Web Server Module with the IP you assigned in Step 3.
After approximately 10 seconds, the Web Server Unit Settings dialog box will display
the IP address of the Web Server Module.
Select the IP address and click to close this window (Do NOT click the OK button).
K. Click the OK button to close the Communication Settings dialog box.
L. Click Online ➡ Monitor. The Web Server Unit Settings dialog box will appear, highlight
the IP address and click the OK button.
M. WindLDR is now monitoring the connected PLC via the Ethernet network. You have
successfully established remote communication with the Web Server Module. You
can now monitor, download and upload ladder programs remotely via Ethernet.
Please visit our website at www.idec.com/plc for other tutorials on how to
confi gure Web Server Module functions, such as Web Monitoring, Email and
Point-to-Point PLC communication.
D. The Web Server Unit Settings dialog box will appear.
E. Click the Network menu.
F. Enter your IDEC Web Server Module IP Address* here.
* The IDEC Web Server Module IP Address is a static IP address that was
required in the Parts Check List section. This is an IP address you need to
obtain from your Network Administrator. Note: Please be sure to document
this IP address for future reference. It is recommended that you record the
IP address on a label and apply it to the module directly.
For demonstration purposes, a random number is used here but please ONLY enter your
IDEC Web Server Module IP Address, Subnet Mask and Default Gateway (leave it as
0.0.0.0 if your network does not use Default Gateway) in these fi elds.
G. Click the Save button.
H. Select Reboot. Then click the Reboot button.
I. Close the Web Server Unit Settings dialog box and browser.
Proceed to Step 4: Confi gure the WindLDR software
Network Hub
Network Hub
9 10 11 12
13 14 15 16
HW Switches
In basic black or stylish metal, the HW series of 22mm
switches from IDEC are available in several styles to
dress up any panel. HW pushbuttons and pilot devices
are internationally-rated, designed for use almost
anywhere in the world, and have removable contact
blocks, finger-safe terminals, and tamperproof
construction. Choose simple black plastic bezels for
clean uniformity or chrome-plated metallic bezels for
a rugged industrial look.
IDEC TouchScreens
IDEC operator interface products offer
perfect solutions for your display needs.
From the large 12.1” TFT LCD screen to the
compact 5.7” STN LCD, our screens support
256 colors with high resolutions, giving you
sharp images and excellent visibility. When
combined with our powerful WindO/I-NV2
software, you can create colorful graphical
interfaces for easier production supervision.
With up to 8MB of memory and a 200Mhz
32-bit RISC CPU, IDEC Touchscreens put
control, power and speed at your fingertips.
Phone: 800.894.0412 - Fax: 888.723.4773 - Web: www.clrwtr.com - Email: info@clrwtr.com
 Loading...