IDEXX VetLab
®
Station
Quick Reference Guide
Initiate a Sample Run
This can be done either with or without a connection to a
practice management system.
A
If you have either basic or no integration with your
practice management system:
1. Tap Analyze Sample.
2. Enter client and patient information and tap Next.
3. Select a Reason for Testing option and tap icon to select for current analysis.
4. Tap Run.
B
If you utilize IDEXX SmartLink
®
or IDEXX InterLink
TM
technology:
1. Tap desired patient from the Pending List or Census List and then tap Run.
2. Select Reason for Testing, Confirm Life Stage and Doctor options.
3. Tap icon to select for current analysis.
4. Tap Run.
Enter SNAP
®
Test Results
Include SNAP test results in the patient’s diagnostic report and in the
electronic record.
1. Include a SNAP test when you initiate a sample run.
2. Tap the SNAP icon in the patient-specific job status area on the
Home screen.
3. Tap the image that matches your SNAP test results.
4. To add comments, tap Edit, enter the information, and then tap OK.
5. Tap OK to save the SNAP test results.
Print a SNAP Log Report
Print a comprehensive SNAP Log Report for a
specified time.
1. Tap the green SNAP icon on the Home screen and
tap Print SNAP Report. Select a date range for
your report.
2. Tap Print SNAP Log for a detailed report about
each test run for the specified time.
Or
Tap Print SNAP Summary for a report that displays
the number of SNAP tests run for the specified time,
plus a pie chart indicating the number of positive and
negative results for each test.
Trend Patient Results
Monitor patients and compare results over time to see subtle changes
and response to treatment.
1. Tap Records on the Home screen.
2. Select the desired patient and tap View Records.
3. Select 2–6 lab results and tap Trend.
4. Select 1–6 parameters to graph and then tap Trend.
Use Interpretive Guides
See common causes and get help interpreting your abnormal
diagnostic results.
1. On the Records: Test Results screen, tap an underlined parameter to
view its interpretive guide.
2. Tap Print Page to print the information.
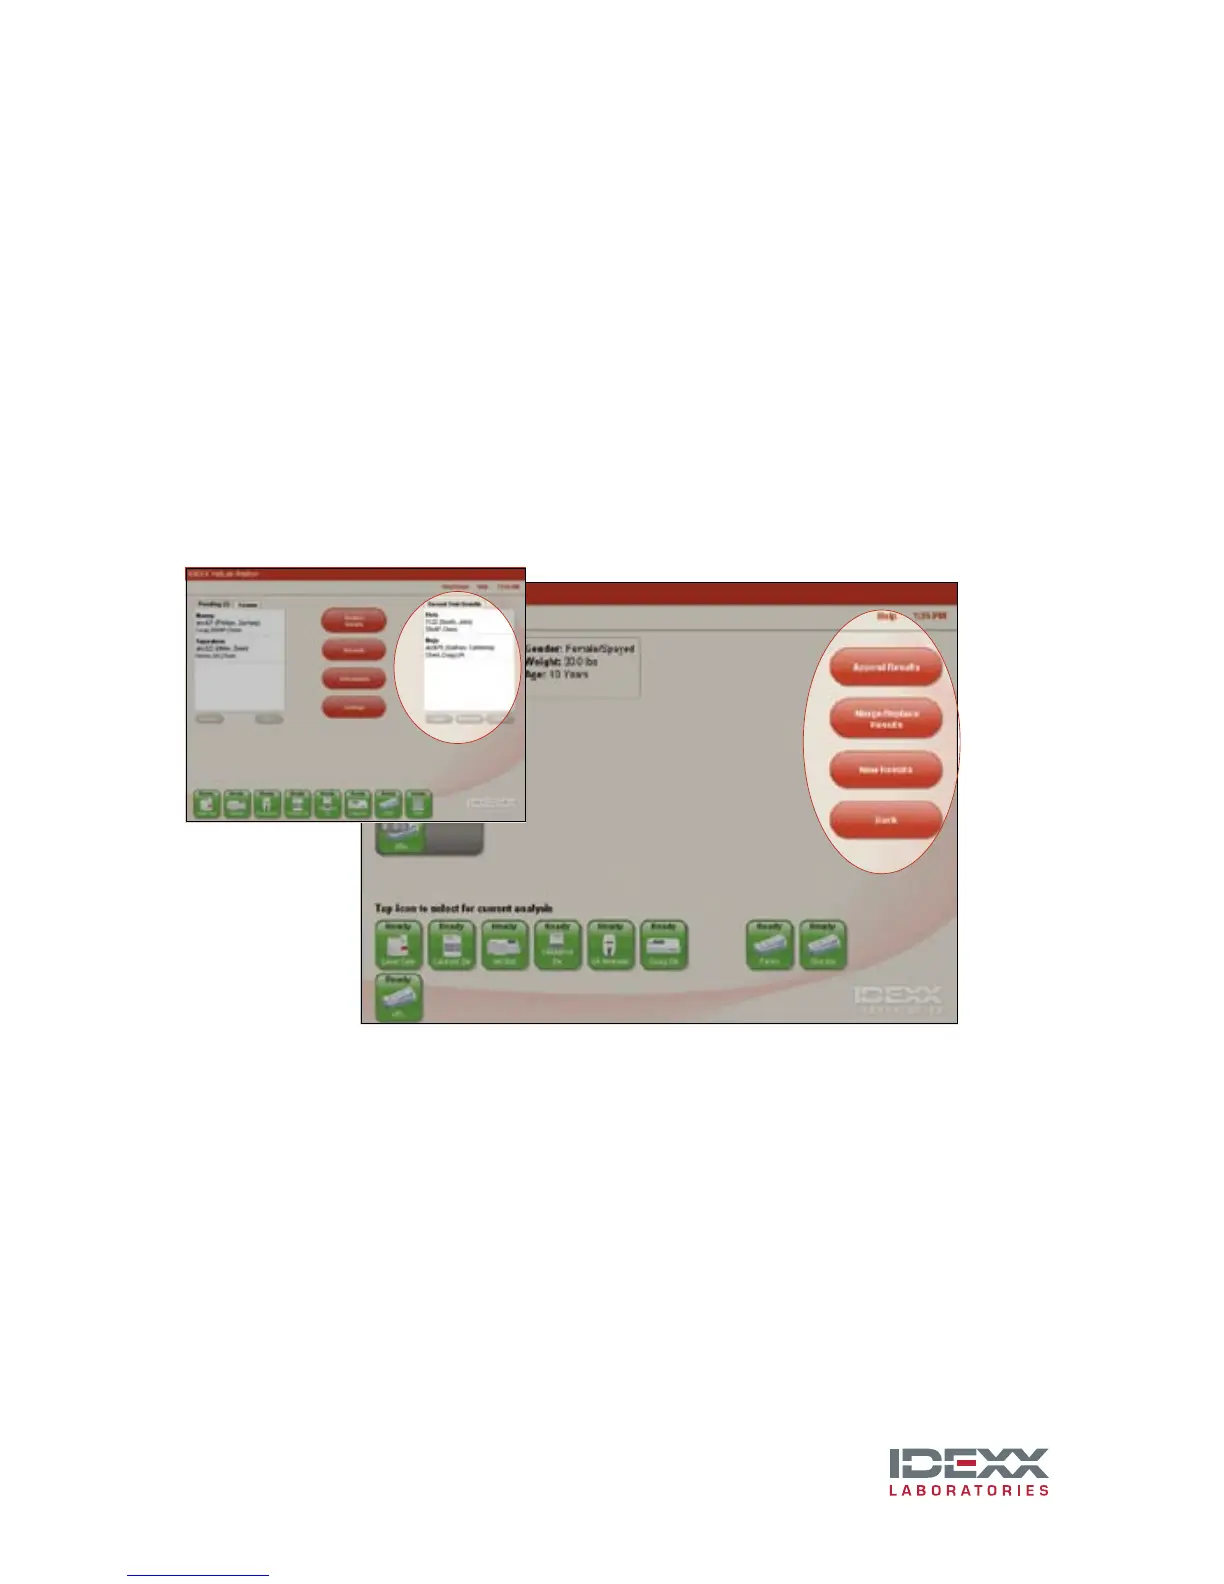
Add a Test to an Existing Patient Run
Attach additional test results to previously completed lab runs.
1. Select a patient from the Recent Test Results List on the Home screen
and tap Add Test.
2. If applicable, select a Reason for Testing option.
3. On the Select Instruments screen, tap an analyzer or SNAP icon.
• Tap Append Results to add the results (all original results are kept).
• Tap Merge/Replace Results to add results for tests new to the lab
run and Replace Results for test that are repeated.
• Tap New Results to add the results to the patient’s record as a new
set of lab results.
A
B
 Loading...