time set
time set
time set
time set
time zone
time zone
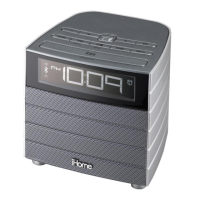
HBN20
Sta Quick Start Guide
Included
• HBN20 system
• Universal AC adaptor
Set Up
Connect the universal voltage AC adapter to the wall
outlet and the DC jack on the back panel of the radio
When Low Battery Icon appears on display,
replace backup battery with 1 fresh CR2450
battery. Keep unit connected to DC power when
replacing battery or you will lose settings.
Remove thumbscrew
and remove back cover
to access sta controls
Secure the attached Security Tether to
a wall or other permanent surface.
CAUTION: DO NOT attach to an AC
outlet or cause it to become entangled
with anything that can create a
hazardous situation.
The unit ships with the Daylight Saving Time (DST) switch in
Auto position, and will automatically adjust when the time
changes in March and November.
Daylight Saving Time
Press the time set button to conrm time
Press the - or + button to adjust time
Clock Setting
Press and hold the time set button
to enter clock setting mode
Maintenance
Once staff has completed setup, replace security cover on
back of unit and tighten thumbscrew.
HBN20 Quick Start Guide - Front
Size: 432 x 140 mm
Printing Color: Black
Mat’l: 100 gsm WF paper
Oct 2, 2013
HBN20 Quick Start Guide - Inside
Size: 432 x 140 mm
Printing Color: Black
Mat’l: 100 gsm WF paper
Oct 2, 2013
HBN20QSG-13102A © 2013 HTI Industries, LLC. All rights reserved Printed in China
• Place the unit on a level surface away from sources of direct
sunlight or excessive heat.
• Protect your furniture when placing your unit on a natural wood
and lacquered nish. A cloth or other protective material should
be placed between it and the furniture.
• Clean your unit with a soft cloth moistened only with mild soap
and water. Stronger cleaning agents, such as thinner or similar
materials can damage the surface of the unit.
WARNING: Lithium batteries can explode or cause burns if
disassembled, shorted, recharged, exposed to water, re, or
high temperatures. Do not place loose batteries in a pocket,
purse, or other container containing metal objects, mix with
used or other battery types, or store with hazardous or
combustible materials. Store in cool, dry, ventilated area. Follow
applicable laws and regulations for transport and disposal.
Setting the Time
(Factory Preset Clock)
Including Year, Date, Month: This step would
only be required if the pre-set time is lost
Press the time set button to conrm year
Press the - or + button to set year
Press the - or + button to set date
Press the time set button to conrm Clock Setting
Time Zone Setting
Press and hold the time zone button.
The currently set time zone will ash.
Press the - or + button to adjust for your
time zone.
Press the time zone button to conrm
time set time zone
time set time zone
Zones are:
00 - ATLANTIC
01 - EASTERN
02 - CENTRAL
03 - MOUNTAIN
04 - PACIFIC
05 - ALASKA
06 - HAWAII
outlet
DC 9V 2A
AUX in cable
AUX in cable