Instructions:
Slide the Back Panel (G) into the notches provided
Caution:
Make sure the plain side of the Back Panel (G) will
ultimately face the wall
Instructions:
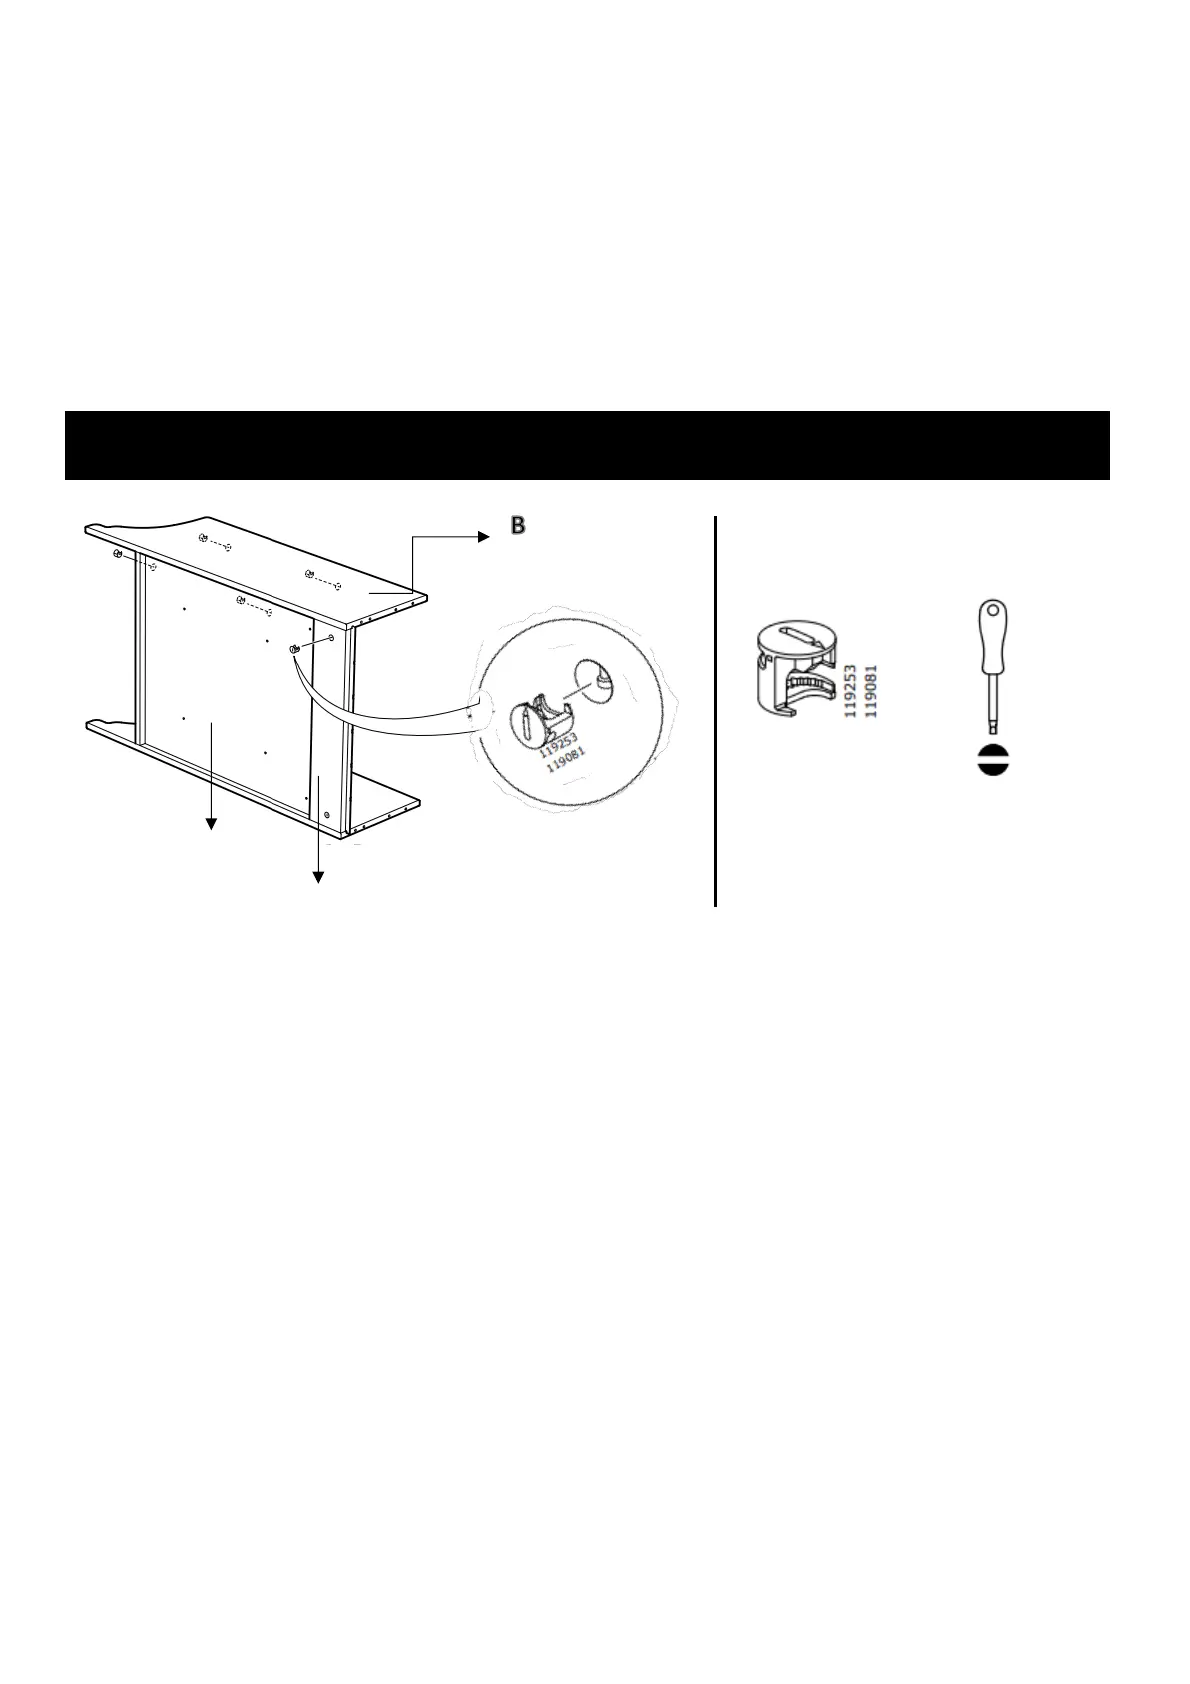
Insert the Cam Locks into the large holes on the Support
Board (F), the Back Panel (G) and the Right Side Panel (B)
(5 in total as shown above)
Please, notice the Cam Locks have a "C"-shaped back
Insert the Cam Locks so the opening of the "C" fits over the
head of the Cam Bolt
Use a flat screwdriver to turn the Cam Locks clockwise on
half a turn so it locks onto the head of the Cam Bolts
Caution:
Turn only until it is snug - over-tightening could cause the
Cam to bend or break.