Do you have a question about the Ikegami HDK-99 and is the answer not in the manual?
States compliance with relevant standards and regulations for the product.
Covers warnings and cautions for safe operation and product handling.
Advises on protecting the camera in adverse environmental conditions.
Details safety measures to be taken before performing maintenance on the product.
Explains the manual's organization into chapters for effective use.
Details the camera's features, including CMOS sensors, image processing, and video expression capabilities.
Explains system configurations for camera operation, including minimum and expanded setups.
Illustrates various connection setups for different operational modes like long-distance and studio.
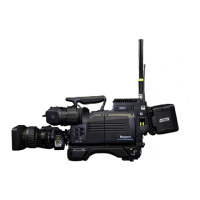
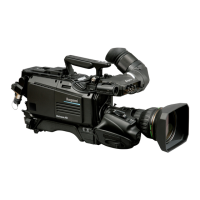
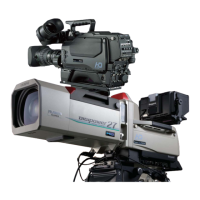
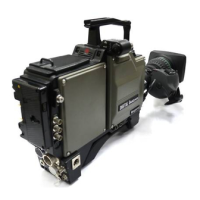
Identifies and explains the function of various parts on the camera and viewfinder.
Describes LED indicators, markers, and status information displayed on the viewfinder screen.
Covers essential preparatory steps before connecting equipment, including safety and power checks.
Details how to mount and connect peripherals like tripods, lenses, and viewfinders to the camera.
Explains the methods for supplying power to the camera, either via AC adapter or CCU.
Guides on connecting the camera to various monitors using different output connectors.
Provides instructions for connecting the camera to the CCU-980 using a fiber cable.
Outlines the sequence of operations, from initial checks to shooting setup and adjustments.
Details the correct initial switch settings on the camera for proper operation.
Explains the procedures for powering on the camera based on the supply method (AC adapter or CCU).
Guides on adjusting the viewfinder for optimal focus and screen clarity.
Describes how to verify output signals using color bars and test pulses for system integrity.
Covers the camera's auto setup functions for various parameters like white balance and black shading.
Advises on protective measures for operating the camera in extreme environments.
Explains how to adjust headset volume, shutter speed, gain, and other functions via camera switches.
Details how to navigate and use the camera's menu system for various settings and configurations.
Covers inserting, removing, saving, and loading camera settings using a memory card.
Explains troubleshooting steps for alarm indicators on OCP/MCP and self-diagnostic functions.
Addresses warnings related to camera temperature and fan operation, providing causes and actions.
Guides on resetting camera settings to user-defined (Engineer) or factory defaults.
Provides detailed instructions for cleaning optical and electrical connectors to ensure signal integrity.
Explains how to reset the camera's internal breaker if power is not supplied correctly.
Describes the process for correcting defective pixels on the camera's sensor.
Lists detailed technical specifications for the camera, including ratings and performance metrics.
Provides visual diagrams illustrating the camera's physical dimensions from various views.
Details the pin assignments and functions for all external connectors on the camera.
Lists the parameters that can be saved and managed within a scene file for camera settings.
| Brand | Ikegami |
|---|---|
| Model | HDK-99 |
| Category | Digital Camera |
| Language | English |