8
GB
10. Should the appliance break down and/or fail to work properly, turn it off and do not tamper with it. If it
needs repairing, take it to an authorised IMETEC Service Centre.
11. Please note that a new appliance may initially give off a certain odour. This is no cause for concern and
will go away after a short time. Ensure good ventilation of the room.
12. Do not attempt to replace the power cord. If it is damaged or needs replacing, contact an authorised
IMETEC Service Centre.
13. Should you decide not to use the appliance any more, make it inoperative by cutting the power cord
after removing the plug from the socket. We also recommend making all potentially dangerous parts of
the appliance harmless, particularly for children who might be tempted to play with it.
14. This appliance should not be used by children or persons with partially reduced physical, sensorial
or mental faculties, and in any case not without specifi c knowledge and experience, or without the
supervision or instructions for use provided by a responsible person.
15. Children must not be allowed to play with the appliance.
16. To avoid danger from overheating, we recommend to unwind completely and unplug the power cable
when the appliance is not operated.
17. Never pull or lift the fl oor polisher by the cable.
18. Never dip the appliance in water or other liquids.
19. Always use the appliance together with the sponge fi lter to avoid damages to the motor unit and to the
fl oor polisher.
WARNING:
• Do not move the appliance over power cords
• Do not touch the rotating brusher while the appliance is switched on.
GENERAL INSTRUCTIONS
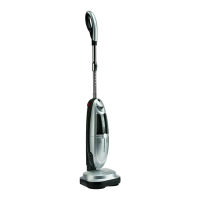
DESCRIPTION OF THE APPLIANCE AND ACCESSORIES [Fig. A]
Please consult Figure [A] in the image section to check the equipment delivered with your appliance.
All fi gures can be found on the inside pages of the cover.
1 Hand grip 12 Brush set
1A – Cord tensioner hook 12A – Felt brushes
2 Telescopic handle 12B – Soft brushes
3 Telescopic handle adjusting button 12C – Hard bristle texture brushes
4 Telescopic handle locking button 12D – Wool felt brushes
5 Three-position ON/OFF switch 13 Combined brush
6 Winding hooks (upper rotating) 13A – Coupling
7 Power cable with plug 13B – Selector switch
8 Dust collection system release button 14 Pre-engine fi lter
9 Dust collection system
9A – Cyclonic fi lter
9B – Dust holding cover
14A – Sponge fi lter
14B – Filter holder (with integrated
non-woven fabric fi lter)
10
9C – Bottom lid opening button
Polishing head release button Explanation of Symbols in Figure [A]:
11 Polishing head
Your appliance does not require
any replaceable paper dust bags.
This vacuum cleaner is equipped
with cyclone fi lter technology
for best performance.
 Loading...