Installation Guide
(Please follow the related chapters to assemble)
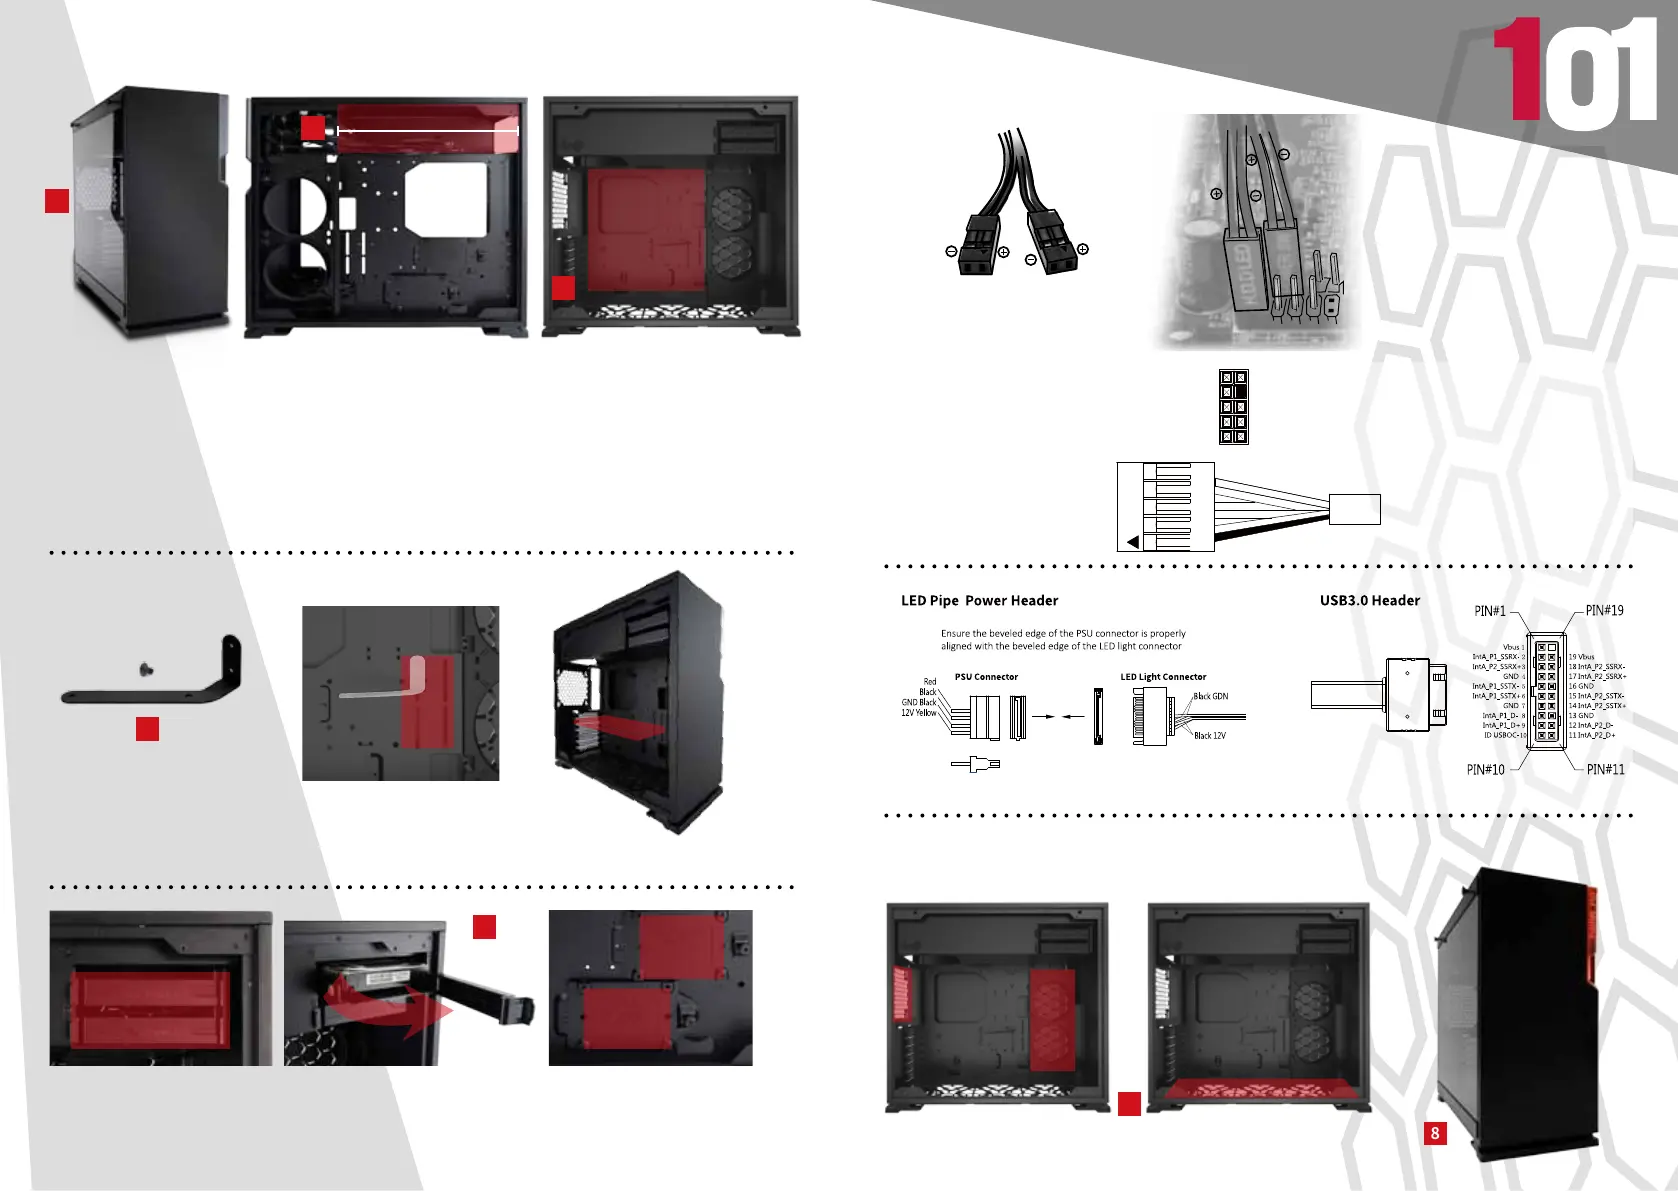
1.Opening the Chassis
For the side panel, please pull the two tooless clips and lift up.
2.Power Supply Installation
Parts Required: PSU Screws
Power supply can be mounted on the top bracket
3.Motherboard Installation
Parts Required: Motherboard Stand-Off, Motherboard Stand-Off Socket, Motherboard Screws
4.Expansion Card Installation
Parts Required: Screws, Graphics Card Holder
6. I/O Wires Installation
7.Fan / Liquid Cooling Radiator Installation
Parts Required: Fan Screws, Water-cooling System Washer
8.Completing Installation
5.2.5”/ 3.5” Drive Bays Installation
POWER SW H.D.D LED
PORT2_2 Blue 10
SENSE_SEND Purple 8
PORT2_R Yellow 6
PORT1_R White 4
PORT1_L Red 2
9 Brown SENCE2_R
7 Key
5 Green SENSE1_R
3 Orange PRESENCE#
1 Black GND
HD AUDIO