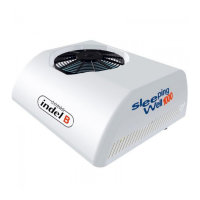
The provided manual describes the Sleeping Well Arctic Plus air conditioning system, manufactured by Indel B. This system is designed for use in vehicles, specifically for cooling sleeper cabins, and can operate with the engine off.
Function Description
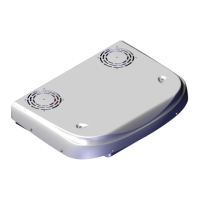
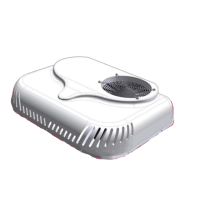
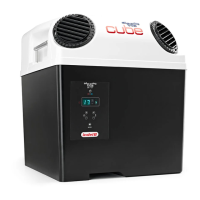
The Sleeping Well Arctic Plus is an air conditioning system that provides cooling and ventilation. It comprises an evaporator, condenser, compressor box, and a central electronic control unit with a digital control panel, and an optional remote control. The system can function in two primary modes: air conditioning (AC) and ventilation (FAN).
In AC mode, the system cools the air to a user-defined temperature. It features two compressor rotation speeds (V1 at 2500 RPM and V2 at 4000 RPM) for varying cooling demands. An "OPTION" feature allows the compressor to operate at a low speed (V1) to conserve battery power, extending run times.
In FAN mode, only the evaporator fan is activated, offering six different ventilation speeds. This mode is useful for air circulation without active cooling.
The system incorporates an Auto-Low Voltage Shutdown function, which automatically turns off the power at 10.8V D.C. to protect the batteries. When the voltage returns to 11.7V D.C. for at least 10 seconds, the system automatically reactivates.
Important Technical Specifications
- Cooling Capacity: Up to 6100 BTU
- Power Consumption: Up to 62A (12V)
- Voltage: 12V DC
- Refrigerant: R-134A
- Ventilation Speeds: 6
- Temperature Control: Electronic, with digital control panel
- Low Voltage Shutdown: Auto (Battery Saver)
- Evaporator Weight: 11.5 Lbs
- Condenser Weight: 15.9 Lbs
- Compressor Box Weight: 54.2 Lbs
- Refrigerant Charge: 17.6 oz (500 grams) R-134a. If the G6 refrigerant hose is cut, the charging amount must be reduced by 1.4 oz for every 3 feet cut (minimum charge = 14.1 oz).
- Compressor Oil: POE oil. PAG oil from previous systems should NOT be mixed.
- Recommended Alternator: A minimum of 180 amp alternator is recommended for proper charging of four auxiliary batteries. Using a smaller alternator may result in insufficient charging and reduced run times.
Usage Features
The system is controlled via a central digital control panel and an optional remote control.
Control Panel (Fig. 1):
- ON/OFF Button: Press for more than 1 second to turn AC ON (starts in STANDARD MODE V1). Press for more than 2 seconds to turn AC OFF.
- Fan Increase/Decrease Buttons: Adjust the fan speed.
- Temperature Increase/Decrease Buttons: Set the desired temperature between 20°C/68°F and 28°C/84.4°F.
- OPTION Button: Engages the compressor at low speed (V1) for battery saving.
Remote Control (Fig. 2):
- Allows for switching the system on and off.
- Regulates temperature.
- Regulates fan speed.
- Engages the OPTION function.
Temperature Unit Selection (Fig. 4):
- When the system is off, simultaneously press the VENT +, VENT -, TEMP +, and TEMP - buttons to display the current unit (°C).
- Quickly press VENT + or VENT - to select between Celsius (°C) or Fahrenheit (°F).
Error Display:
The system provides error codes on the display to indicate specific issues:
- E1 (Battery Voltage): Battery-saver device cut out, voltage below 10.8V D.C.
- E2 (Fan Over Current Cut-Out): Condenser or evaporator fan overload (e.g., short circuit, fan blockage).
- E3 (Compressor Locked): Rotor locked or high pressure in cooling circuit.
- E4 (Minimum Compressor Rotation Speed): Cooling circuit overloaded, compressor cannot maintain minimum rotation speed.
- E5 (High Temperature on Central Control Unit): Cooling circuit overloaded or high ambient temperature.
- E6 (Communication Error): No communication between display and central control unit.
- E7 (Temperature Sensor): Temperature sensor short circuit, wiring not connected, thermostat switched off, system without gas, or pressure valve open.
Maintenance Features
The manual outlines a comprehensive system maintenance schedule and a system test procedure.
System Maintenance (Visual Inspection):
- Condenser:
- Core should be clear of dirt and debris.
- Bracket mounting bolts should be tight and secure.
- Freon High/Low connections should be undamaged and secure.
- Electrical connection should be undamaged and secure.
- WARNING: Never use high-pressure washing on the condenser.
- Compressor Box:
- Hold down bolts should be tight and secure to the floor.
- Freon High/Low connections should be undamaged and secure.
- Electrical connections should be undamaged and secure.
- Cooling Duct should be connected and undamaged.
- Evaporator:
- Mounting bolts should be tight and secure.
- Freon High/Low connections should be undamaged and secure.
- Electrical connections should be undamaged and secure.
- Batteries (Accessory):
- Mounting bracket/hold down should be secure.
- Terminal connectors should be clear of corrosion and secure.
System Test:
After completing visual inspection and correcting any concerns, the SW system should be run for 30 minutes. Verify that the Condenser, Compressor Box, and Evaporator fans are operating, and check the evaporator output for cold air production.
General Operation and Longevity:
- For best cooling performance, windows and doors of the vehicle should be closed when operating the AC. Pre-cooling the cab extends run time and battery life.
- To prevent components from drying out during long periods of inactivity, the SW system should be run for 30 minutes during standard truck in-shop maintenance.
Refrigerant Filling Procedure:
- Before charging, run a vacuum cycle for 30 minutes.
- Disconnect the high-pressure attachment.
- Charge the system with 17.6 oz (500 grams) of R-134a through the low-pressure attachment.
- Run the system for 10 minutes before disconnecting the charging hose(s).
- After charging, check for leaks and proper system operation.
- WARNING: Compressors use POE oil; do not mix with PAG oil.
- ATTENTION: If the G6 refrigerant hose is cut, reduce the charging by 1.4 oz for every 3 feet cut (minimum charge = 14.1 oz).