34
EN
Handwash in cold water
Do not bleach
Do not tumble dry
Dry at in shade
Do not iron
Do not dry clean
Do not spin-dry
• Dry the textile lining completely before using or storing it.
• To prevent formation of mildew, it is advisable to air the
carrycot periodically. In particular, separate the textile lining
from the structure and run a dry cloth over the bottom.
LIST OF COMPONENTS
g. 1
ELECTA CHASSIS
A Rear wheels
B Front wheels assembly
ELECTA CARRYCOT
C Hood lining
D Carrycot apron
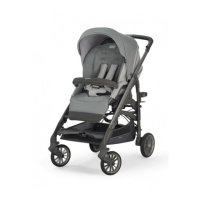
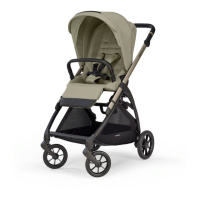
ELECTA STROLLER
E Stroller seat
F Handrail
G Hood
ACCESSORIES
J Feeding bottle holder
H Storage basket
K Mu (if available)
L Rain cover (if available)
CAB 0+ / DARWIN INFANT i-SIZE CAR SEAT
(IF AVAILABLE)
STANDUP (IF AVAILABLE)
ELECTA CHASSIS
CHASSIS OPENING
g. 2 Holding the lever (T1) down, lift the chassis rmly
until it opens completely.
g. 3 Caution: ensure that all locking mechanisms
are properly engaged on both sides before use and that
none of the red indicators are visible.
ASSEMBLING/REMOVING THE REAR WHEELS
g. 4 Insert the rear wheels (A) into the seats on the
chassis and push them until they click into place.
g. 5 Caution: make sure that the wheels are properly
attached before use.
Should it be necessary, the rear wheels can easily be removed.
g. 6 To remove the rear wheel (A) act on the lever (A1)
and at the same time extract it from its seat on the chassis.
REMOVING/ASSEMBLING THE FRONT WHEEL ASSEMBLY
Should it be necessary, both front wheel assemblies (B) can
easily be removed.
g. 7 Pushing the small button (B1), pull the wheel
assembly out from its housing in the support.
g. 8 To reinstall it, simply position it and push it until it
clicks into place.
g. 9 Caution: make sure that the wheels are properly
attached before use.
CLOSING THE CHASSIS
g. 10 Using both adjustment buttons (T2), bend the
handlebar to the lowest position.
g. 11 Press the button (T3) and simultaneously rotate
the rear handle (T4) until the chassis closes completely.
Caution: always check that the chassis is closed correctly.
g. 12 To transport the closed chassis, use the rear handle
(T4).
Never lift the chassis by the handlebar.
REAR WHEELS BRAKE
g. 13 To operate the brake, press on the right lever (T5).
g. 14 To release the brake, press on the left lever (T6).
Always engage the brake during stops.
g. 15 Caution: never lift the brake action and release
levers, only press them.
BLOCKING/UNBLOCKING THE FRONT WHEELS
The chassis features swivel wheels.
g. 16 To lock or unlock them make sure they are correctly
aligned, then operate the lever (B2) located on both front
wheel units.
ADJUSTING THE HANDLEBAR
The chassis is equipped with an adjustable handle.
g. 17 Operate both buttons (T2) and simultaneously
raise or lower the handlebar to the desired position.
STORAGE BASKET
The chassis is equipped with a large storage basket (H),
which can be easily removed if necessary.
g. 18 To remove the basket, undo the 4 snap fasteners
(H1) that secure it to the side tubes and detach the Velcro
ap (H2) from the spacer tube.
g. 19 Remove the two rear hooks (H3) from their
corresponding seats.
g. 20 Release both front Velcro aps (H4) and pull them
o the chassis footboard, then remove the basket from the
small front hooks (H5).
To reinstall the basket, carry out the above operations in
reverse.
INSTRUCTIONS
T
T