INSTAR Deutschland - Your Specialist for IP-Cameras and Network Technology www.instar.com
QUICK Installation Guide
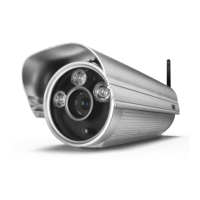
4 mm Wide-Angle Lense for IN-5907HD
Content of delivery: 1x Wide-angle lense; 4x screws; 4x spacer; 4x springs; 3x di user lenses; 1x installation guide
Step 1: Remove the top cover by gently pulling it in the direction of
the lense. Hold the back of the camera and remove the front cover
by turning it counter clockwise. Remove all three re ectors from the
infrared LEDs and keep them for the use in the future (Fig. 2 & 3).
They will later be replaced by special di user re ectors (Step 11).
Step 6: Remove the screw securing the
lense. Grab the lense at the bottom and
unmount the lense by turning it counter
clockwise (Fig. 8).
Step 4: Loosen the four screws connect-
ing the LED board to the long gold co-
loured spacers (Fig. 5).
Step 2: There is a black cover sheet direct-
ly above the LED board. Please remove
this cover to get access to the screws be-
neath. For a clearer view, the following
pictures won’t show the camera casing.
Step 3: Remove all 3 screws on the sides which
are holding the LED board in place. Then
carefully take out the whole unit which con-
sists of LED board, lense and the sensor unit
(Fig. 4 & 5).
INSTAR Germany GmbH hereby ensures that you will not loose your warranty by installing this additional lense.
ATTENTION: Any damages caused by the user due to faulty installation are excluded from the warranty.
Fig.3Fig.2 Fig.4
Remove the top cover by gently pulling it in the direction of
Fig.1
Fig.5 Fig.6 Fig.7
Fig.8
Step 5: Loosen the two outer screws at the opposite corners to get access to the
four inner screws which are holding the four long spacers in place (Fig.6). Remove
the long spacers and replace them with the included short spacers (Fig. 7 & 8).