Intel Desktop Board D865PERL Quick Reference 9
2.
OM14811
Install the I/O shield as shown in the illustration.
I/O
I/O .
I/O
=DLQVWDOXMRVáRQ ,2ZVSRVyESU]HGVWDZLRQ\QDU\VXQNX
Installare la mascherina per l’I/O come mostrato in figura.
Installez le blindage E/S comme le montre l’illustration.
Installieren Sie die I/O-Blende wie in dieser Abbildung dargestellt.
Instale a blindagem de I/O conforme mostrado na ilustração.
Instalar la pletina de E/S como se muestra en la ilustración.
3.
OM16257
Secure desktop board to the chassis using all mounting screws.
.
'RNU
üSá\W JáyZQ GRREXGRZ\SU]\X \FLXZV]\VWNLFK UXE
PRFXM F\FK
Fissare la scheda allo chassis con tutte le viti di montaggio.
Fixez la carte pour PC de bureau au châssis à l'aide des vis de montage.
Bringen Sie das Desktop-Motherboard unter Verwendung aller
Montageschrauben fest am Gehäuse an.
Fixe a placa de desktop ao chassi usando todos os parafusos de
montagem.
Asegure la placa de escritorio al chasis utilizando todos los tornillos.
4.
OM12078
m
P
G
A
4
7
8
B
m
P
G
A
4
7
8
B
m
P
G
A
4
7
8
B
A
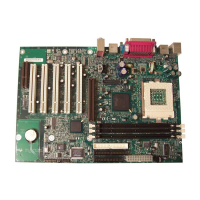
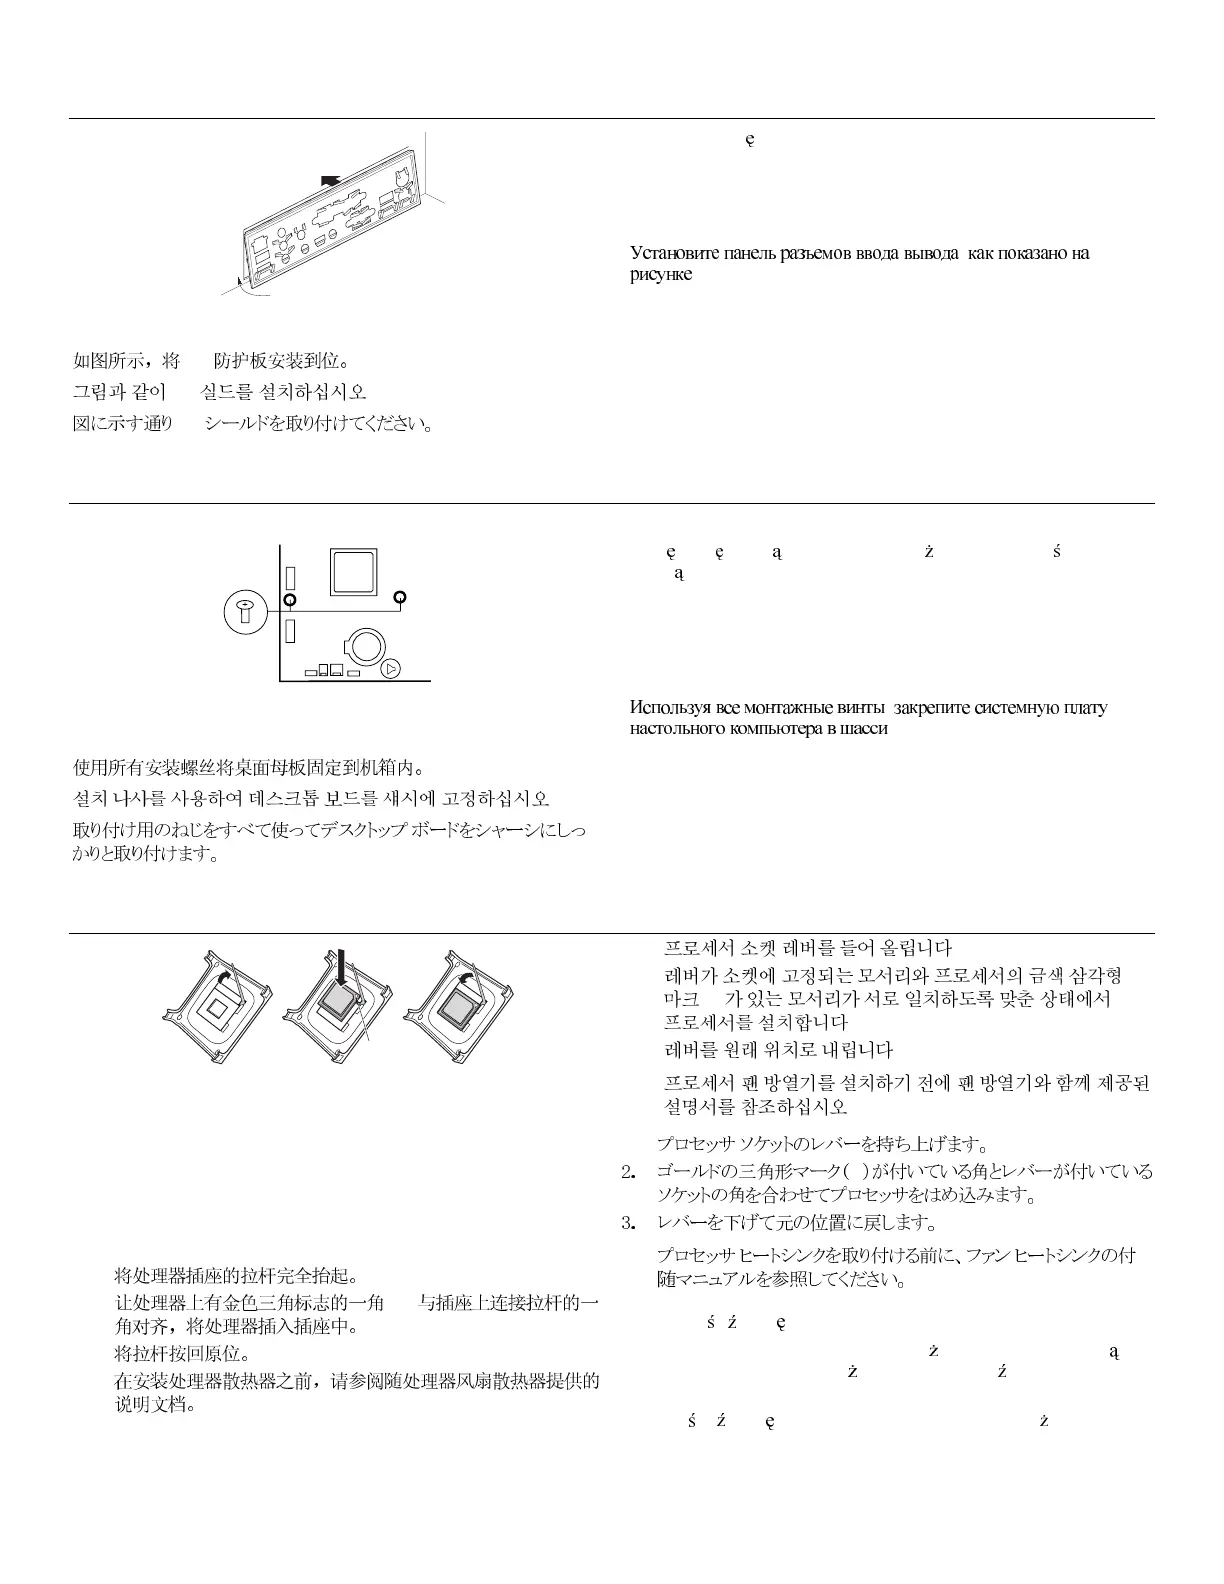
1. Lift the processor socket lever.
2. Install the processor so that the corner with the gold triangle
marking (A) is aligned with the corner where the lever is attached to
the socket.
3. Lower the lever back to its original position.
4. Refer to the documentation that came with the fan heat sink before
installing the processor heat sink.
1.
2.
(A)
3.
4.
1.
.
2.
(A)
.
3.
.
4.
.
1.
A
4.
1. 3RGQLH G ZLJQL JQLD]GDSURFHVRUD
2. =DLQVWDOXMSURFHVRUWDNDE\MHJRQDUR
QLN]R]QDF]HQLHPWUyMN WD
$E\áZ\UyZQDQ\]QDUR QLNLHPZNWyU\PG ZLJQLDMHVW
zamocowana do gniazda.
3. 2SX
üG ZLJQL ]SRZURWHPGRMHMSLHUZRWQHJRSRáR HQLD
 Loading...