Hot Swap Drive Cage Upgrade Install Instructions (optional)
78 Intel® Entry Server Chassis SC5299-E UP/DP/WS/BRP User Guide
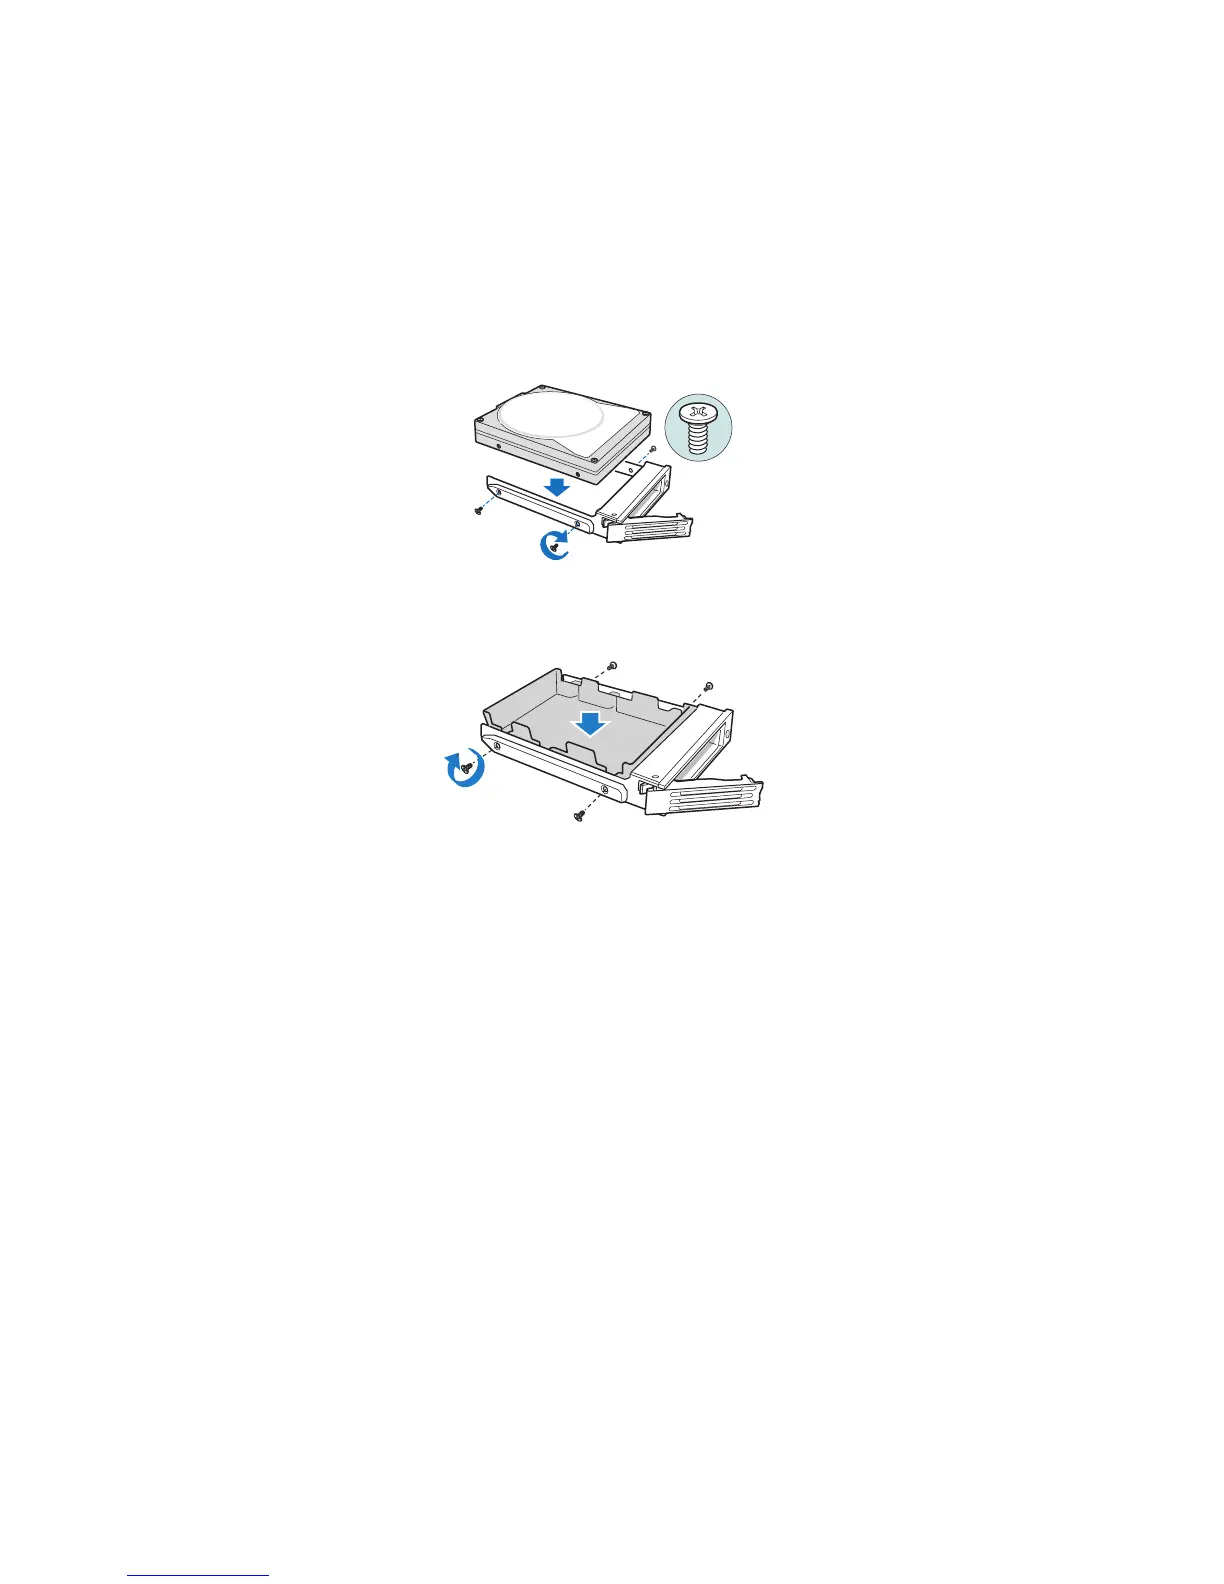
4. Remove the new drive from its anti-static bag and place in the drive carrier. With the
drive circuit-side down, position the connector end of the drive so that it is facing the
rear of the drive carrier. Align the holes in the drive to the holes in the drive carrier
and attach the drive to the carrier with the screws removed in the previous step.
Note: If you are not installing a new drive, place a plastic retention device into the drive carrier,
using the four screws you removed from the hard drive.
Figure 99. Installing Hard Drive in Drive Carrier
Figure 100. Installing Plastic Retention Device in Drive Carrier
5. With the black lever in the fully open position, slide the drive carrier into the chassis.
The green latch must be to the left. Do not push on the black lever until the lever
begins to close by itself. When the black lever begins to close by itself, push on it to
lock the drive carrier into place.
TP00929
TP01713
 Loading...