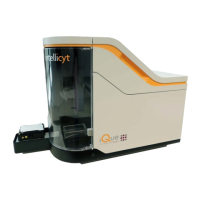
Do you have a question about the INTELLICYT iQue Screener PLUS and is the answer not in the manual?
| Brand | INTELLICYT |
|---|---|
| Model | iQue Screener PLUS |
| Category | Laboratory Equipment |
| Language | English |
Defines the intended purpose and usage environment for the iQue Screener PLUS system.
Details the terms and conditions for using the iQue Screening System and associated products.
Outlines the terms and conditions governing the use of the iQue Screener System software.
States compliance with relevant European directives and product standards.
Explains terminology, conventions, and symbols used in the manual for clarity.
Defines common terms used in the iQue Screener PLUS hardware manual.
Details formatting conventions for menus, buttons, window titles, and dialog boxes.
Explains symbols used to highlight important information, tips, and suggestions.
Illustrates safety symbols indicating hazards like DANGER, WARNING, and CAUTION.
Provides contact information and preparation steps for seeking technical assistance.
Highlights essential safety measures and warnings for product usage.
Outlines critical warnings regarding intended use, safety protection, and attire.
Details safety precautions to prevent operator injury, including handling covers and moving parts.
Explains safety symbols and labels for understanding potential hazards and precautions.
Provides guidelines for safely handling biological samples and reagents.
Details safety measures related to the instrument's laser system to prevent eye and skin exposure.
Covers precautions related to ambient conditions, area of use, and equipment setup.
Highlights electrical safety measures, including proper power connections and UPS usage.
Introduces the iQue Screener PLUS as a platform for screening cells, beads, microbes, and mixtures.
Lists the power, environment, and size requirements for the iQue Screener PLUS.
Describes the three available variations of the iQue Screener PLUS and their distinguishing features.
Details features like detection method, laser power, multicolor detection, and sample formats.
Lists fluorescence channels, filters, and example dyes for the BR variant.
Lists fluorescence channels, filters, and example dyes for the VBR variant.
Lists fluorescence channels, filters, and example dyes for the VYB variant.
Identifies key components visible on the front of the instrument.
Explains the meaning of the status light colors and their relation to system readiness.
Provides a detailed view and labels for the instrument's shaker mechanism.
Details the components within the sampling area, including tube holders and fluid cartridges.
Illustrates the probe assembly, sensors, and arms of the sampler.
Shows the peristaltic pump housing, rollers, and tubing connections.
Identifies ports and connections on the right side panel of the instrument.
Details the bottles for Sheath, PLUS ONE, PLUS TWO, and Waste fluids.
Shows the fluid station data cable and auto-closing quick connects.
Identifies power switch, fuse holder, power socket, and data port on the back panel.
Highlights user-serviceable parts like the fluidlink connection and sheath filter.
Illustrates the optical bench and components for the BR laser configuration.
Shows the Photomultiplier Tube (PMT) module details for the BR variant.
Illustrates the optical bench and components for the VBR laser configuration.
Shows the Photomultiplier Tube (PMT) module details for the VBR variant.
Illustrates the optical bench and components for the VYB laser configuration.
Shows the Photomultiplier Tube (PMT) module details for the VYB variant.
Step-by-step guide for performing the daily startup of the iQue Screener PLUS.
Procedure for running daily quality control to ensure system performance and diagnose issues.
Guidance on analyzing the results of the daily QC test, including dot plots and metrics.
Details the minimum steps required to run a simple plate, from preparation to analysis.
Step 1: Guidance on preparing the sample plate for the experiment.
Step 2: Instructions for creating a new experiment in the ForeCyt software.
Step 3: Details on setting the prime, shake, and sip time for the acquisition protocol.
Step 4: How to initiate and monitor the plate run on the instrument.
Step 5: Process for identifying and gating wells for data analysis.
Step 6: Basic data analysis techniques using ForeCyt software and scatter plots.
Procedure for safely shutting down the iQue Screener PLUS daily.
Describes preparation and management of fluids in the bottle station.
Explains how the bottle station monitors fluid levels and provides warnings or errors.
Details the fluids used in the sampling area, including cartridges and troughs.
Outlines daily, weekly, monthly, and on-demand maintenance procedures.
Explains various cleaning procedures accessible via the ForeCyt software Clean Wizard.
Cleans the probe and tubing using a sequence of Decon, Cleaner, and Water.
Clears deposits and bubbles from the flow cell and tubing after short inactivity.
Thoroughly cleans the flow cell and tubing after heavy usage or long inactivity.
Procedure for suspected clogs in the detector and monthly preventative maintenance.
Clears air bubbles from detector fluidic lines and bottles.
Describes the procedure for replacing the instrument's probe and tubing assembly.
Recalibrates the deck height after a probe and tubing change.
Prompts to clean the probe and tubing after replacement and calibration.
Details the replacement of filters and the FluidLink for optimal system performance.
Discusses setting up and maintaining user-defined plate models for experiment protocols.
Customizes which plate model is used by default when creating new experiments.
Explains how to remove or deactivate plate models from the system.
Allows direct interaction with instrument subcomponents for troubleshooting.
Guidance on finding a safe shaker speed by testing various RPMs.
Verifies proper sampling position and depth after mapping a plate model.
Isolates subsystems to diagnose and troubleshoot clogs in the probe or detector.
Explains how to recognize, address, and prevent clogs in the system.
Provides procedures for safely shutting down and moving the instrument within a lab.
Details the proper connection of power and data cables, including UPS usage.
Describes the process of purging fluids for transport and re-priming the system for use.