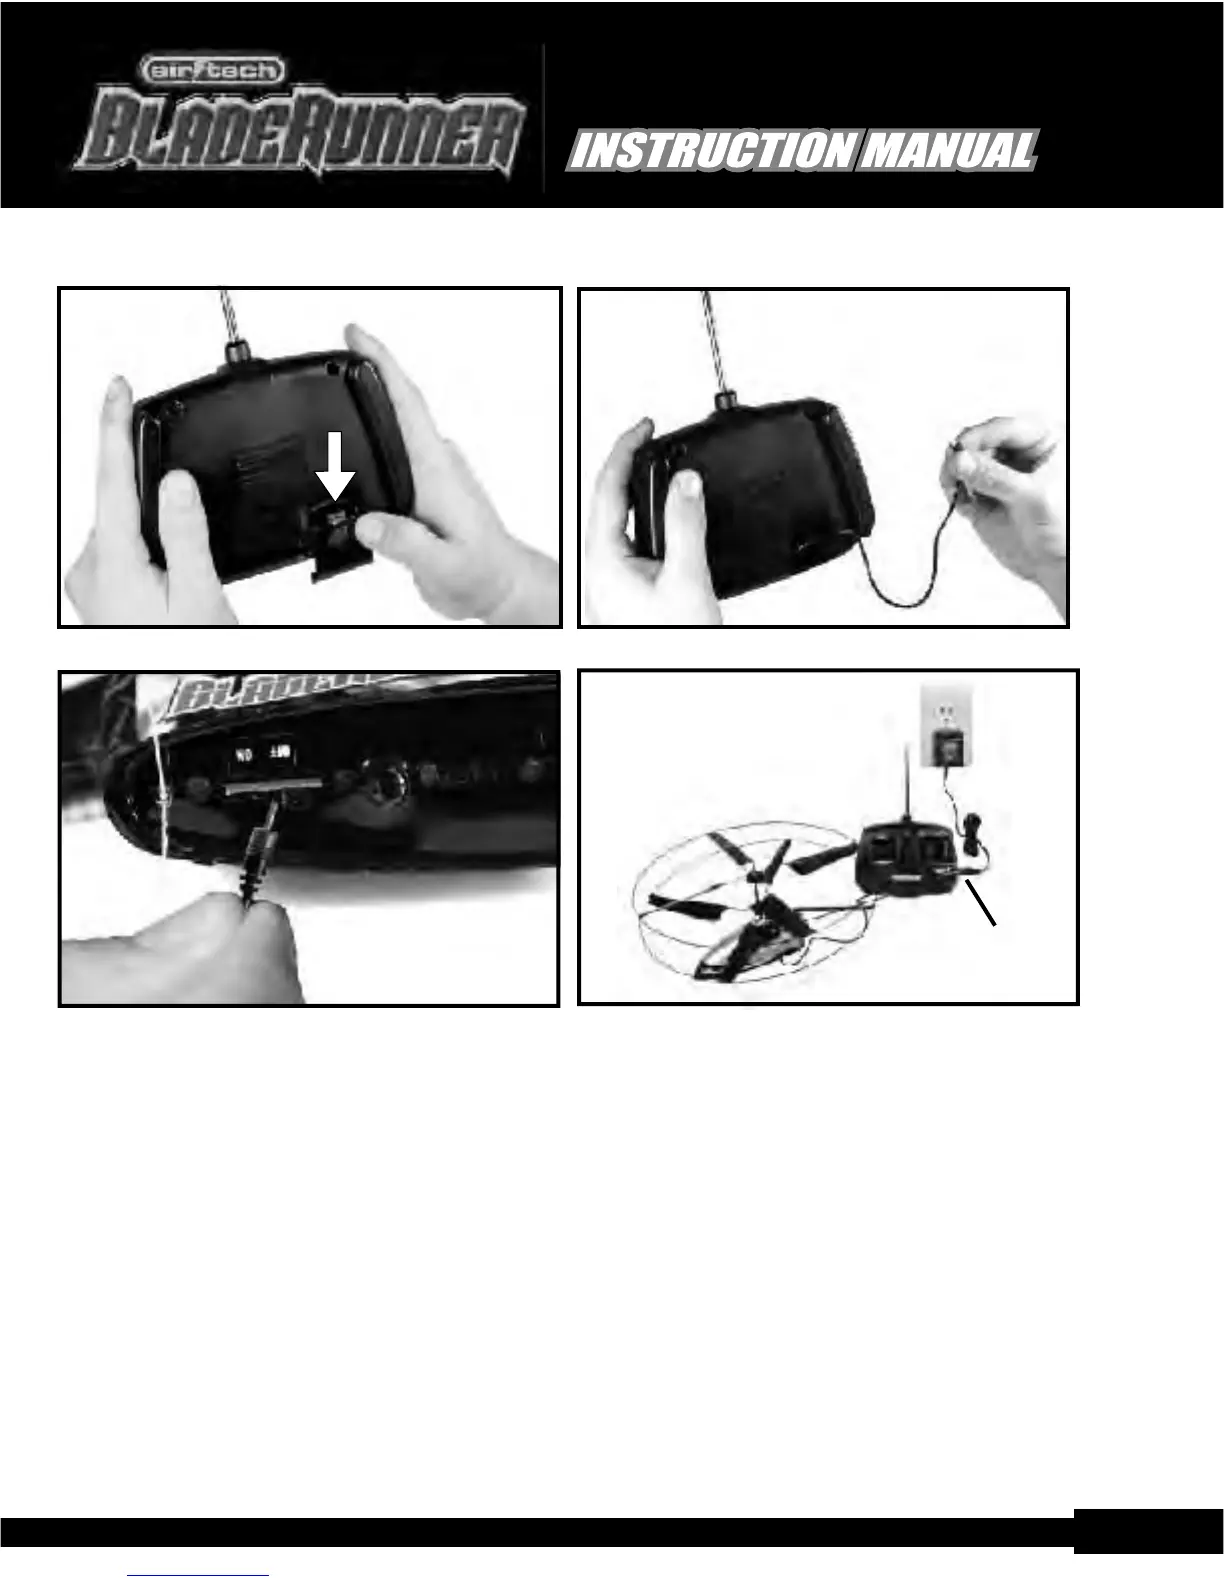
Locate the AC adapter and plug it into the side of the transmitter/charger, then plug the adapter into an AC wall
outlet.
NOTE: Plug the helicopter into the charger/transmitter before plugging the charger into the AC outlet.
As soon as you plug the charger into the AC circuit, the charger's face-mounted LED will light up and start
flashing indicating that charging is taking place. Please note that if the helicopter's battery pack is fully
charged and you attempt to recharge it - the LED will not flash and no charging will take place. A full charge
usually takes about 20-40 minutes and can be as much as 60 minutes if the battery is completely discharged.
W hen the red LED stops flashing, the charge is complete. Disconnect the charge cable from the helicopter.
What the RED LED on the transmitter is telling you during charging:
RED LED blinks - 3 seconds ON and 1 second OFF.
Helicopter's onboard battery low in power
RED LED blinks - 1 second ON and 3 seconds (or more) OFF.
Helicopter's onboard battery almost full
Replacing your BladeRunner
TM
rotors is easy.
Follow these instructions and you will be back in
the air in no time!
Component List
1.Capping Tube.(clear plastic)
2.Top Rotor.(short stem)
3.Spacer.
4.Spacer.
5.Base Rotor. (long stem with notch)
6. Motor Mount. (fixed to helicopter)
Instructions
Insert the base rotor stem down
onto the motor mount. (line up
the half circles inside the tube).
Slide down until the notches
interlock.
Slide the 2 spacers down.
Next slide the top rotor down.
Now, holding the bottom of the
helicopter slide the capping tube
down to meet the top spacing
tube. Squeeze all components
together gently.
Keep instructions for future reference.
long
stem
(no difference)
notches
short
stem
Contact us: www.interactivetoy.com or call: 1-866-214-2220
Replacing the rotors continued...
W hat if the BladeRunner
TM
keeps turning in one direction?
Obviously you should first try to trim it with the trim tab located on the transmitter. If this doesn't fully correct the
problem you can try to increase the pitch angle of the blades on one of the rotors (see below) by GENTLY bending
the trailing edges of the blades as follows: If the heli turns to the left - bend down the rear (trailing edges) of the
upper rotor blades If the heli turns to the right - bend down the rear (trailing edges) of the lower rotor blades
An alternative to bending the blades is to place a small piece of transparent tape on the trailing edge of each blade,
so that it extends over the end of the blade, thus giving the blade more lift. As above, if the heli keeps turning left,
adjust the upper rotor blades. If it keeps turning right, adjust the lower rotor blades.
Important note: Please do not expect the BladeRunner
TM
to remain in perfect trim. The temperature of the motors
and shafts etc varies during flight so the trim tends to drift a bit.
Open rear door Extend charge cord
Plug A/C charger into the wallPlug in charge cord carefully
pg.10
Contact: Email: info@ interactivetoy.com,W ebsite: www.interactivetoy.com,Tel: 1-866-214-2220
Contact: Email: info@ interactivetoy.com,W ebsite: www. interactivetoy.com,Tel: 1-866-214-2220
CHARGING
Plug A/C Adapter
into the side of the
transmitter.
pg.3
TM
TM
TM
TM
 Loading...