Flight School - Developing Advanced Flying Skills
Throttle control - developing hover skills
The purpose of this exercise is to develop good hover control - essential to flying a helicopter. Place the
Bladerunner
TM
in the center of a fairly large open area - this will be your training zone. Increase the throttle to take off
and hover at a target height of about 1 foot. Once in the air, trim the helicopter for left / right stability with the trim tab,
but otherwise do not fiddle with left/right control stick (the right-hand stick). Also, do not fiddle with forward and
reverse, you should concentrate on holding the helicopter in a stable hover - try not to let it move up or down -
keep it level. Hold the hover for 5 seconds then land. Repeat 5 times. If the Bladerunner
TM
starts to drift off center,
land immediately and manually reposition it in the center of the training zone. Once you are proficient at this,
increase the target height by 1 foot. Repeat 5 times and then increase target height again, etc.
Throttle and Yaw (rotation)
Intentionally put the Bladerunner
TM
into a spin by giving it a left or right turn command, and then regain control. Do
not apply forward or reverse thrust. Repeat 5 times. If the Bladerunner
TM
ever drifts to the edge of the training zone,
land immediately and manually reposition it in the center.
Straight-line mission
Mark takeoff and landing targets a modest 3 feet apart. Take off, fly forward to your target area and land. Repeat
5 times. Initially orient the Bladerunner
TM
in the direction of flight prior to takeoff. During later flights, orient the heli in
other directions, requiring you to correct yaw first and then fly forward. Later attempt flying backwards. Then start
to increase the distance.
Shuttle mission
Same as above but land at your predetermined spot, then take off and return to the starting point. Try the
same variations as above when you start to get good.
Figure-8 pattern
Fly a controlled figure-8 pattern. Make the loops of the figure-8 even in size and don't allow its center to drift away
from a predetermined central point.
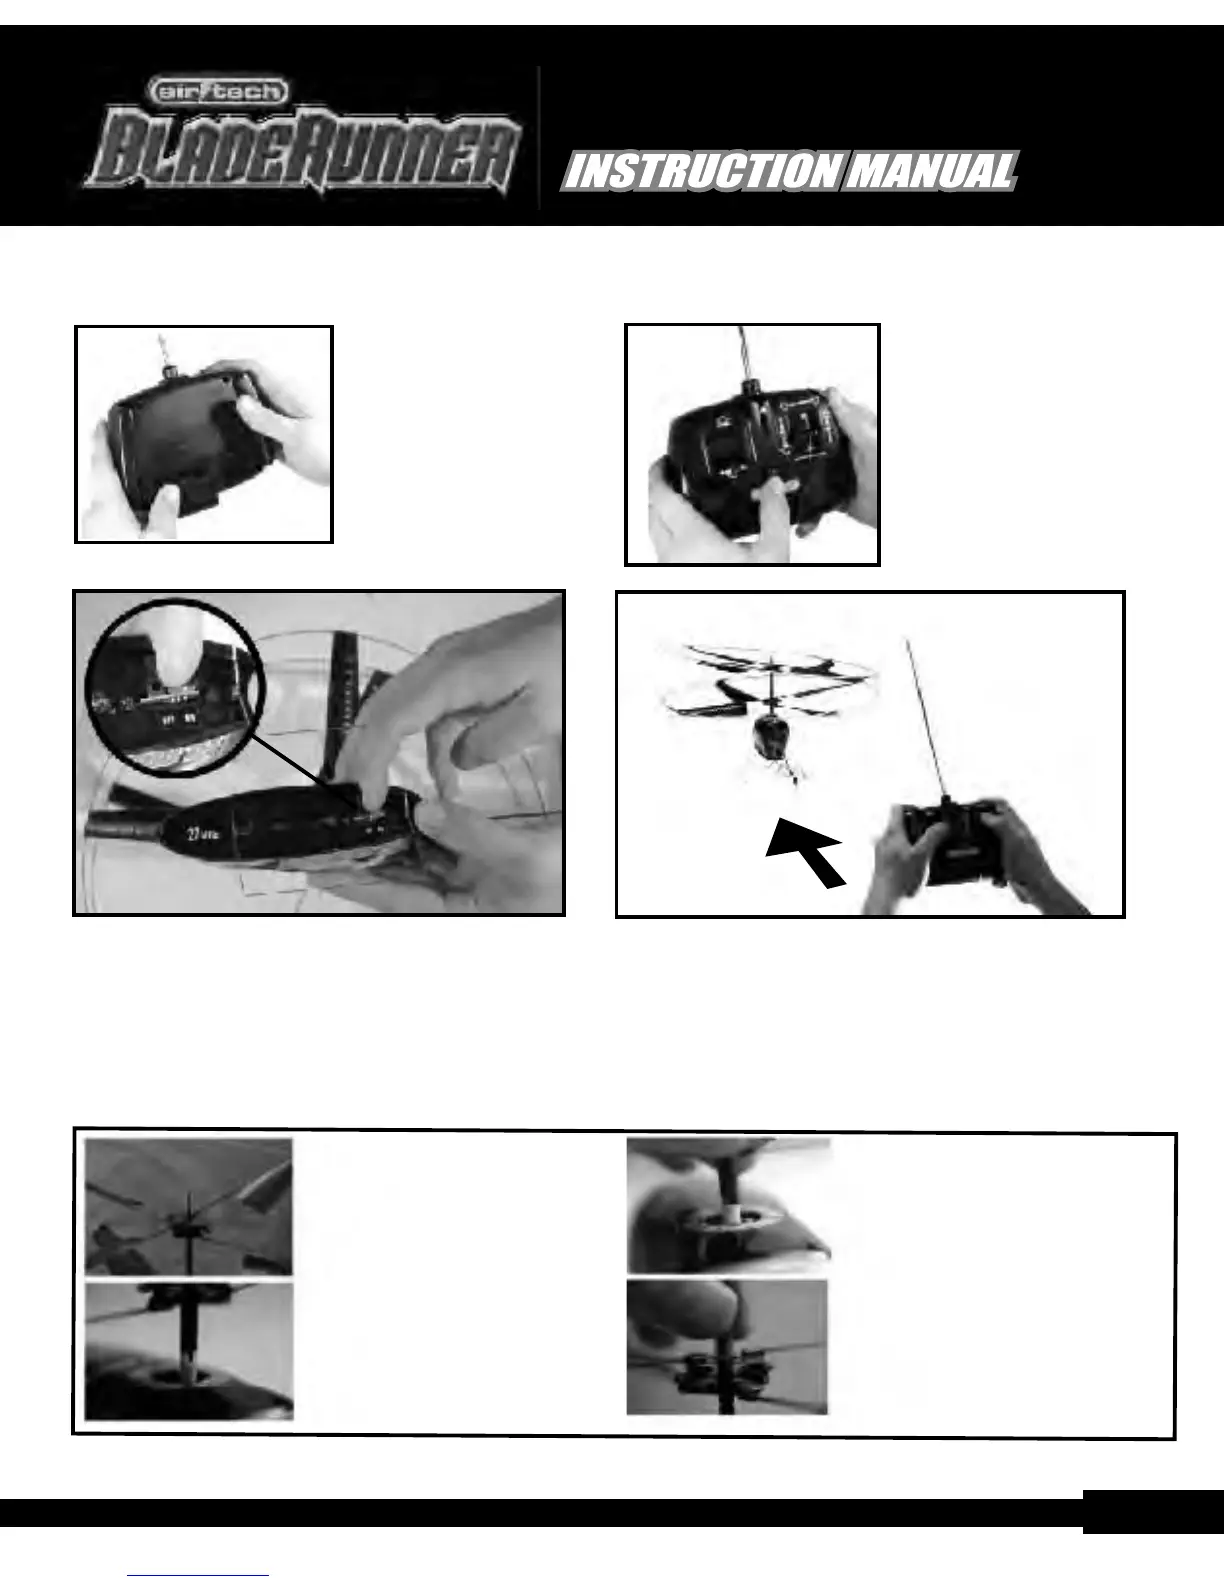
Remove the battery
cover on the back of the
transmitter by sliding it
downward. Load a fresh
9V alkaline battery into
the transmitter making
sure that the polarities are
correct then close the
battery cover.
Extend the antenna then
switch the transmitter 'On'
(the GREEN LED should
light).
Position the Bladerunner
TM
Place the helicopter on the ground with the tail pointing
towards you and the nose facing away from you. Make sure
that it's well clear of any potential obstacles.
1) After repeated flights, the
upper, rubber tube holding
the rotors onto the drive shaft
(capping tube) may start to
come loose and you will see
excess up/down movement
of the rotors on the driveshaft.
2) If there is excess play, the lower
connection between the rotor
and the driveshaft may come
loose as shown in this photo. If
this happens, the lower rotor will
not turn even though the motor
is running.
3) To solve this, rotate the lower rotor
until the connectors lock back into
place.
4) Gently, push the capping- tube
down to remove any up/down
motion of rotor system on the
driveshaft.
Capping Tube Adjustment
Next, switch the helicopter 'On' (by moving
the belly-mounted on/off switch to the 'On'
position - towards the tail).
Pre-Flight Preparation Continued...
pg.8
Contact: Email: info@ interactivetoy.com,W ebsite: www.interactivetoy.com,Tel: 1-866-214-2220
Contact: Email: info@ interactivetoy.com,W ebsite: www. interactivetoy.com,Tel: 1-866-214-2220
pg.5
TM
TM
TM
TM
 Loading...