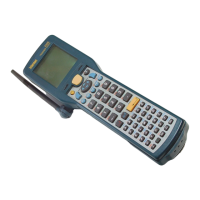
TRAKKER Antares 2420 and 2425 Hand-Held Terminal User’s Manual
Nugg
Co de 39
7-6
3. Press
:
or
V
to choose Software Diagnostics, Hardware Diagnostics, or System
Diagnostics and press
. One of these menus appears.
SOFTWARE DIAGNOSTICS
Error Logger
Application Events
Task Status
Clear Task Profiles
_` Select item
[Enter] Next screen
[F1] Help
[Esc] Exit
242XU.065
HARDWARE DIAGNOSTICS
Hardware Config
Battery/PIC Status
Display Test
Keypad Test
Main Board Menu
Radio Test
Scanner Test
_` Select item
[Enter] Next screen
[F1] Help
[Esc] Exit
242XU.067
SYSTEM DIAGNOSTICS
Subsystem Versions
Access Point
App Efficiency
Serial Port Test
Malloc Info Menu
_` Select item
[Enter] Next screen
[F1] Help
[Esc] Exit
242XU.069
Note: The Radio Test and Access Point diagnostics are only available for a T2425.
You will not see these options on a T2420 since it does not have a radio.
4. Press
:
or
V
to choose the diagnostic test you want to run and press
. The
diagnostic screen appears. Use the information on the screen or follow the
instructions to run the diagnostic test. For help, see “Defining the Diagnostics
Screens” later in this chapter.
5. Press
?
to exit each diagnostic screen and to exit the diagnostics menus.
6. Choose another menu from the Main Menu or press
?
to exit the TRAKKER
Antares 2400 Menu System. If you have made any changes, a screen prompts you to
store the changes in flash memory. For help, see “Exiting the TRAKKER Antares
2400 Menu System” in Chapter 3.
After you exit the menu system, the terminal will resume the application you were
running when you started the menu system.
 Loading...