Do you have a question about the International CR-W400U and is the answer not in the manual?
Keep volume low to stay aware of road and traffic conditions.
Avoid exposing the equipment to water or excessive moisture to prevent damage.
Allow interior to cool before switching on the unit after parking in direct sun.
Designed for 12-volt, negative ground battery systems, common in North America.
Do not disassemble; refer to service center list for assistance.
Install horizontally with front end up at a convenient angle, not exceeding 30°.
Record model/serial numbers and purchase date for future reference or theft aid.
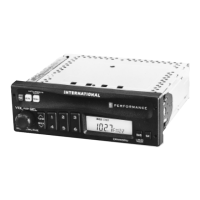
Press [PWR] button to switch the unit on or off.
Turn the knob clockwise/counterclockwise to adjust volume from 0 to 40.
Volume returns slowly to previous level if it was 20 or higher at power on.
Press [SEL] knob to cycle through Volume, Bass, Treble, Fader, Balance modes.
Select Bass/Treble mode and turn knob to adjust levels from -12 to 12.
Turn knob to shift sound volume between left and right speakers (1 to 15).
Turn knob to shift sound volume between front and rear speakers (1 to 15).
Press and hold [BAND] to enhance bass/treble at low/medium volume.
Press [MUTE] to silence audio; press again to cancel.
Press [BAND] to cycle through FM1, FM2, W/B (Weather Band), and AM.
Use [TUNE ∧] or [TUNE V] buttons to tune to a desired frequency.
Press and hold [SEEK ∧] or [SEEK V] to find the next strong station.
Save up to 6 stations per band (FM1, FM2, AM) using preset buttons.
Tune to a station, then press and hold a preset button [1-6] to save it.
Press and hold [SCAN] to automatically save the 6 strongest stations.
Press preset buttons [1-6] to recall saved stations.
Press preset buttons [1-6] to monitor weather band channels.
Lists NOAA Weather Radio broadcast frequencies (162.40-162.55 MHz).
Press/hold [CLK], then use [V]/[∧] to set hour/minute.
Repeat initial setting steps to reset the clock time.
Press [CLK] to show time; it displays even when the radio is off.
Use a pointed object to press the reset switch for unit reset to default settings.
Guide for experienced installers, or DIY with caution. Professional installation recommended.
Lists included items like the Mounting Collar, needed for installation.
Steps for securing the mounting collar and the unit into the dashboard.
Use removal tools to detach the unit from the vehicle's dashboard.
Operate with 12V DC negative ground. Insulate exposed wires to prevent shorts.
Illustrates connections for power, ground, dimmer, and speakers to the unit.
Use a soft cloth for exterior cleaning. Avoid solvents.
For unresolved issues, take to an authorized service center or qualified technician.
Check charts for causes and solutions to problems; simple checks may resolve issues.
Provides solutions for common problems like unit not turning on or radio static.
Details power supply, output, dimensions, and weight of the unit.
Frequency ranges, sensitivities, and selectivity for AM and FM bands.
Frequency range and sensitivity for the Weather Band reception.
| Brand | International |
|---|---|
| Model | CR-W400U |
| Category | Car Receiver |
| Language | English |