R
A
R
A
A
R
PASOS PARA ENSAMBLAR / ASSEMBLY STEPS
6
MARTILLO
/HAMMER
EN ESTE PASO NECESITA:
FOR THIS STEP, YOU WILL NEED:
HERRAMIENTAS
HERRAJES
TOOLS
HARDWARE
ATORNILLADOR
DE ESTRELLA
/ PHILLIPS SCREWDRIVER
TAPAS TUERCA
CAM CAPS
( # 4 )
R
A
J
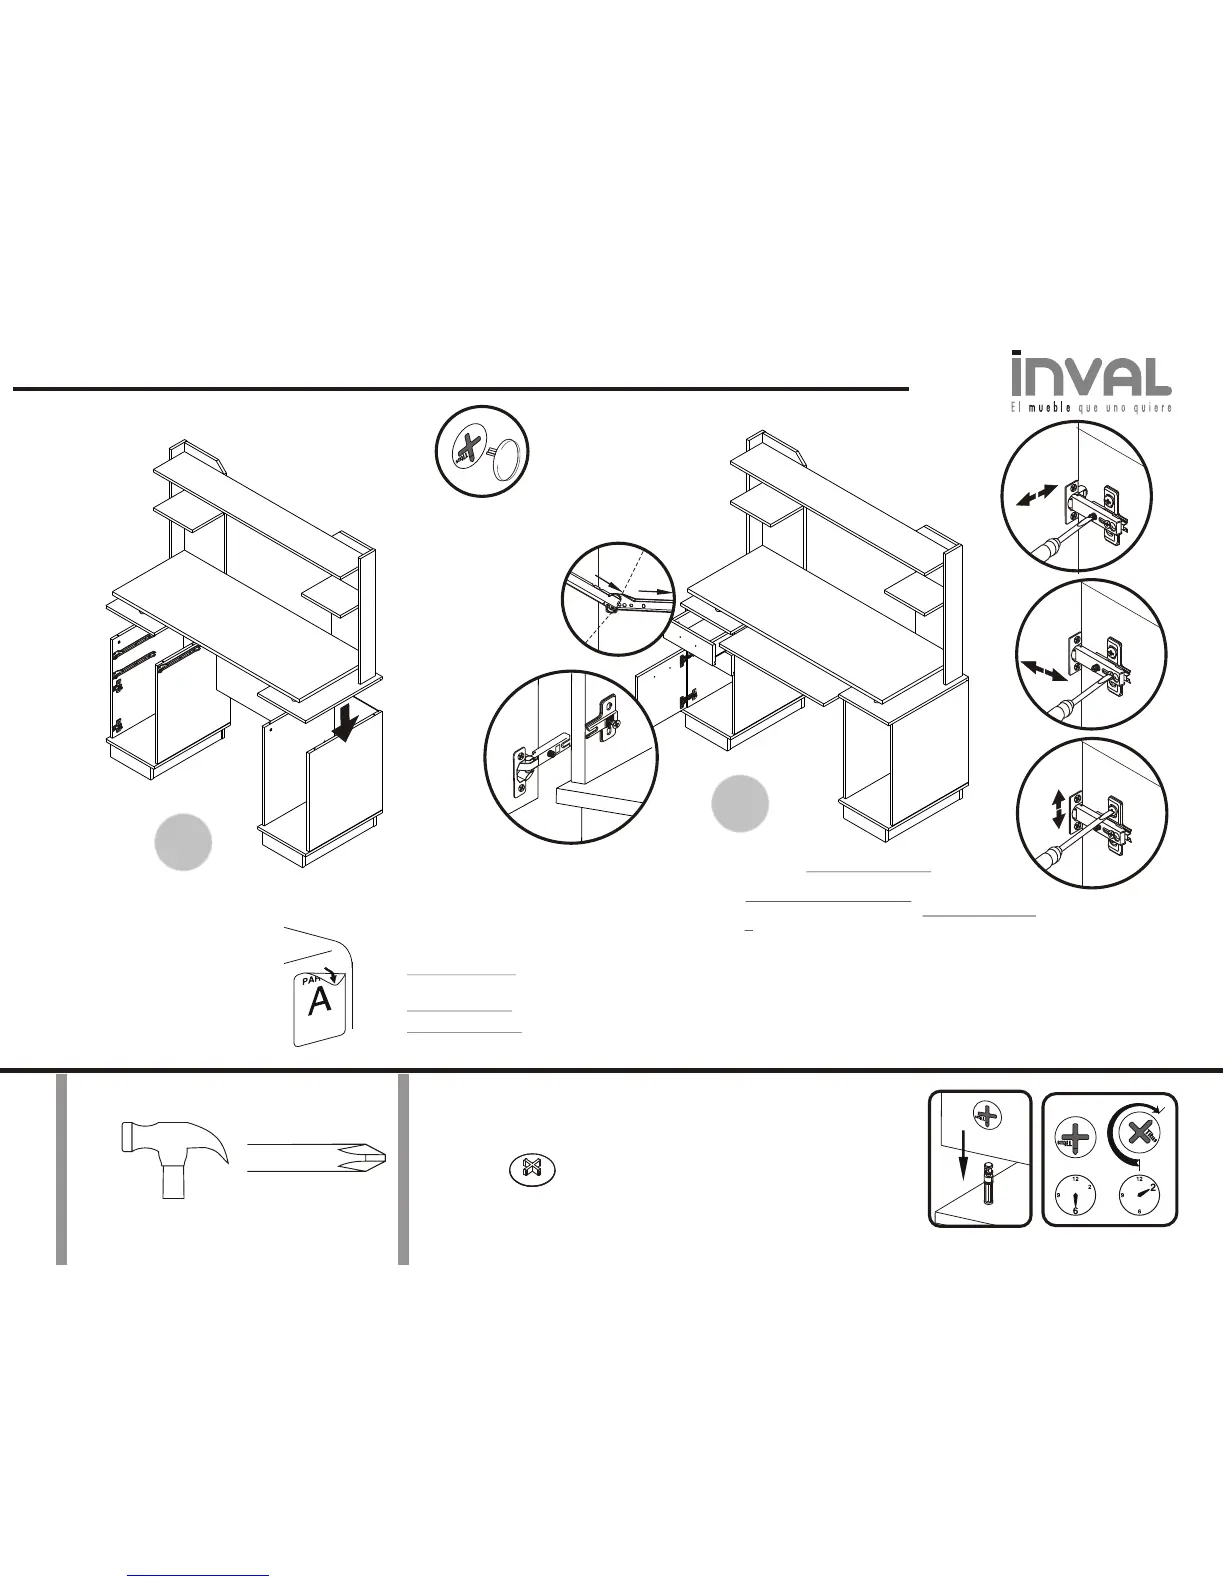
Para nivelar la puerta parte R, tenga en cuenta las siguientes indicaciones: AJUSTE DE ALTURA: Le permite subir
o bajar la parte R, cuadrándola al nivel de la parte A, aflojando el tornillo de la bisagra , como lo muestra el detalle.
Cuando este en el lugar indicado, asegure los tornillos bisagra. AJUSTE DE PROFUNDIDAD: Le permite llevar la parte
R, hacia adentro o hacia afuera, aflojando el tornillo de la bisagra, como lo muestra el detalle. AJUSTE LATERAL: Le permite llevar la
parteR, hacia la derecha o la izquierda, nivelándola con laparte A aflojando o apretando el tornillo de la bisagra, como lo muestra el detalle.
To level the Door Part “R”, follow these steps:
HEIGHT ADJUSTMENT: Allows part “R” to be raised or lowered to level it with part “A”. Loosen the Hinge screw, as shown in the detail, to adjust the door to the desired
position, and retighten the Hinge screws.
DEPTH ADJUSTMENT: Allows part “R” to be moved forward or backward by loosening the Hinge screw as shown in the detail.
LATERAL ADJUSTMENT: Allows part “R” to be moved right or left, leveling it with part “A” by loosening or tightening the Hinge screw as shown in the detail.
Al terminar de armar,
desprenda los adhesivos .
(en caso de que queden
residuos de pegante, limpie
la superficie con alcohol )
When you are done with the
assembling process, detach the
stickers. (In case of glue residues,
clean the surface with alcohol)
Ubique las tapas tuerca
( #4 )en las partes V-W-M.
Place the Cam Caps (#4)
on Parts V-W-M
I
D
B
H
A
C
77
A
88
R