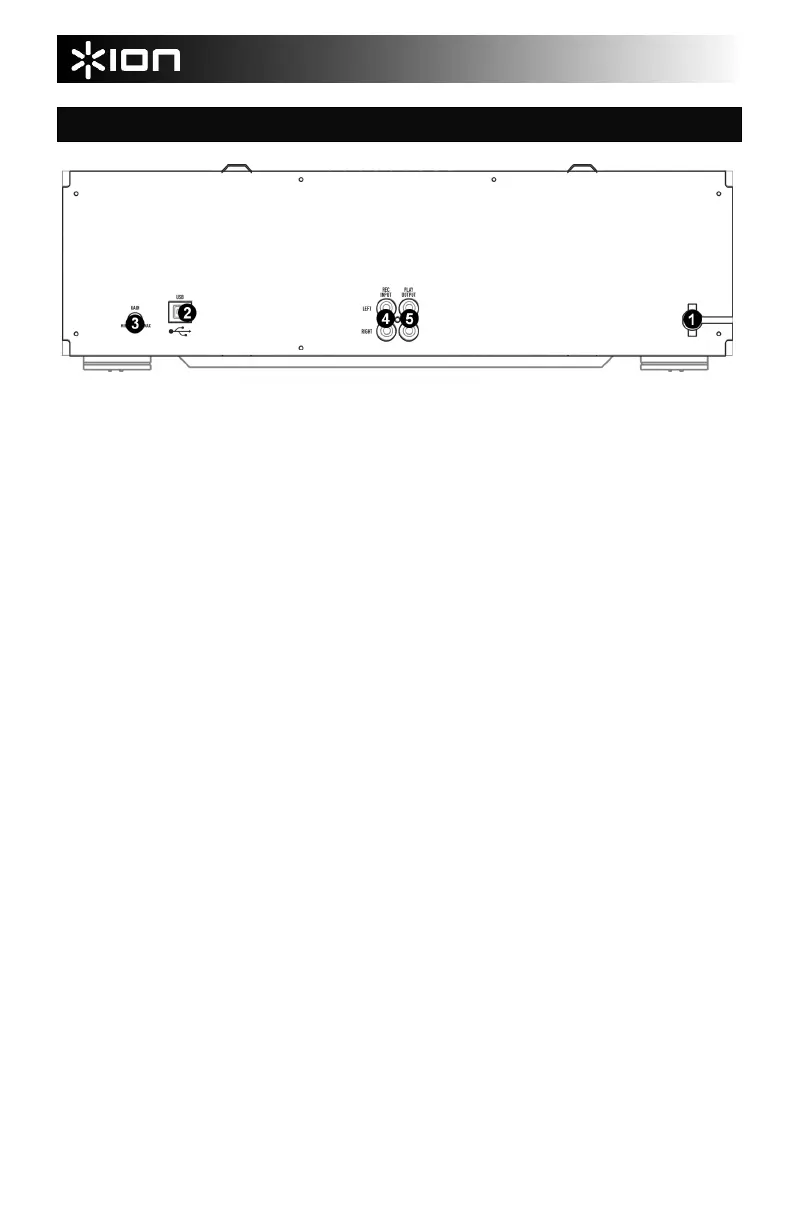
REAR PANEL OVERVIEW
1. POWER CORD – Plug this cord into a power
socket before powering on the unit. If not using
the unit for prolonged periods of time, please
remember to turn it off and remove the cord from
the socket.
2. USB PORT – Use the included USB cable to
connect this port to an available USB port on
your computer when transferring tapes. You can
use the included EZ Tape Converter and
Audacity software applications to transfer and
backup your tapes digitally. If you are a novice
user, we recommend the EZ Tape Converter
software for transferring your tapes to your
computer. For advanced users, we suggest the
Audacity software, which allows for advanced
editing of your recording, including noise removal
normalization, and automatic track separation.
3. GAIN KNOB – This knob can be used to adjust
the audio signal from the unit to your computer.
If you experience distortion and clipping when
recording to your computer, we recommend
turning down the Gain. If the audio level from the
unit is extremely low when recording to your
computer, we recommend turning up the Gain.
4. REC INPUT – Connect a stereo RCA cable from
an external source to this input. Please note that
recording and dubbing only works on deck B.
5. PLAY OUTPUT – This is the combined audio
output from deck A and deck B. Connect a
stereo RCA cable from this output to the Line or
Auxiliary input of a home stereo receiver system.
3
 Loading...