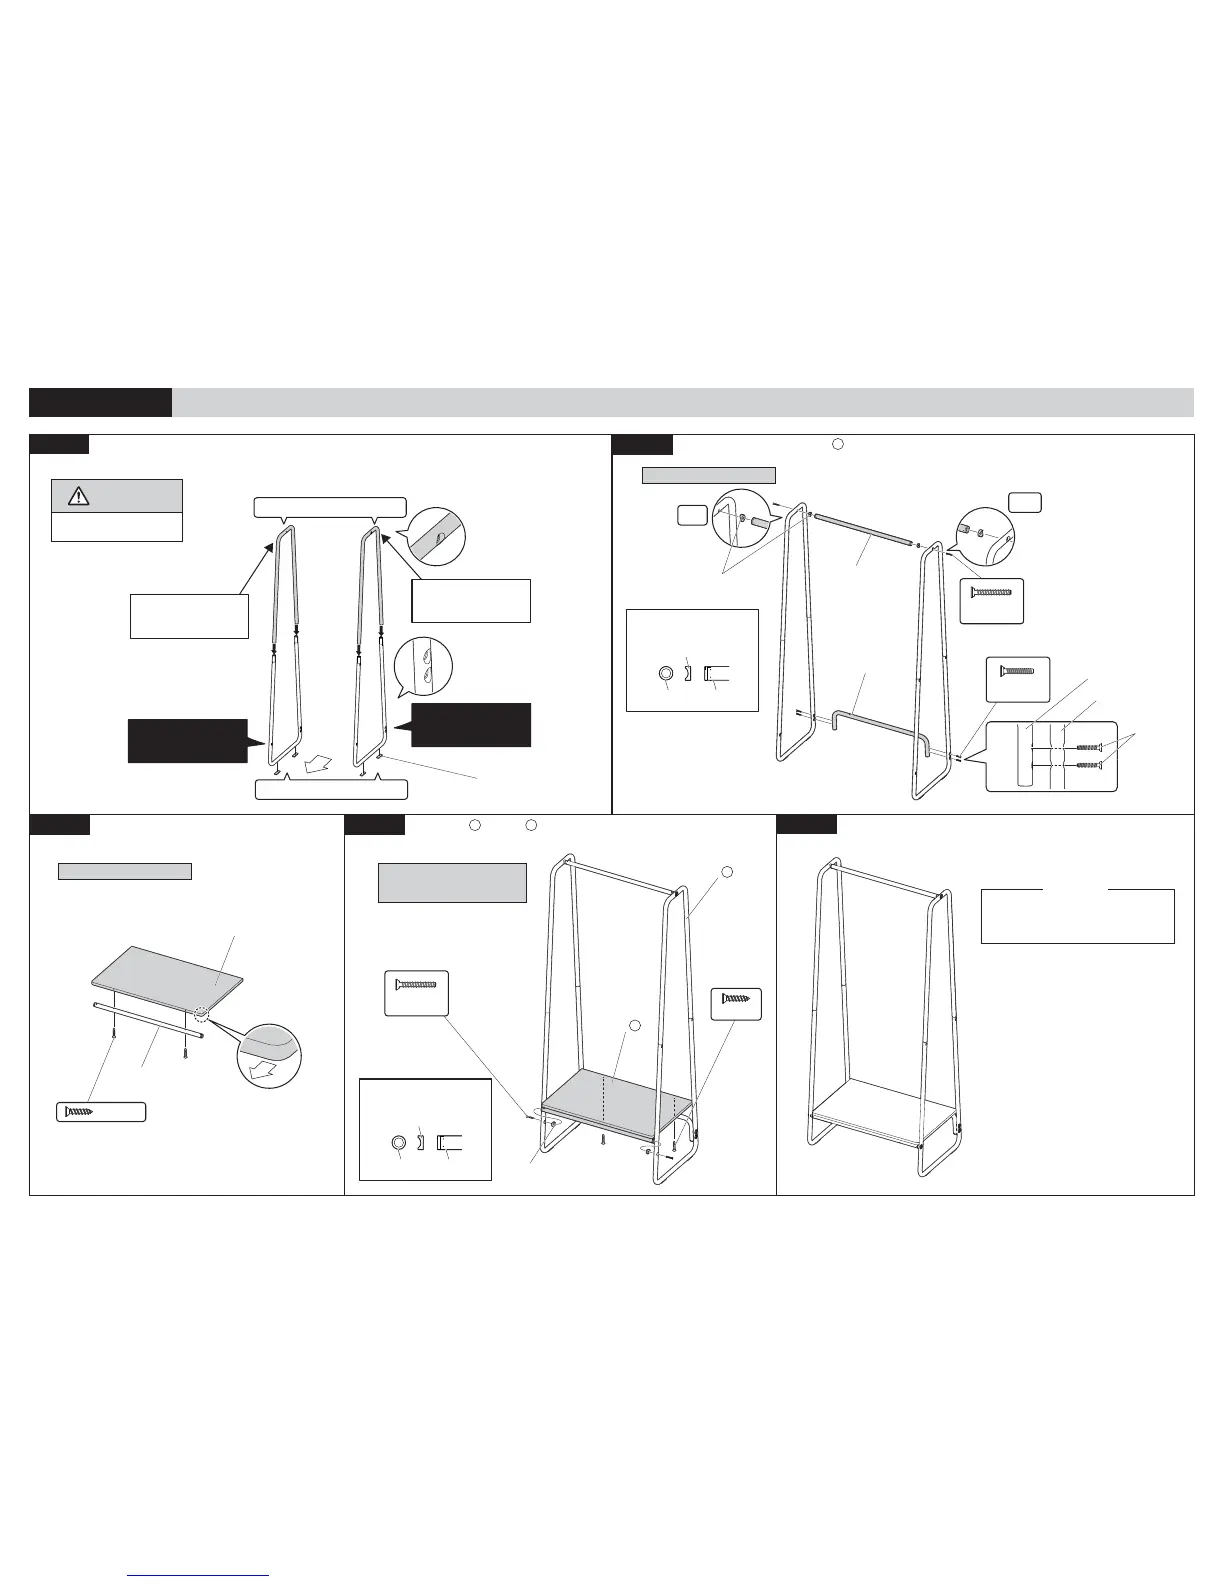
Lower Pipe
Spacer
Rack Pipe
Be mindful of direction when
placing spacers.
1
2
3 4
5
Insert the Upper Pipes and adhere Felt Stickers to bottom of Lower Pipes.
Use the diagram below as reference and be mindful of the direction the pipes are facing,
with indented holes facing out of Upper Pipes and 2 holes in back of Lower Pipes.
Install the U-Shape Pipe and Hanger on
Attach the Rack Pipe on to the Board.
Fasten screws from below.
Attach section to section with bolts and screws. Make sure all screws are tightly secure.
ASSEMBLY METHOD
• RECOMMENDED TO ASSEMBLE WITH 2 PEOPLE
• IF ASSEMBLING INDOORS, BE WARY OF UNEVEN SURFACES SCRATCHING THE FLOORING.
• GLOVES SUGGESTED TO AVOID INJURY DURING ASSEMBLY.
• ASSEMBLE NEAR LOCATION OF INTENDED USE.
CAUTION
Be mindful of your fingers
when inserting pipes.
Upper Pipes (left + right are the same)
Lower Pipes (left + right are the same)
The screw holes with the
indented surface are the
outer sides.
front
The screw holes with the
indented surface are the
outer sides.
Felt Stickers (4)
The side with the one
screw hole is the front end.
The side with the two screw
holes is the back end.
1
Loosely place screws
Left
Right
Hanger Rod (1)
U-Shaped Pipe (1)
Spacers (2)
U-Shaped Pipe
Lower Pipe
Short Bolts
Long Bolts (2)
Short Bolts (4)
Pipe
Spacer
Hanger Rod
Place spacers between Upper
Pipe and Hanger Rod.
*The long bolts are already attached on the hanger.
Please remove before assembling.
Secure the screws tightly.
Board (1)
Rack Pipe (1)
Screws (2)
*The 2 rounded corners
should be facing forward.
Spacers (2)
3 2
Secure the screws into the
U-shaped pipe before screwing
Long Bolts into Lower Pipes.
Part
3
Part
2
Long Bolts (2)
Screws (2)
*The long bolts are already attached on the hanger.
Please remove before assembling.
WARNING
• Tighten and secure screws properly
• Make sure product is straight and sturdy
• All feet are equally on the ground

 Loading...