Do you have a question about the iSun L120 and is the answer not in the manual?
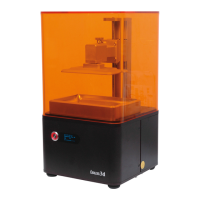
Details the technical specifications of the ISUN 3D printer, including print technology, dimensions, and software.
Guides users through connecting the ISUN 3D printer to a network via Ethernet or WiFi.
Provides steps to resolve network connection issues with the printer, focusing on IP address configuration.
Explains how to connect the printer to a router for enhanced network access and remote operation.
Step-by-step instructions for configuring the printer to connect to a wireless network (WIFI).
Procedure for performing an initial test print without resin to verify printer functionality.
Instructions for printing a basic test model to confirm the printer is operating correctly.
Essential checks and preparations before starting a 3D print job, focusing on platform and resin tank.
Overview of the slicing software interface and basic functions for model preparation.
Explains how to view basic model information within the slicing software.
Details how to move and position the 3D model within the slicing software interface.
Guides on scaling the 3D model in the slicing software, either uniformly or per axis.
Instructions on rotating the 3D model using the software's triaxial adjustment.
Explains how to flip or mirror the 3D model along a selected axis.
How to duplicate models within the slicing software for printing multiple copies.
Guidance on adding support structures to 3D models for successful printing.
Step to initiate the slicing process for a 3D model in the software.
Process of saving the sliced model file with a specified name.
Instructions on waiting for the slicing process to complete.
Confirmation and details upon successful completion of the slicing process.
Essential checks and preparations before starting a 3D print job, focusing on platform and resin tank.
Procedure for uploading and managing slice files on the printer via the web interface.
Configuring print parameters for STL and SLC files that lack slicing information.
Initiating the 3D printing process by selecting and printing a file from the interface.
Monitoring the progress and status of an ongoing 3D print job using the interface.
Modifying exposure time settings dynamically during a print job for CWS files.
Steps to follow immediately after a print job is completed, including cleanup.
Instructions for cleaning the print platform and safely removing the printed object.
Detailed steps for cleaning the resin tank after printing, ensuring no residue remains.
Guidance on filtering and reusing leftover resin for future prints to minimize waste.
Steps for post-curing and finishing printed objects using light or UV lamps.
General operations and controls accessible via the printer's browser interface.
Instructions on using the controls to move the print platform vertically.
Procedure for checking and performing online software updates for the printer.
Steps to level the print platform for optimal adhesion and print quality.
Guidance on maintaining the FEP film (membrane) in the resin tank and best practices.
Instructions for safely cleaning the printer's LCD screen to prevent damage.
| Build Volume | 120 x 120 x 120 mm |
|---|---|
| Nozzle Diameter | 0.4mm |
| Filament Diameter | 1.75mm |
| Connectivity | USB, SD Card |
| Print Technology | FDM (Fused Deposition Modeling) |
| Materials | PLA, ABS, TPU |
| Display | LCD |
| Power Supply | 60W |