I I I I I I I I I I I I I I I I I I I I I I I I I I I I I I I I I I I II II I I I I I II II II II II I I I I I I I I I
5l
.
.
l3zl
.
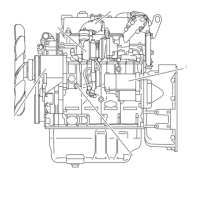
Plastigage Clearance Measurements
This is another method to measure the crankjournal
bearing clearance.
Crankshaft Journal Bearing Clearance
1.
Clean the cylinder body, the journal bearing fitting
portions, the bearing cap, and the inside the outside
surfaces of the bearing.
2. Install the new journal bearing to the cylinder body.
3. Carefully place the crankshaft on the bearing.
4. Rotate the crankshaft approximately 30’ to seat the
bearing.
5. Place the Plastigage (arrow) over the crankshaft
journal across the full width of the bearing.
Apply engine oil to the Plastigage to keep it from
falling.
6. Install the bearing cap with the bearing.
7. Tighten the bearing cap to the specified torque.
Do not allow the crankshaft to turn during bearing
cap installation and tightening.
8. Remove the bearing cap.
9. Compare the width of the plastigage attached to
either the crankshaft or the bearing against the scale
printed on the plastigage container.
If the measured value exceeds the limit, perform the
following additional steps.
1) Use a micrometer to measure the crankshaft
outside diameter.
I
J
i
.
\
2) Use an inside dial indicator to measure the bear-
ing inside .diameter.
3) Replace the crankshaft and/or the bearing if the
measured value(s) exceed the limit.
 Loading...