60mm or 70mm
24mm
54mm
60mm/2-3/8"
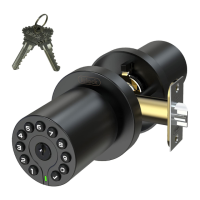
Lock Components
1. Prepare the door and check dimensions
Required tools (not included)
Ruler
Philips head screwdriver
Hammer
Chisel
Use template to mark holesDrill two holesCheck dimenslons
4.Install the batteries and perform
the door handing process
5.Install the interior cover
feed power cable through hole in knob and guide spindle into handle.
Align the exterior keypad with the bore hole. Feed the power cable through latch.
The spindle on the exterior keypad should be aligned with the hole in the center
of the latch. Insert the spindle through this hole as you press the exterior keypad
against the door.
Adjust the latch to the distance you are going to install, 60 or 70mm
(Backset 2-3/8” or 2-3/4”)
Bore 1'' diameter
hole for latch
Bore 2-1/8''
diameter hole
Template
Backset
must match lock (2-3/8'' or 2-3/4'')
2.Install the latch and strike
Install latch
Install strike plate
3.Install the exterior keypad and the interior assembly
Setting latch(2-3/8" or 2-3/4")
Install the exterior keypad
Install the interior assembly
Push out the power cable with a screwdriver
70mm/2-3/4"
+
-
+
-
+
-
+
-
2-1/8''
IULOCK
IU-30 SMART DOOR KNOB
Installation and User Guide
Features
. two ways to access: code and key
.
-30 to 80 °C temperature range
. Low power consumption, 4 AAA for 1.5 Years Battery Life or 15,000 times unlock
. Backlit keypad for use in low light environments
. 1 master code and 50 user codes
. Passage mode for hassle-free entry
. Color LED indicator lights up to show when codes and commands have been successfully entered
. Built-in disguise feature to protect your codes from prying eyes
. Low battery warning indication
Programming guide
Indicator light signals and beep
This function is an added security feature which is aimed at preventing passcode theft. With Passcode Disguise, you may enter 40 digits into the keypad.
As long as the correct passcode sequence is entered, regardless of how many digits were entered before or afterwards, the lock will unlock.
For example, if your user passcode is “112256“, you can successfully unlock the lock by entering “xx...xx112256xx...x”(limit 40 digit).
Passcode and Passcode Disguise
.The master code MUST EXIST and can be modified, but cannot be deleted.
. The lock comes preset with default master passcode 123456
. Used to put the lock in programming mode.
. Can unlock the lock
. Must be different from all of the User Codes currently in the lock.
If you forget the master passcode, you can reset the lock to factory
settings,which restores the default master passcode. See Restore Factory
Settings
.User codes can be added, modified, deleted.
. The lock comes not preset any User Code
. Used to unlock the lock
. Must be different from the master passcode and other user passcodes
. Up to 50 possible User Codes can be stored in the lock at one time.
Master passcodeUser passcode
To delete all user codes, including the master code, follow the instructions
below:
1. Use a screwdriver to remove the screws from the interior cover.
2. Remove the cover and find the reset button located on the battery pack.
3. Press and hold the reset button for 7 seconds until long beep are heard. The
master passcode will return to the manufacturer default code '123456'.
Restore Factory Settings
Change the master passcode as soon as
possible! because of the master passcode can unlock the door.
After restore factory ,
Keypad
Check botton
LED indicator
The color of the light indicates & beep ,the status of the lock.
. a correct master passcode or user passcode was entered ,one long beep
. the programming process is complete ,one long beep
. an incorrect master passcode or user passcode was entered,three short beep
. there was an error in programming, three short beep
. red blinking and beep after keypad backlit off indicates critically low battery
Green
Red
Control of the lock is simply 4-16 digit master passcode or 4-16 digit User passcode.
Passcode Disguise
Key
Pay attention toon the spindle "THIS SIDE UP”
Do not pull the power cable too hard
Key
Keypad
LED indicator
Emergency Power Jack
Exterior Assembly
Plastic box
Strike plate
Screw
Latch
Interior Assembly
Mounting Screws (M4*40mm)
Interior Cover
THIS S I
DE UP
T
HIS SIDE UP
THIS S
I
DE UP
AAA
AAA
AAA
AAA
Rubber grip
M4*10mm
Rubber grip
Rosette rubber
Rosette rubber