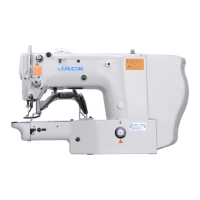
Do you have a question about the Jack JK-T9270D and is the answer not in the manual?
Explains the meaning of safety instructions, indications, and symbols used in the manual.
Details the meaning of different indications like CAUTION to ensure safe product usage.
Explains the meaning of various warning symbols and their significance for safe operation.
Outlines recommended environmental conditions for safe sewing machine operation.
Provides crucial safety steps and warnings related to machine installation.
Safety guidelines to follow during the sewing process to prevent injury.
Safety instructions to adhere to while performing cleaning operations on the machine.
Specific caution statements related to sewing and cleaning procedures.
Safety notes for maintenance and inspection tasks.
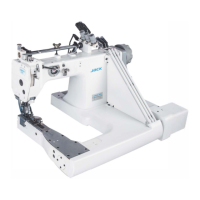
Details the procedure for mounting the sewing machine head onto the work table.
Instructions for assembling and installing the cotton stand for thread spools.
Explains how to lubricate the sewing machine, including oil types and procedures.
Guides on how to verify the correct rotational direction of the machine pulley.
Provides guidance on selecting appropriate needles and threads based on fabric type.
Step-by-step instructions for correctly installing the sewing machine needle.
Illustrates the process of threading the lower thread through the bobbin and shuttle mechanism.
Details the procedure for threading the upper thread through the machine's guides.
Describes the basic steps for operating the sewing machine to start sewing.
Explains how to adjust upper and lower thread tension for optimal stitch quality.
Guides on adjusting the presser foot pressure for proper fabric feeding.
Details the process for adjusting the stitch length based on material requirements.
Instructions for adjusting the puller feed mechanism for different fabric types.
Outlines daily cleaning procedures to maintain machine performance and longevity.
Provides instructions for changing the lubricating oil at regular intervals.
Describes how to adjust the needle bar height for correct needle plate positioning.
Explains the procedure for setting the correct timing between the needle and looper.
Details how to adjust the clearance for loopers to pass the needles without interference.
Guides on adjusting the needle guard for proper needle protection and clearance.
Instructions for adjusting the height of the feed dog for optimal fabric feeding.
Explains how to adjust the upper thread take-up thread guide for proper thread tension.
Details adjusting the upper thread arm thread guide for slight tension.
Guides on adjusting the thread release shaft for proper tension disc operation.
Explains how to adjust the timing for the lower thread take-up mechanism.
Instructions for installing the lapper guide plate.
Guides on adjusting the puller height relative to the needle plate.
Details how to adjust the puller timing based on the needle bar position.
| Brand | Jack |
|---|---|
| Model | JK-T9270D |
| Category | Sewing Machine |
| Language | English |