10
MONTAGE
INSTALLATION
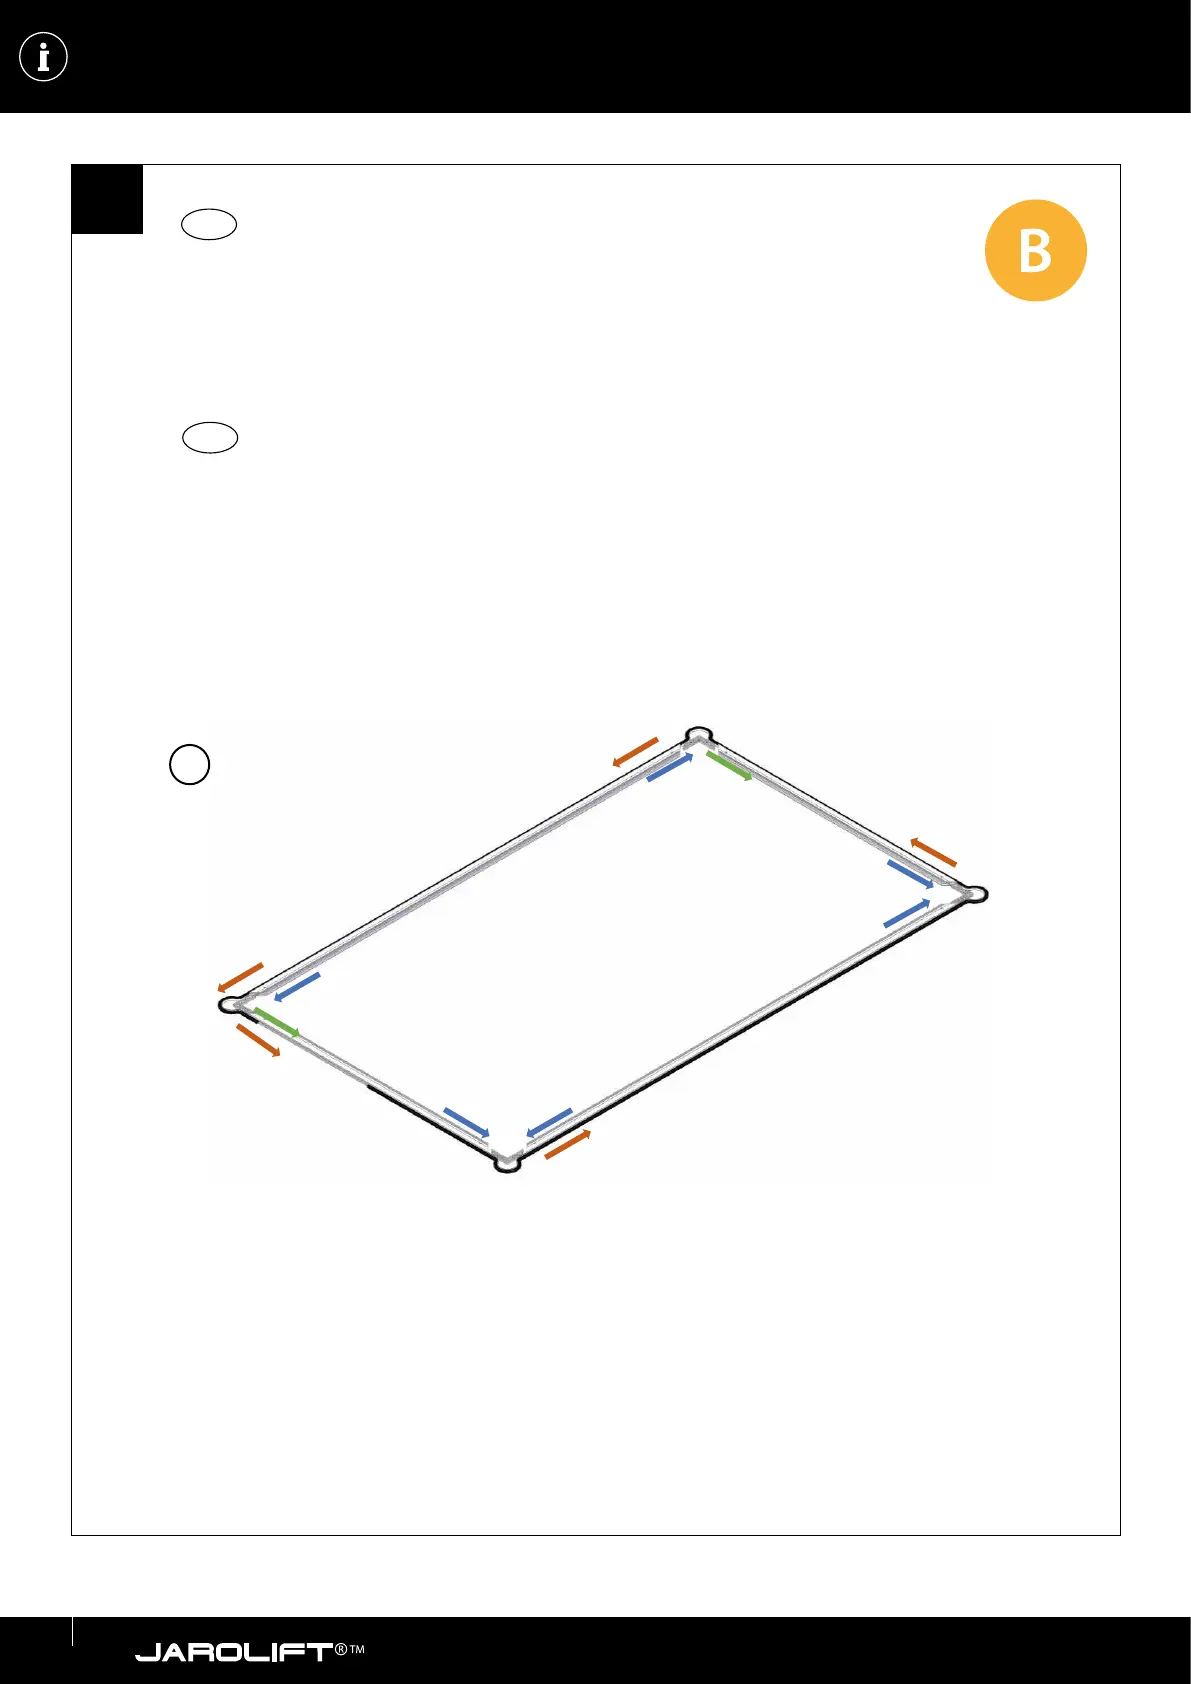
3.d. Montage B
1a. 1b.
1c.
2a.
2b.
2c.
3a.
3b.
3c.
3d.
3d.
3c.
3e.
1
2
Gehen Sie nun Schritt für Schritt wie folgt vor:
• 1a + 1b. Verbinden Sie die Prolschienen mit dem Eckverbinder.
• 1c. Ziehen Sie die Bürstendichtung an.
• 2a + 2b. Verbinden Sie die Prolschienen mit dem Eckverbinder.
• 2c. Ziehen Sie die Bürstendichtung an.
• 3a + 3b. Verbinden Sie die Prolschiene mit dem Eckverbindern.
• 3c. Ziehen Sie die Bürstendichtung nach.
• 3d. Verbinden Sie die Eckverbinder mit den Prolschienen.
• 3e. Ziehen Sie die Bürstendichtung an.
Now proceed step by step as follows:
• 1a + 1b. Connect the proles with the corner.
• 1c. Tighten the brush seal.
• 2a + 2b. Connect the proles with the corner.
• 2c. Tighten the brush seal.
• 3a + 3b. Connect the prole with the corners.
• 3c. Tighten the brush seal.
• 3d. Connect the corners with the proles.
• 3e. Tighten the brush seal.
EN
DE
2d