Page
8
of
10
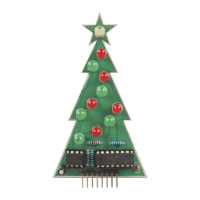
XC3754 Soldering Guide
For the other two resistors, your band-colour recognition is put to the test, (don’t worry,
you can use a multimeter or an online calculator to check if you are not sure).
For R1 you want to use the 10kΩ resistor, which should be:
brown-black-black-red-brown = 1 0 0, ×100, 1% tolerance. (100 × 100 = 10,000 or 10k).
Bend and put this resistor in place on the PCB board. R1 is found next to the large IC2
on the PCB.
For R2 you want to use the 1kΩ resistor, which should be:
brown-black-black-brown-brown = 1 0 0, ×10, 1% tolerance. (100 × 10 = 1000 or 1k).
and this is found right next to R1, closer to the IC1 side.
Once they are in place, snip and solder the resistors, like everything else.
Solder the IC sockets
Once the resistors are in, we’ll do the IC sockets. It should be pretty obvious where
these go, but they do have an orientation to them.
It is not critically important that you get the IC sockets facing the correct way, however it
is important that you get the IC chips in the correct way. For that reason, we’ll make sure
that the IC sockets are facing the correct way so we can match our chips to the socket,
instead of trying to look under the part we’ve soldered at the picture.
Place them on the board as shown. Notice that there is a small notch cut out from the
top of both of the sockets which corresponds to the notch on the image in the silkscreen.
Make sure these match up, then you can simply bend one pin on each corner of the
socket so that they don’t move when you flip the board over to solder them in.
There’s no snipping involved in this one.
 Loading...