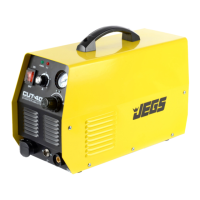
FRONT PANEL FUNCTION AND INSTRUCTIONS
AC/DC transfer switch: Allows you to select either "AC" or "DC" depending on the type of material
you’re working with. "AC" is for Aluminum and "DC" is for Carbon Steel, Stainless Steel, Iron,
Copper and Other Materials.
Hand torch/ Foot pedal transfer switch: Selecting the "ON" position allows you to adjust current
with the pedal. Selecting "off" allows adjustments to be made with the knob on the front panel.
Current adjustment knob: This knob adjusts current when the hand torch/pedal transfer switch is in
the "off" position.
AC Balance Adjustment: If welding in AC this will need to be set. The more negative the value will
result in greater penetration and less cleaning and the more positive the value will result in less
penetration but greater cleaning. Typically higher current levels require less or negative AC balance.
Down-Slope adjustment knob: In order to achieve top quality welds current should be gradually
reduced at the end of the weld. This knob adjusts the amount of time required to reach zero after you
release the trigger or pedal.
Post-flow time adjustment knob: The post-flow adjustment knob controls how long the gas
continues to flow after the trigger is released. This machine allows up to 10 seconds of post-flow.
2T / 4T Switch: When you select 2T the torch will activate whenever you press and hold the trigger.
If you select 4T the first press of the trigger activates the torch and a second press of the trigger will
deactivate the torch. Select the method that best suits your welding style.
Malfunction Indicators
Overheat protection indicator: This indicator is lit when the machine is used continuously for long
time periods or high current levels are used to prevent overheating or damage. The indicator will stay
lit until the machine cools to an acceptable level and will resume normal function once safe to do so.
Abnormal indicator: The indicator is lit when there is anything abnormal inside the machine. When
it is lit, please turn off the power switch and restart the machine after the indicator is off. If indication
occurs again, please have it checked by professionals or manufacturer.
Machine Set-up
Make sure the intake of the machine is not blocked or covered for best cooling system performance.
Make good connections for the shielded gas source to prevent leaks and weld contamination.
Use supplied inducting cable to connect the housing to the ground. Connect the cable to the ground-
connecting screw on the back of the machine.
Put the eyelet on the end of the torch cable to the fastening socket at “+” polarity of the panel, turn
clockwise and fasten.
When using the pedal control, connect its two-pin plug and three-pin plug with the relevant socket on
the panel.
 Loading...