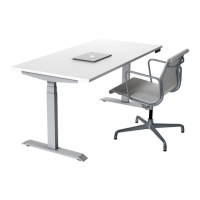
This document describes the Venta T, a height-adjustable desk designed for use in dry work areas. The desk features electric motors that allow its height to be adjusted to the most ergonomically suitable position.
Function Description:
The Venta T desk is primarily designed to provide a customizable working height, promoting ergonomic comfort. It is equipped with electric motors for smooth height adjustments and a control box with a handset for operation. The desk can be programmed with up to four preset heights, allowing users to quickly switch between preferred positions. It also includes features like a reset procedure, anti-collision sensitivity adjustment, and the ability to change measurement units between inches and centimeters.
Important Technical Specifications:
- Height Range (without desktop): 625-1275mm
- Base Width: 1080mm min. - 1800mm max.
- Speed: 32mm/s
- Load Capacity: 1000N
- Duty Cycle: 10% Max. (2 minutes on, 18 minutes off)
- Power Input: 230V outlet
Usage Features:
Installation:
The installation process involves several steps:
- Frame Assembly: Install the frame left (part 4), frame right (part 5), and lifting column (part 2) using M6*10 screws (part 9). Repeat for the other column and frame components.
- Center Rail Installation: Install the center rail (part 3) with M6*10 screws (part 9). Ensure the slots in the center rail face inward and are closer to the top edge when the assembly is upside down.
- Foot Attachment: For each leg assembly, attach a foot (part 6) with M6*14 screws (part 8), tightening in a cross-pattern.
- Side Bracket Installation: Slide the side bracket (part 1) into the frame end and secure it with M6*14 screws (part 8).
- Desktop and Component Attachment: Attach the desk base to the underside of the desktop using ST520 wooden screws (part 10). Install the control box (part 15), power adapter fixing (part 13), power adapter (part 14), and handset (part 12) using ST520 and ST5*16 wooden screws (part 11). The handset should be flush with the front desktop edge or recessed up to 1/8".
- Final Setup: Turn the assembled desk right-side up with at least two people, grabbing the desk base (not the desktop). Adjust the pre-installed glides on the feet as needed. Plug the power cord (part 17) into a 230V outlet.
Operation:
- Reset Procedure: Before initial use, the desk must be reset. Press and hold the DOWN button until the desk reaches its lowest height. Release, then press and hold DOWN again until the LED display reads "RST". Release, then press and hold DOWN again until the desk lowers slightly, rises, and stops. Release the button. The desk is now ready.
- Height Adjustment: Use the UP or DOWN buttons to adjust the desk to the desired height.
- Programming Presets: To program up to four presets, adjust the desk to the desired height, then press "M" followed by a number (1-4).
- Handset Lock/Unlock: To lock the handset, press and hold "M" for about 8 seconds until the LED displays "S -" then "LOC". To unlock, press and hold "M" for about 8 seconds until the LED switches from "LOC" to the height display.
- Changing Units (Inches/Centimeters): Perform the reset procedure. Then, press and hold the "2" button for about 5 seconds while the LED flashes "RST" and switches to "10.3 = cm" or "10.4 = inches". Release, then press and hold "2" again until the desired setting is reached. Wait 5 seconds for the display to return to "RST".
- Changing Anti-Collision Sensitivity: Perform the reset procedure. Then, press and hold the UP button for about 5 seconds while the LED flashes "RST" and switches to "10.5 = 10 kg pressure (most sensitive)", "10.6 = 15 kg pressure (middle setting)", or "10.7 = 20 kg pressure (least sensitive)". Release, then press and hold UP again until the desired setting is reached. Wait 5 seconds for the display to return to "RST".
- Setting Upper & Lower Limits:
- Upper-Limit: Move the base to the desired maximum height. Press "M" and release. Press UP and release. The LED will flash "S -". Press and hold "M" (about 2 seconds) until the LED changes to "999".
- Lower-Limit: Move the base to the desired minimum height. Press "M" and release. Press DOWN and release. The LED will flash "S -". Press and hold "M" (about 2 seconds) until the LED changes to "000".
- Removing Limits: Press and hold "M" until the LED flashes "S -" and release. Within 5 seconds, press "M" again and hold for 2 seconds. The LED will change to "555".
Maintenance Features:
Troubleshooting:
- Desk not functioning: Perform the reset procedure.
- Handset displays "RST": Perform the reset procedure.
- LED displays "Er1" - "Er1 3": Confirm all wired connections are secure (legs to cables, cables to control box), then perform the reset procedure.
- Error message persists: Contact your seller.
- Height between legs exceeds 1.5 inches: Stop the reset procedure and contact your seller.
- Handset displays "HOT": Let the base cool down for 20 minutes.
Safety Precautions:
- Ensure no obstacles are in the desk's path.
- Ensure the desktop is not touching any walls.
- Ensure all cords are of appropriate length to accommodate height changes.
- Keep children away from electric height-adjustable desks, control units, and handsets to prevent injury and electric shock.
- Keep all electrical components away from liquids.
- Do not sit or stand on the desk frame, or crawl/lie under it.
- Do not place objects taller than 20" underneath the desk.
- Do not open any components (legs, control box, switch) due to the danger of electric shock.
- When setting upper/lower limits, ensure proper clearance below the desk base during retraction.
- The desk height is adjustable to achieve the most ergonomically suitable height.
- Any use other than its intended purpose is at the user's risk.
- The manufacturer does not accept warranty or liability claims for damages caused by improper use or handling.
- If the desk is sold, the manual should be provided to the buyer.