7
STEP 1
Removefountaincomponentsfromtheirboxes
andplacefountaindrumonasturdy,level
surface.Makesurethedrumislevelsothatthe
chocolatewillowproperly.
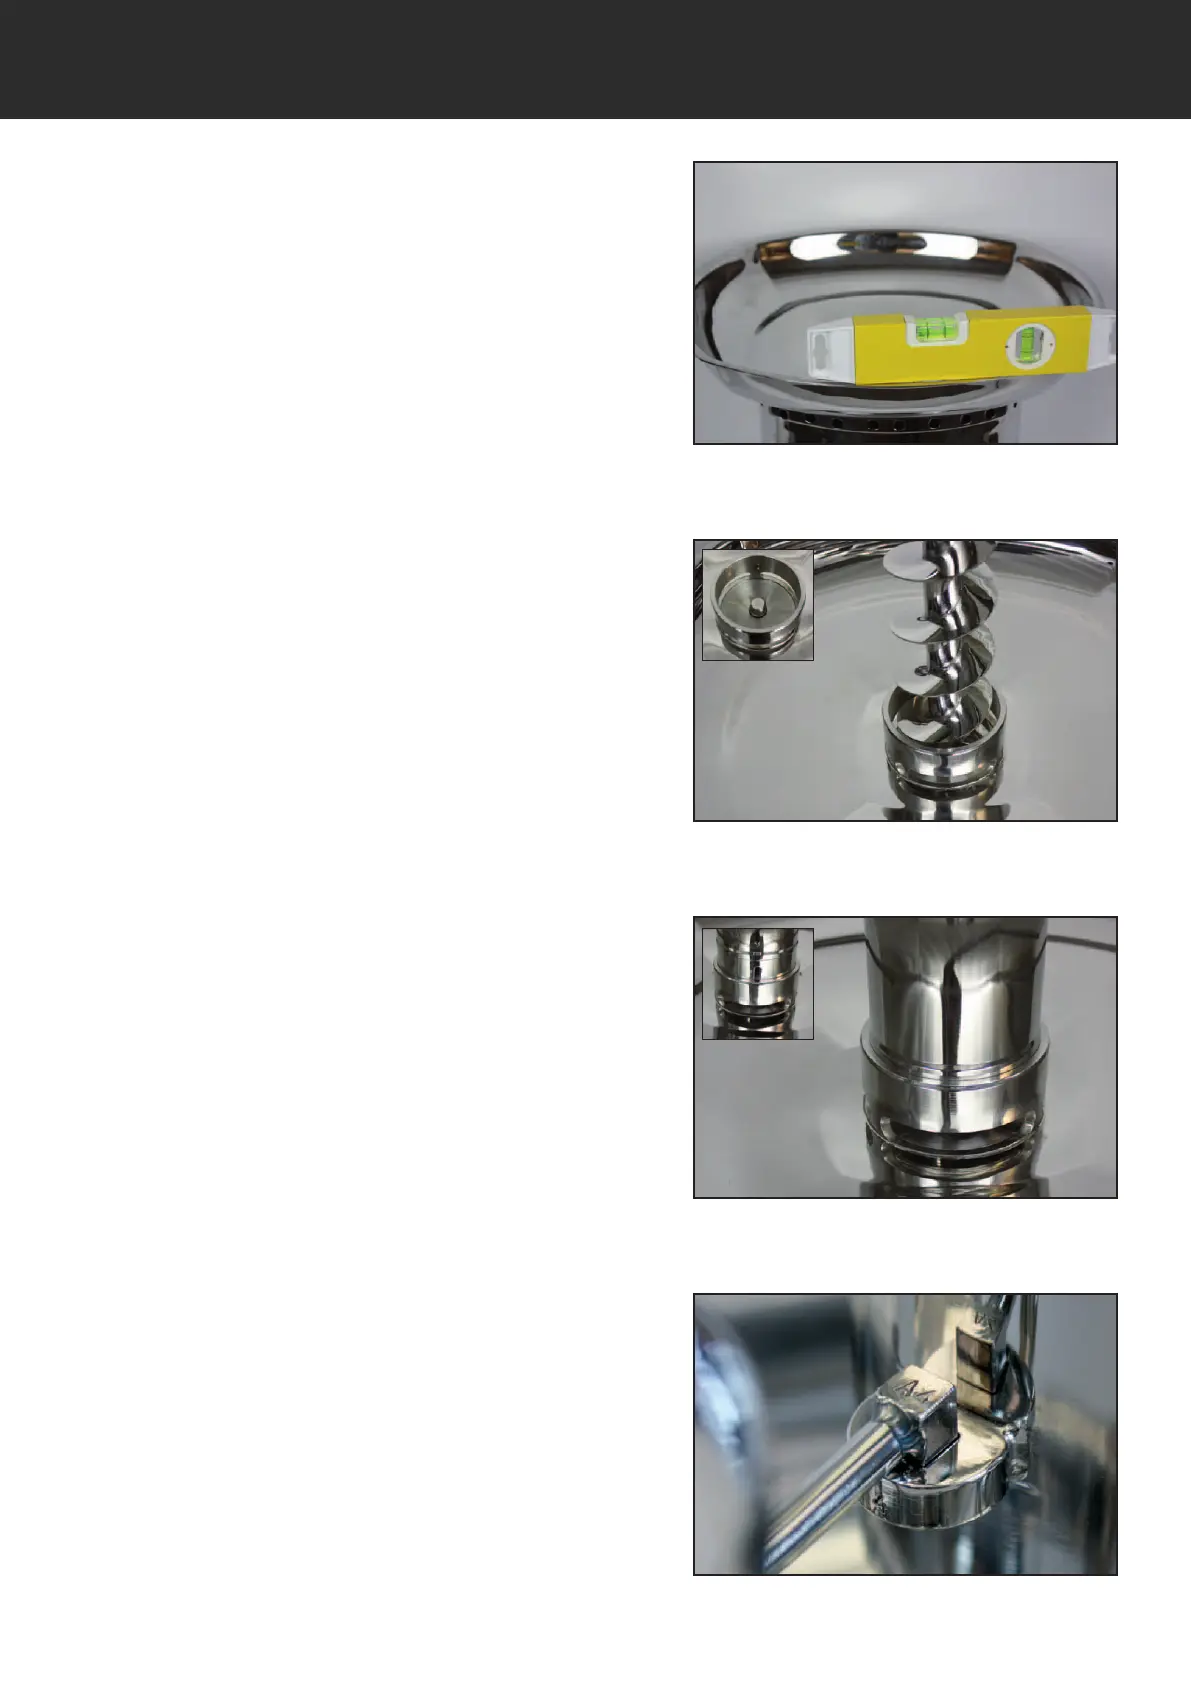
STEP 2
Placethebasinontopofthedrumatan
angleandpushdownandturnclockwise45
degreestolockthebasinwithdrum.Tocheck
thefountainislevelplaceaspiritlevelonthe
basinrimatvariouslocations(Fig.1).Ifleveling
isneeded,raiseorloweraparticularsideofthe
fountainbyadjustingthefeet.
STEP 3
Placeaugerontopofthesquarecentreshaftin
themiddleofbasin(Fig.2).
STEP 4
Placethecentrecolumnontothecentre
housinginthemiddleofthefountainbase(Fig.
3).Ensurethattheslotonthecolumnbaselines
upwiththelocatingpinontheinsideofthe
housing.
STEP 5
PlacetheCupsonthecentrecolumn,
matchingthenumbersonthecupswiththe
correctnumberedbracketonthecolumn(Fig.
4).Forexample,cupA1mustattachtobracket
A1;thereare15cupsintotal,A1-A5,B1-B5and
C1-C5.
STEP 6
Placethetophatontopofthecentrecolumn
makingsurethattheaugerpinsitsinthemiddle
ofthetophatring.
STEP 7
Placethedecorativeballintothetophat.
FOUNTAIN ASSEMBLY SQ3 CASCADE
Centre & Locating Pins
Slot in column
Fig. 1
Fig. 2
Fig. 3
Fig. 4