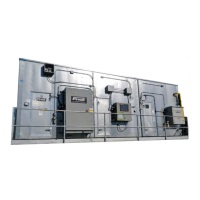
Start-up
Before attempting to start up and operate any electrical
cooling equipment such as an AcuAir
®
system unit, it is
essential that all personnel associated with it have a basic
knowledge of how and why the unit operates in normal
conditions. The following description outlines a standard unit’s
general features, operation, and controls.
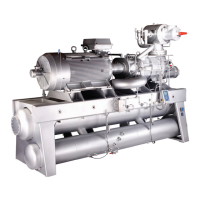
An AcuAir
®
system (Hygienic air unit) is an engineered heat
transfer device that provides some or all of the listed functions:
cooling, dehumidication, pressurization, ltration, heating,
exhaust, and condensation control. Each unit is engineered
and designed for a specic application.
Safeties and controls vary with each AcuAir
®
system
installation and may be interfaced with ancillary equipment
or system controls. All operators should be thoroughly trained
in an integrated cooling system’s sequence of operations and
safeties.
After installation of the AcuAir unit, controls and necessary
ancillary and auxiliary equipment, the entire system should
be veried before placing the hygienic system on-line for the
rst time. Specically, the following prestart measures must
be completed to ensure the readiness of the AcuAir system.
Do not start the unit until the following inspections verify
operational readiness. Avoid accidents or equipment failure
by rectifying any unsatisfactory condition.
• Inspect general condition of unit, e.g., structural integrity,
anchors/supports, etc.
• Conrm that all conduit openings through the walls of the
AcuAir unit, as well as conduit openings into electrical
panels, are sealed with electrical putty.
• Conrm drive assembly condition and alignment of motor,
bearings/collars, and fan/shaft.
• Conrm proper belt condition and tension. (See
section)
• Verify there are no obstructions at the fans and fan guards.
• Verify the correct rotation of the fans.
• Understand and prepare for rst 24 hour operation mea-
sures e.g., new belt run-in procedures. (See
section)
• Understand and prepare the unit prestart-up checklist. See
Appendix A for the prestart-up form.
a. Verify tightness of fan bearing bolts.
b. Verify tightness of blower wheels to shafts.
c. Verify tightness of blower, motor, and sheave.
d. Verify tightness of all motor mounting bolts.
a. Adjust belt tension if slipping is evident.
b. Verify belt tension after 50 hours of operation and again
after 100 hours of operation.
During initial start-up of new belts, a belt run-in procedure
is recommended. During start-up, follow these instructions:
1. Listen and look for unusual noise or vibration.
2. After shutting down and locking out the starter, check the
bearings and motor. If they feel hot, the belt tension may be
too tight.
3. Run the drive under full load for 24 hours of continuous
operation. Running the belts under full load allows them to
seat themselves into the grooves.
4. After running the drive, verify the tension of the belts.
Re-tension to the recommended values.
This run-in procedure will reduce the future need for re-
tensioning and will help extend the life of the belts.
– Wall or panel openings for dampers must be
properly sized. Do not force a factory damper into undersized
eld ductwork or attempt to ll an oversized opening. This
will bend the frames causing air leakage. Dampers must also
be installed plumb and square. Twisted and distorted frames
develop stresses causing linkage to bind and correlating
improper blade operation. All control damper seams must be
caulked air and watertight.
– Conguration of damper frames permits
the use of screws, rivets, or welding to attach damper(s) to
ducts or housings. Fastener ends must not protrude in any way,
which can interfere with blade movement. Correctly mounted
dampers allow free and smooth operation from completely
closed to fully open.
– Where dampers consist of more
than one section, sections are mounted together to form larger
damper assemblies. Matching frame members must be tightly
welded or bolted together in the eld. Multiple sections require
additional structural support (provided on site by others) to
ensure complete rigidity. Horizontally mounted dampers may
sag unless supported adequately. Blade motion is transmitted
between adjacent panels by common blade shaft couplings and
jackshafts. It is important that all shafts are accurately aligned,
otherwise blade edges will bind and prevent a good seal.
– Operation of dampers may be manual using
locking quadrant handles, chain operators or other devices.
For automatic operation, electric or pneumatic actuators
can be connected to dampers either internally or externally.
Dampers constructed with multiple panels require individual
actuators or jackshafts. Actuators or multiple actuators
should be of adequate torque capacity to effectively open
and close the damper according to its type, size, location, and
 Loading...