OPTIONAL PARTS
3-6
TC-16001-rev.5
NOTES:
1. Secure the appropriate service space at both left
and right side of outdoor unit.
2. Do not put any obstacles at the airow direction.
NOTES:
1. This optional Wind Guard is to protect the air outlet from strong winds.
2. Do not put any obstacles at the airow direction.
If there are obstacles, a short-circuit will occur or the airow volume will decrease.
Secure the appropriate service space according to the "Installation Manual" for the outdoor unit.
3. Do not install another outdoor unit next to the air outlet direction. Another outdoor unit will suck the airow
from the Wind Guard.
4. The operation noise is slightly increased by attaching a Wind Guard.
5. The Snow Protection Hood should be utilized in a snow covered area.
6. In the case of icing at the air outlet in a cold area, melt ice using lukewarm water (approx. 104
o
F (40
o
C)).
The Wind Guard may be damaged when trying to crack ice with hard blows (such as with a hammer).
Specications
Model
Item
WSP-160A
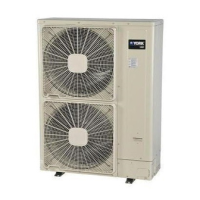
Applicable Outdoor Unit Model 036 to 060
Quantity (per outdoor unit) 1
Material Galvanized Steel Sheet + Baked with Synthetic Resin Paint
Color Natural Gray (1.0Y 8.5 / 0.5)
Weight lbs (kg) 24.3 (11.0)
Accessory
2 Wind Guards, 1 Securing Stay, Securing Screw (M5 (SUS)
x L=1/2 inch (12mm) x 12), Installation Manual
Installation Restriction
It can not be utilized with the Airow Guide and
the Snow Protection Hood.
10-13/16
(275)
Outdoor Unit
Screw (4 x M5)
(Accessory)
Airflow
Airflow
Airflow
Airflow
Airflow
Screw (4 x M5)
(Accessory)
Securing Stay
Screw (4 x M5)
(Accessory)
Wind Guard (Lower)
Wind Guard (Upper)
< Service Space >
Outdoor Unit
< Installation >
(1) To attach the Wind Guard, secure the securing stay in the middle of air outlet grille. Attach the lower
Wind Guard to the outdoor unit and the securing stay by securing screws. Then attach the upper Wind
Guard to the upper cover and the lower Wind Guard using the securing screws.
(2) When the Airow Guide is attached, do not remove the air outlet grille.
(If it is removed, there is a danger of touching the fan rotating parts.)
 Loading...