Installation
& maintenance
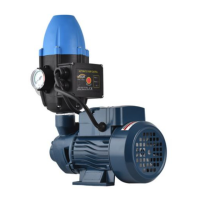
of your JoJo
Booster Pump
Note: The test can be performed without connecting
the pump to the water supply.
1. After your pump has been cleaned and
re-assembled it is now ready to be tested. As
mentioned, this is done whilst the pump is not
connected to the tank.
2. Insert the plug into the main power supply and
switch it on. The pump should start up immediately
and run for 20 seconds.
3. As per the built in safety feature, the pump should
shut down automatically after 20 seconds. To reset
the pump, press the reset button on the pressure
switch.
04
Testing your pump
after cleaning it
Ensure that you have followed the
cleaning instructions provided.
+27 11 695 8300 | www.jojo.co.za
STEP 8
Replace the front cover and refit the 3
x 6mm screws to the front cover.
STEP 7
Make sure the “O” ring as
indicated on the photo is in place
before re-fitting the front cover.
STEP 6
Clean behind the impeller and casing
with the sandpaper as indicated. Then
clean both sides with a cloth.
Your pump is now ready to be
re-assembled.
STEP 5
Use a piece of sandpaper and gently
clean the surface where the impeller
runs.
STEP 9
Tighten the 3 screws on the cover,
making sure you do not overtighten
them.
STEP 4
If dirt is visible on the wear-plate and
impeller as indicated then refer to
step 5.