Est. 2002
Jones Bikes.com
Total function
|
On-road and off
|
Jones Geometry
|
Inspirational handling
|
The high-performance non-suspension bicycle
DETAILED HANDLEBAR
INSTALLATION INSTRUCTIONS
These instructions are written for an
experienced mechanic. If you are not
sure of your ability to correctly install
this handlebar, or do not have the proper
tools for handlebar installation, have
the handlebar installed by your Jones
H-Bar
™
dealer.
Before you begin
In order to get the full range of hand positions, it is
critical to use the correct length grip for your H-Bar.
660mm H-Bars require grips that are approximately
165mm/6.5” long, and 710mm H-Bars require grips
that are approximately 205mm/8” long. The Jones
H-Grips come in just the right length to fit your
H-Bar, and are what we recommend!
The Jones H-Bar works best when the main
grip area is approximately the same height as
the saddle, and far enough back toward the
saddle to allow you to sit very upright when
holding the rearmost portion of the grip area, so
that you have easy access to the front positions
as well. To achieve this, you may need a significantly
shorter and/or higher rise stem. As with any new
handlebar or stem installation, you may also need
longer cables, housing, and/or hydraulic lines in
order to accommodate the new position and
width of the H-Bar.
REPLACING AN EXISTING HANDLEBAR
To remove the old grips
1
Lift the edge of a grip with a thin flathead
screwdriver or similar tool.
2
Spray some alcohol or water under the grip.
3 Remove the screwdriver.
4 Rotate the grip back and forth, while pulling
toward the end of the handlebar, until the
grip slides off the handlebar.
Remove the controls
Before removing them, note the order of the
brake levers and shift controls on the handlebar
and also the path of the cables.
1
Use an allen wrench (usually 5mm, or smaller)
to loosen the clamp bolts on the controls.
2
Slide the levers off the handlebar.
Remove the old handlebar
1
Loosen and remove the handlebar
stem-clamp bolts.
2
Remove the handlebar from the stem.
Install the new handlebar
1
Apply a small amount of grease to the threads
and bearing surfaces of the clamp bolts.
2
Center the Jones H-Bar
™
in the stem.
The sweep of the bars should face back, toward
the rider. The H-Bar is designed to be used in
the upright position with the rise (13mm/0.5”
for standard H-Bars, 63.5mm/2.5” for 2.5 H-Bars
3
Install the stem’s handlebar clamp bolts. Tilt the
grip portion of the handlebar down 10-15° (see
overleaf) and gradually tighten the bolts to the
manufacturer’s recommended torque setting.
Make sure the gaps at the top and bottom
of the stem face plate are even.
4 Stand the bike up on the floor, straddle the
top tube and align the stem with the front wheel.
Tighten all the stem bolts to stem manufacturer’s
torque specifications.
Install the controls and grips
1
Slide the right-hand controls onto the right side
of the H-Bar, keeping the order the same as it
was on the old bar. Push the inner control clamp
all the way to the weld but not on the weld
(or taper of the carbon bar).
Above, correct lever position on aluminium H-Bar
™
Above, correct lever position on carbon H-Bar
™
The H-Bar is designed and tested to have
the controls positioned just behind the
crossbar junction. Riding the H-Bar with
the controls farther back, so that the main
hand position is at the end of the grip area,
subjects the bar to more strain, and is not
recommended. The position at the end of
the grips is meant for upright riding, and
the aggressive, downhill-oriented position
is farther forward on the grip area.
Important: If the cables are too short to get the
levers on it may help to rotate the handlebar first.
Sometimes it may necessary to remove the bar
from the stem to gain enough cable slack.
2
Using the manufacturer’s instructions adjust
the brake lever reach to position the lever closer
to the bar than you might normally in order to
allow easier access from the new hand position
on the H-Bar
™
.
3
Using the same procedure as above, slide
the left-hand controls onto the left side of
the handlebar and tighten the shift and brake
lever clamps enough to hold them in place
for riding, but keep them loose enough to
move in the event of an impact to protect
your levers and H-Bar.
Note: Once the bar is installed, make sure
that the brake and shift cables and housing
allow the handlebar to be turned 90° to the
right and left without tugging on the cables.
Replace cables, housing, and/or hydraulic lines
as necessary. Leaving the cables and housing
longer will also make it easier to mount a bag
underneath the handlebar.
4
Slide the grips onto the bar following the
manufacturer’s instructions, making sure that
the grip fills the entire grip area as shown.
Note: Make sure the grip covers the entire
bar to the end. The 660 bar needs grips that are
approx 165mm / 6.5” long, while the 710 bar will
require grips that are approx 205mm / 8” long.
5 Wrap the rear crossbar with handlebar tape
(see top picture).
6
If desired wrap the front of the Loop H-Bar
with handlebar tape as shown (also top picture)
leaving about 100mm / 4” open in the center
for mounting a light and/or computer.
7
Inspect the assembly as described in Inspect
your handlebar regularly.
Note: Jones H-Bars come in two widths. If you
have the wider 710mm version, you can cut
the ends off to the “Original H-Bar Width” line
to make a 660mm H-Bar – any other modification
of the H-Bar will void the warranty.
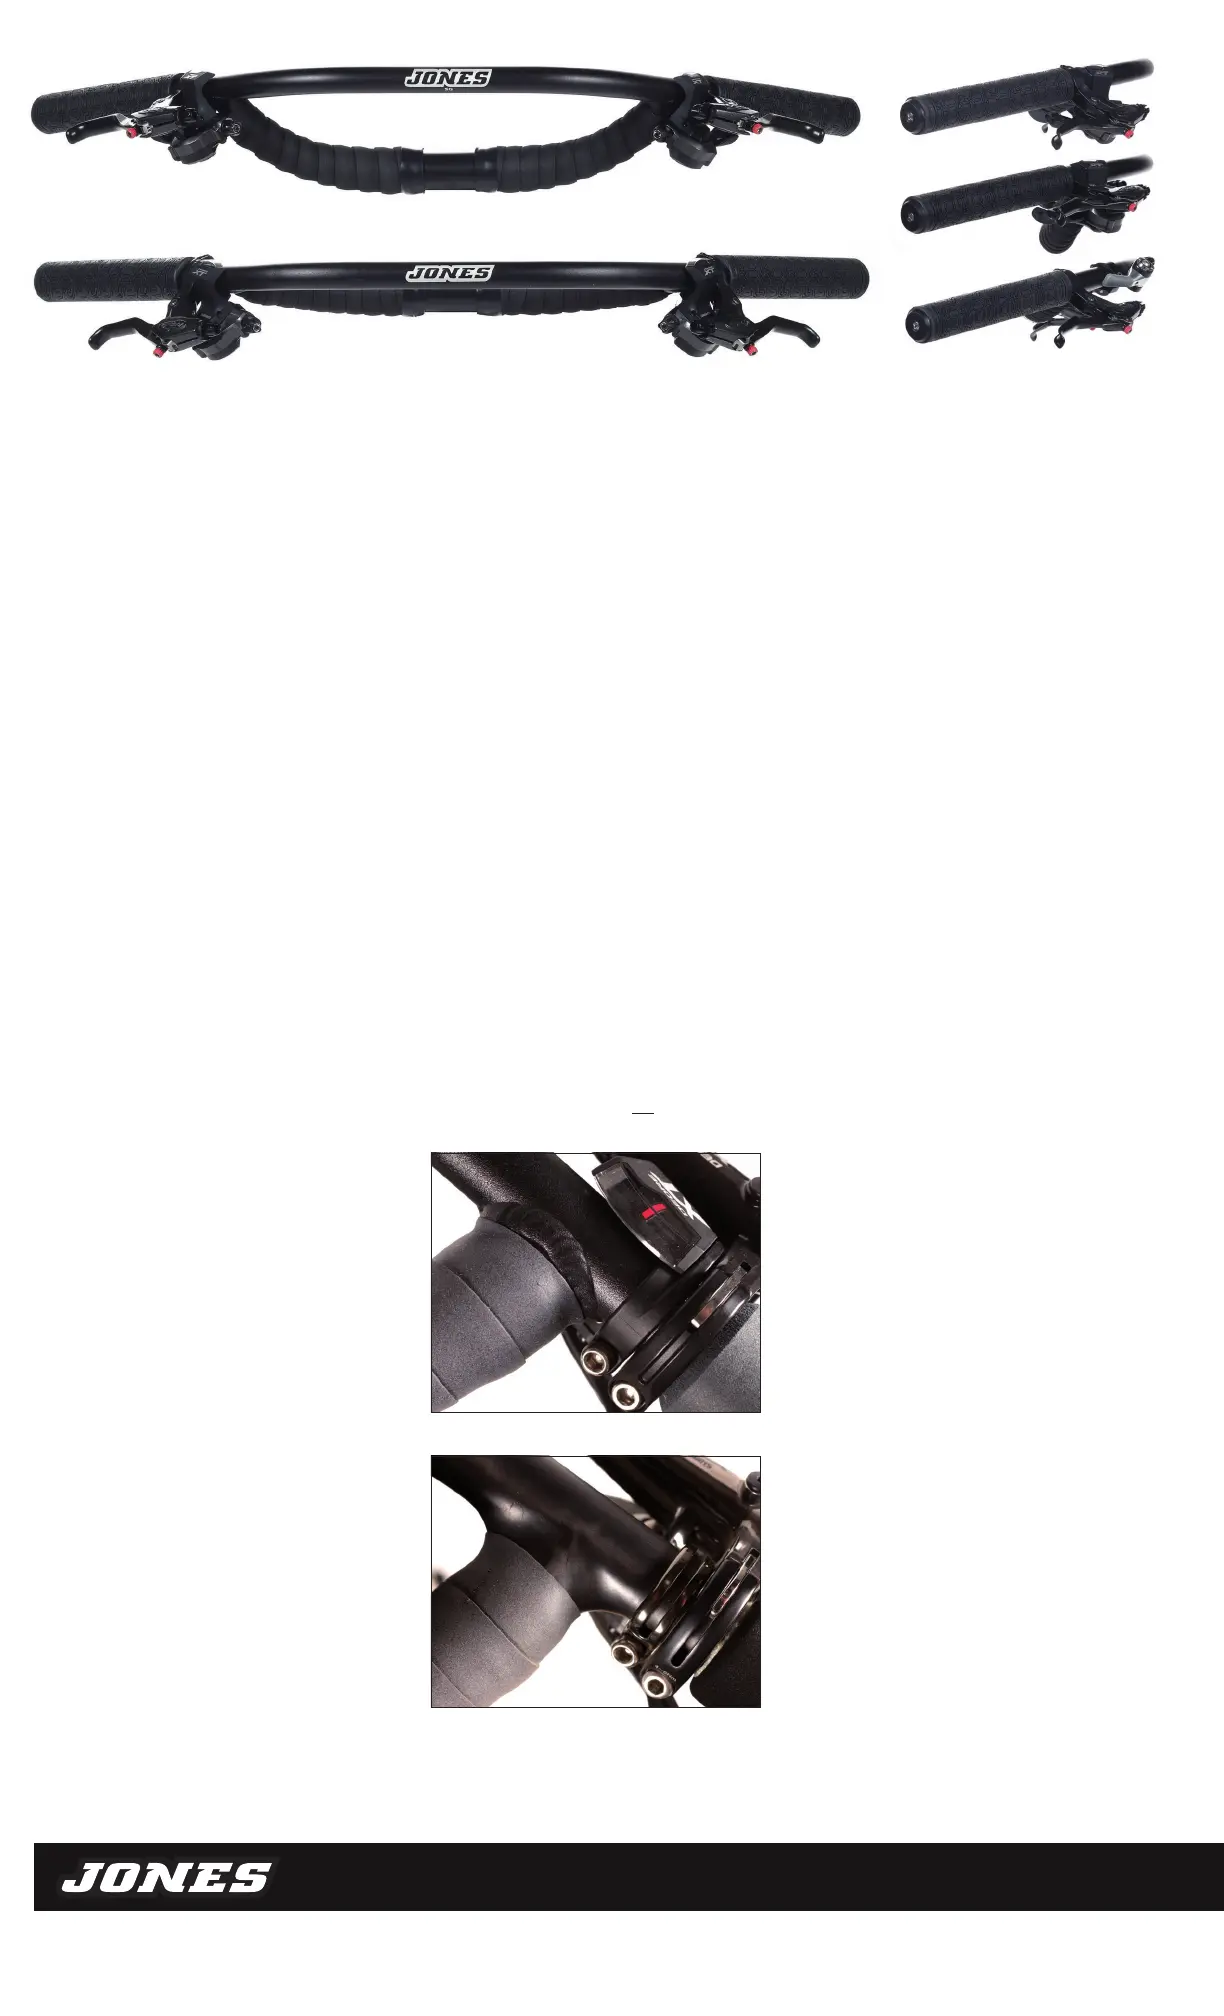
Above: Jones SG 2.5 Aluminum Loop H-Bar (top), Jones Aluminum Loop H-Bar (bottom)
Both fitted with Jones Kraton H-Grips and H-Bar tape.
Above right: (top) Loop H-Bar with trigger shifters and Kraton H-Grips,
2.5 SG Loop H-Bar with same controls (middle), Loop H-Bar with Paul Thumbies
and Kraton H-Grips (bottom). Note: grips fill the entire grip area.
 Loading...