7
ASSEMBLY
Fig. 4
INSTALL SEAT (See Figs. 2 and 3)
• Remove bolt and flat washer se cur ing seat to cardboard
packing and set aside for as sem bly of seat to tractor.
Remove the cardboard packing and discard.
• Connect switch to seat.
• Place seat on seat pan so all three (3) bottom pads
are positioned over large slotted holes in pan.
Fig. 2
WIRING HARNESS
SEAT
SWITCH
PAD
TAPE
SEAT
PAN
SLOT
• Push down on seat to engage pads in slots and pull
seat towards rear of tractor.
• Raise seat and tighten bolt securely.
• Remove tape and discard.
• Lower seat into operating position and sit on seat.
Press clutch/brake pedal all the way down. If operating
position is not comfortable, adjust seat.
To adjust seat: Grasp adjustment handle and pull up, slide
seat to desired po si tion and release adjustment handle.
Fig. 3
BOLT
FLAT
WASHER
SEAT PAN
PAD
TAPE
SLOT
TAB
ADJUSTMENT
HANDLE
NOTE: You may now roll your tractor off the skid. Follow
the ap pro pri ate instruction below to remove the tractor
from the skid.
WARNING: Before start ing, read, un der stand and fol low
all in struc tions in the Op er a tion section of this man u al. Be
sure tractor is in a well-ventilated area. Be sure the area in
front of tractor is clear of other peo ple and objects.
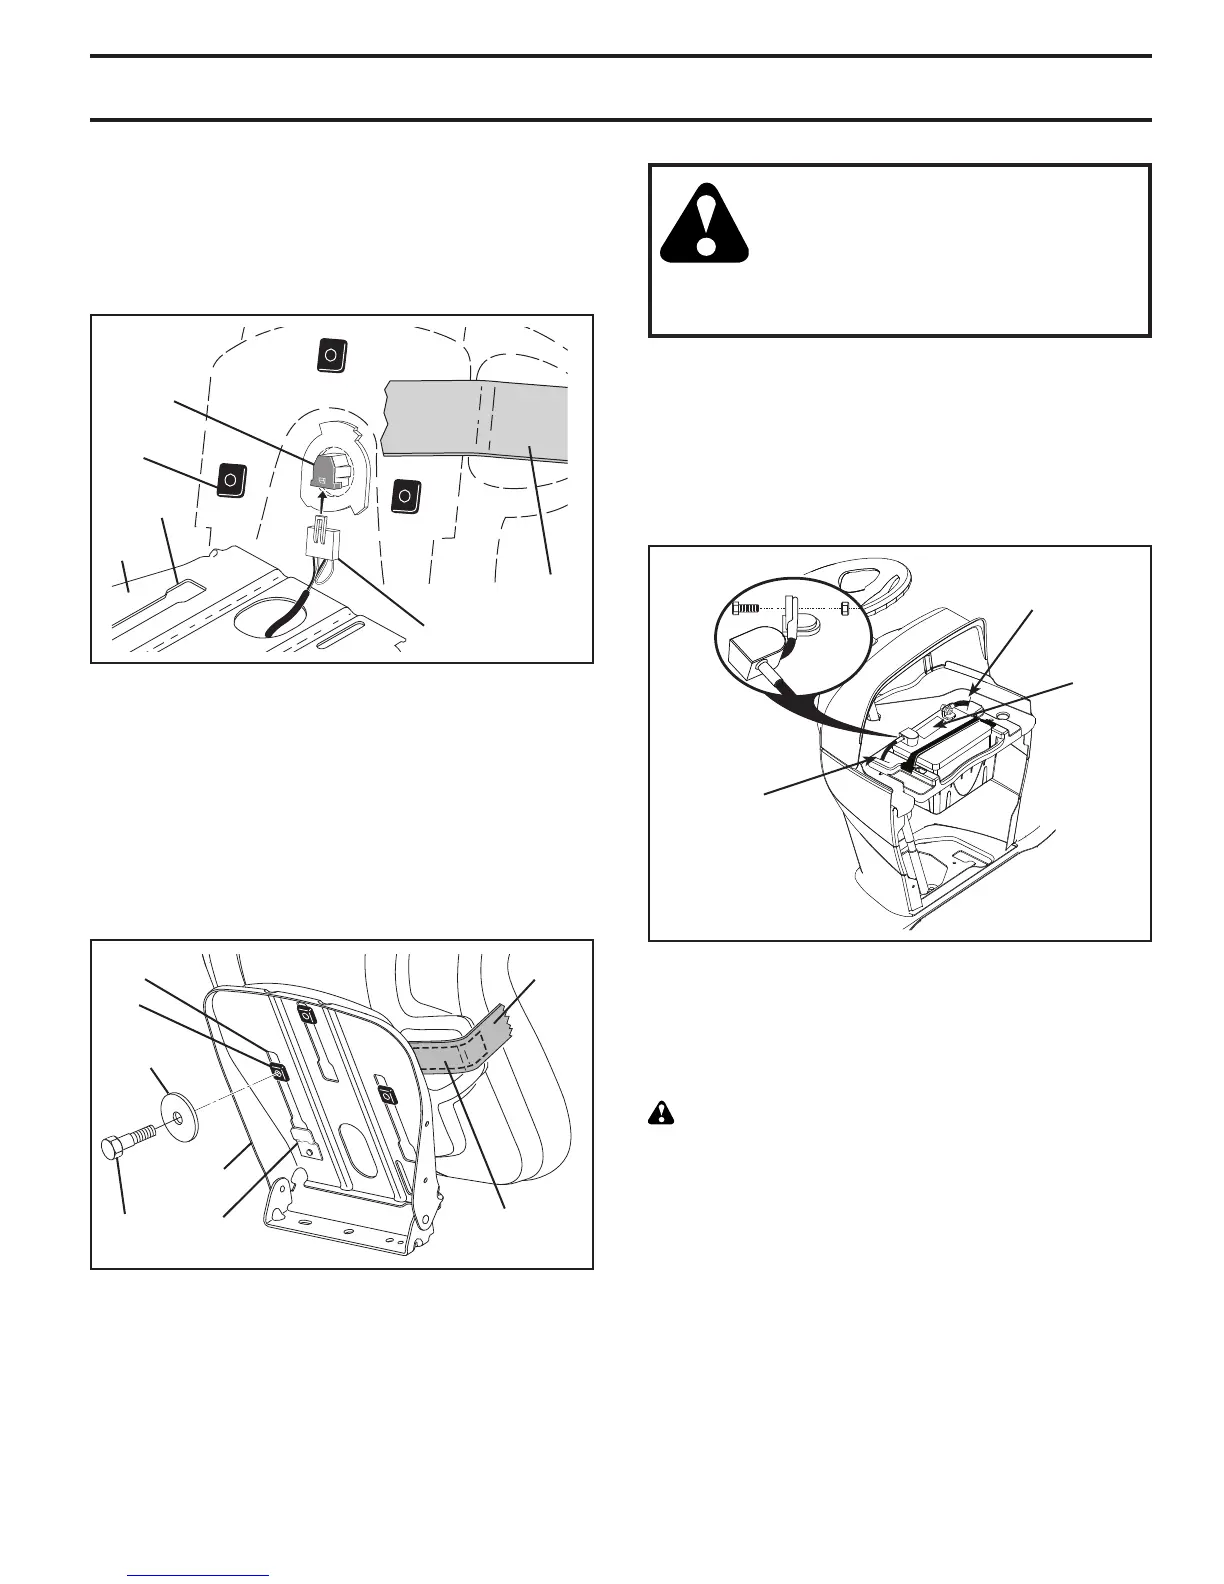
CONNECT BATTERY (See Fig. 4)
CAUTION: Do not short battery terminals by
allowing a wrench or any other object to con-
tact both terminals at the same time. Before
connecting battery, remove metal bracelets,
wristwatch bands, rings, etc.
Positive terminal must be connected first to
prevent sparking from accidental ground ing.
• Lift hood to raised position.
• Remove terminal protective caps and discard.
NOTE: If this battery is put into service after month and year in-
dicated on label (label located between terminals) charge battery
for minimum of one hour at 6-10 amps.
• First connect RED battery cable to positive (+) ter mi nal with
hex bolt and keps nut.
• Connect BLACK grounding cable to negative (-) terminal
with remaining hex bolt and keps nut. Tighten securely.
POSITIVE
(RED)CABLE
NEGATIVE
(BLACK)CABLE
LABEL
Fig. 4
TO ROLL TRACTOR OFF SKID (See Op er a tion
section for location and function of con trols)
• Press lift lever plunger and raise attachment lift lever
to its highest po si tion.
• Release parking brake by de press ing clutch/brake ped al.
• Place freewheel control in "trans mis sion dis en gaged
position" (See “TO TRANS PORT” in the Op er a tion
section of this manual).
• Roll tractor forward off skid.
• Remove banding holding the deflector shield up against
tractor.