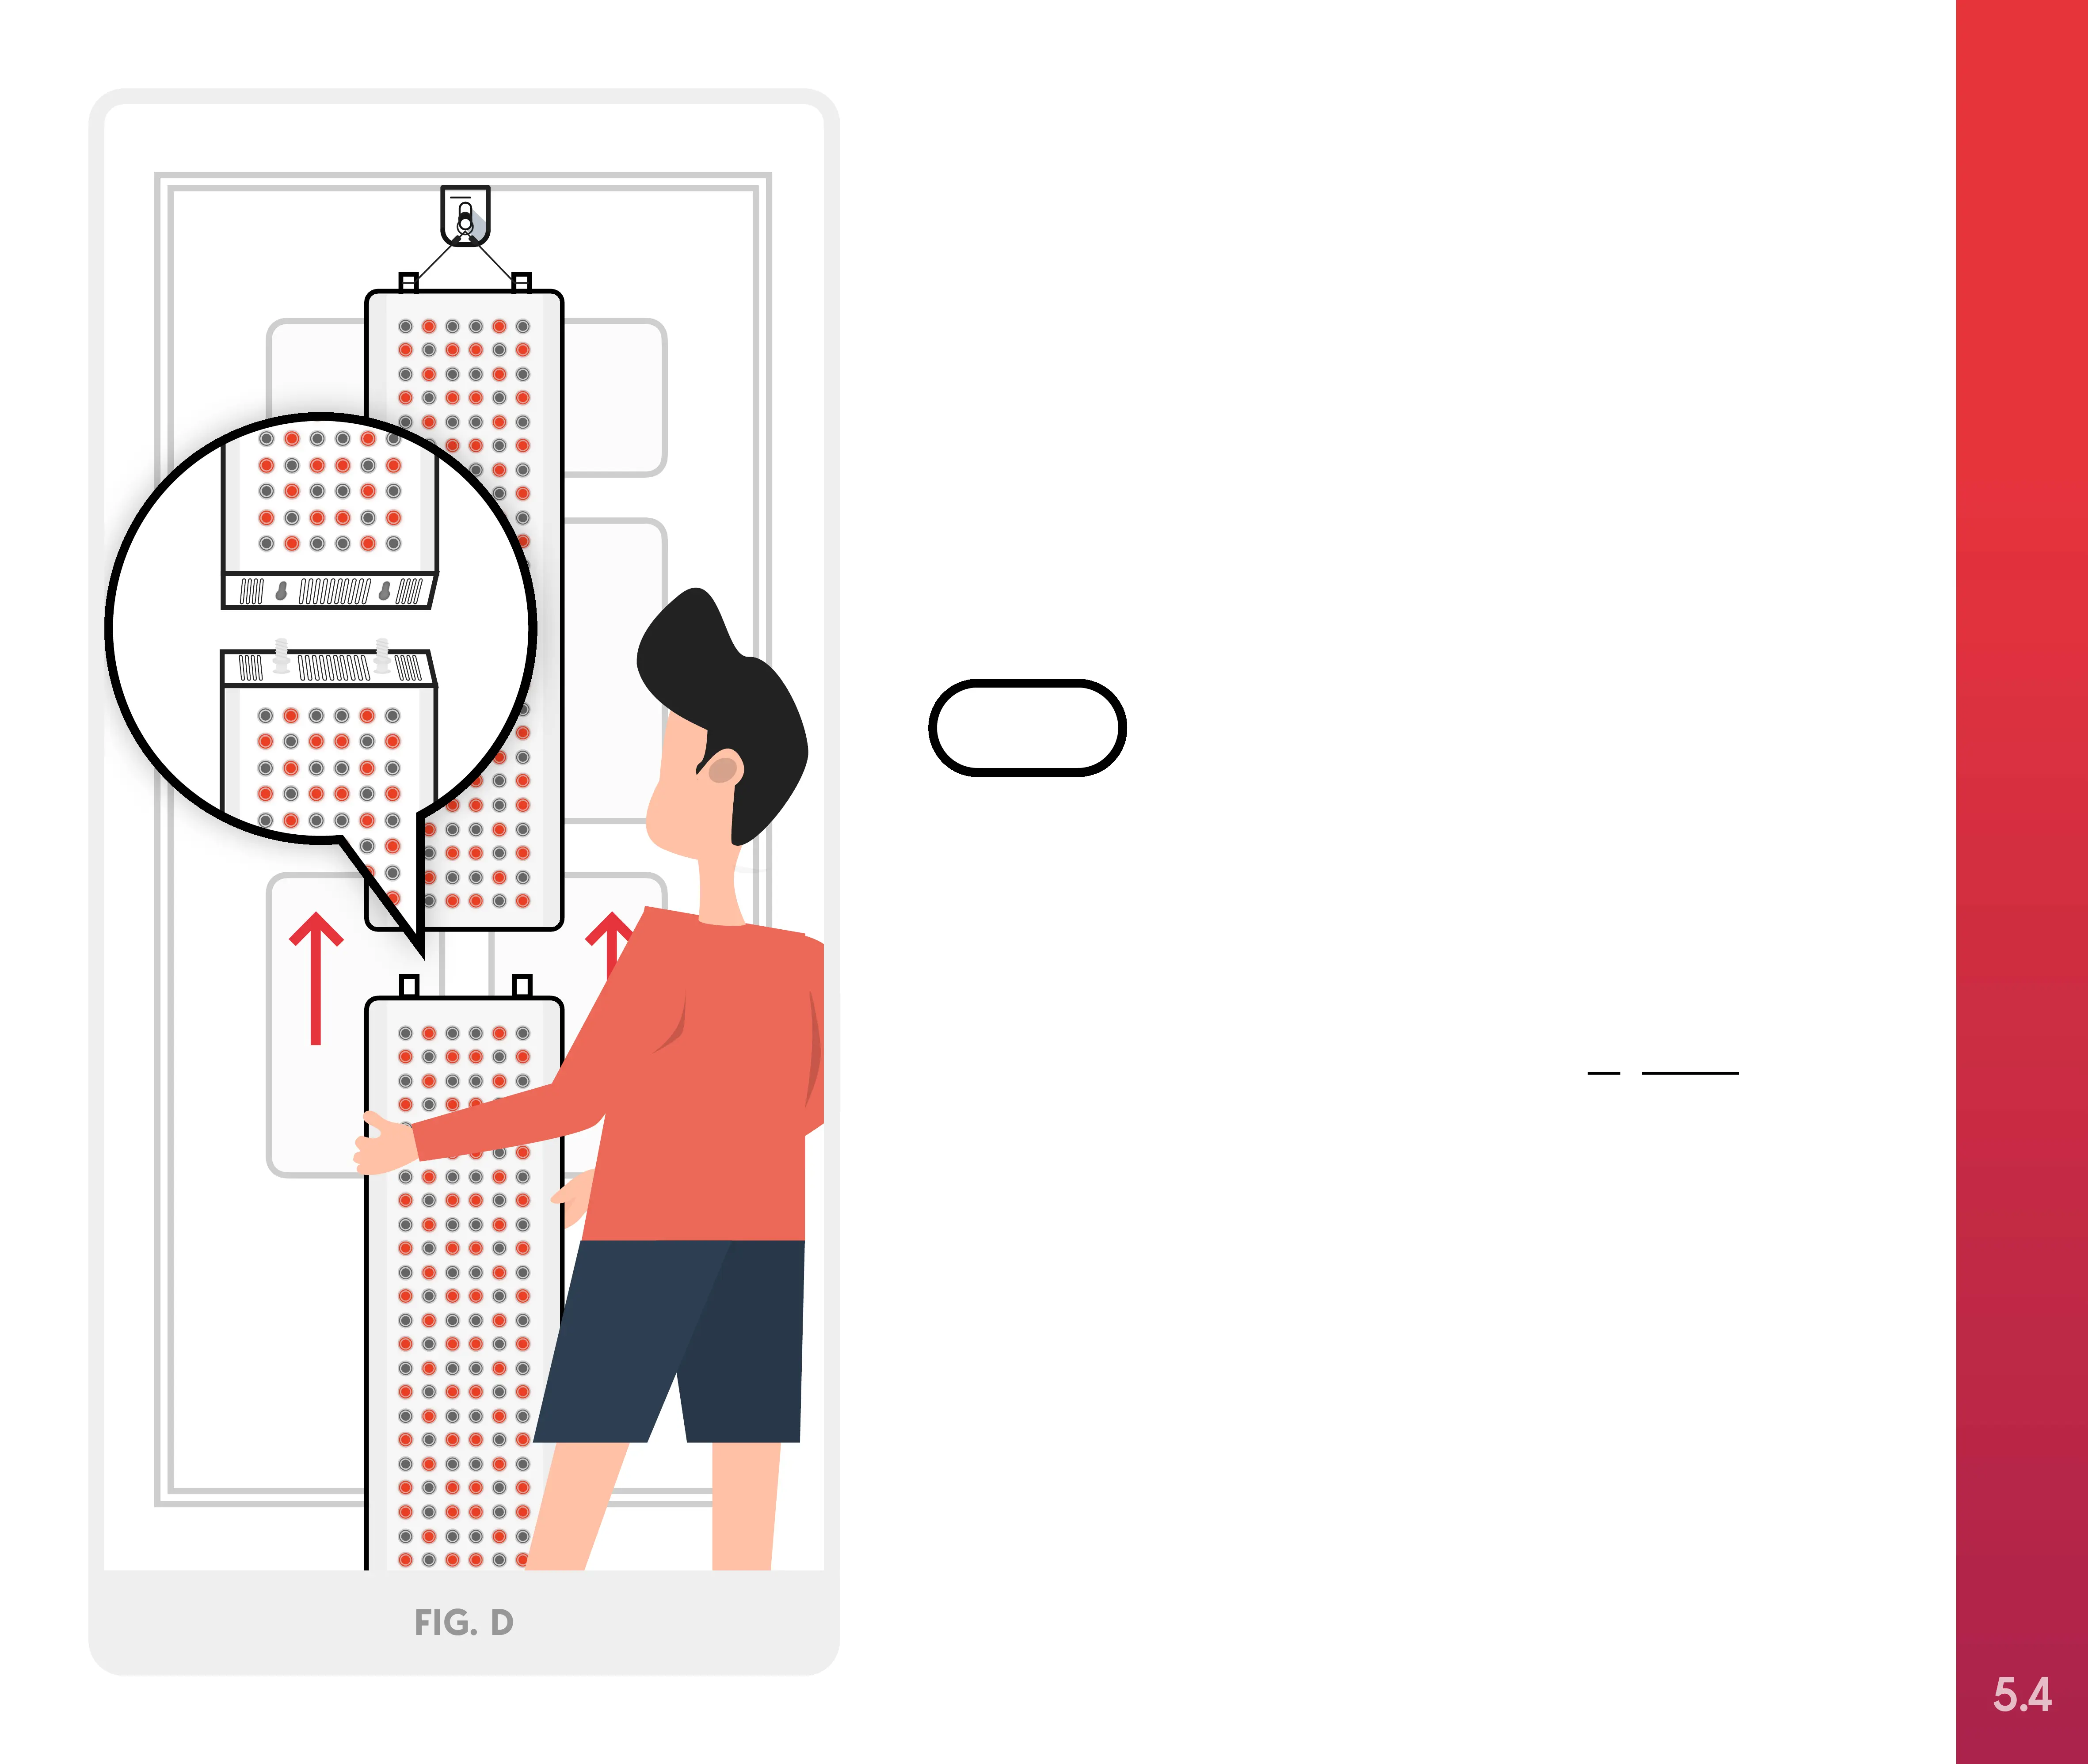
To connect #2 Solo, lift it into position below #1 Solo
that is already in place. Line up the threaded posts
with the holes in the end caps of #1 Solo. Then,
insert threaded posts into the holes, and slide
forward to lock in place, as shown in Figure D.
STEP 5
(2 people required)
SETTING UP YOUR JOOVV DUO
5.4