1 Unpacking the Product
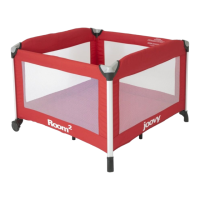
• RemoveeverythingfromtheboxandidentifythepartsusingFigure 1.1. (not to scale)
A: playard, B: mattress, C: travel bag, mattress sheet (not shown), and documents (not shown).
• Discard all packaging materials properly including plastic coverings.
• DO NOT allow children to play with any packaging materials.
!
WARNING
Adult assembly is required for this product. No Tools Required.
2 Unpacking/Assembling the Playard
• Keep children away from playard while unpacking and assembling.
• Open the travel bag and remove the playard and mattress.
• Release each of the Velcro® straps and slide them through the plastic ring as shown
• Set the mattress aside and position the playard so it is resting on the feet and wheels.
• DO NOT push the center down yet.
• With the center of the playard up, pull upward on each side rail until it locks into position. You will hear the rails lock into place.
See Figure 2.1.
NOTE: There is ONE mechanism that locks BOTH pieces of tubing on EACH side rail. See Figure 2.2.
CAUTION: DO NOT squeeze the release button underneath the locking mechanism while you are pulling up on these rails. Doing so may
prevent the locking mechanism from fully latching.
• Makesurethatthetoprailshavebecomerigid.Iftheyhaven’t,pullupagainuntiltheyarerigid.Youmayneedtoliftthecenteroftheoor
higher.
• Once you have locked the side rails in the up position, go back and check each side rail again to be sure they are all locked into position.
• Holdonesideoftheplayardupandpushdownthecenteroftheoor.See Figure 2.3.
• Place the mattress inside the playard with the soft side up.
NOTE: If using the sheet see section 3.
• Locate the Velcro® straps near the corners of the mattress.
• Slidethestrapsthroughthecorrespondingslotsintheooroftheplayardandsecureittotheundersideoftheplayardmakingsurethe
strap goes over the bar. See Figures 2.4 and 2.5. Repeat this step on the other three corners.
!
WARNING
Becarefulnottopinchyourngersonthetopcornersduringassembly.ALWAYSensurethatallsiderailsarelocked
intopositionbeforeusingthisproduct.ALWAYSsecurethemattresstotheplayardoorwiththeVelcro®straps.
NEVER use items not recommended by Joovy with this product.
3 Attaching/Removing the Mattress Sheet
NOTE:Thisproductcomescompletewithacustomtmattresssheet.Tousethesheetwithyourplayard,pleasefollowtheinstructions
below.
Beforeattachingthemattresstotheplayard,tthesheetoverthemattresswithallfourcornerspulledtight.Then,feedtheVelcro®straps
throughtheslotsinthesheetandthenthroughtheslotsontheplayardoor.Slidethestrapsthroughtheslotsintheooroftheplayardand
secure them to the underside of the playard as detailed in Section 2 and shown in Figures 2.4 and 2.5.
To remove the mattress sheet, detach the Velcro® straps and feed the straps through the slots in the sheet. Then, pull the sheet off of the
mattress.
!
WARNING
Preventpossiblestrangulationorentanglement.Neveruseplayardsheetunlessittssecurelyontheplayard
mattress.
4 Folding/Packing the Playard
• Tofoldtheplayard,releasetheVelcro®strapsonthecornersofthemattressfromtheundersideoftheplayardoor.See Figure 4.1.
• Lift the mattress from the playard and set it aside. If necessary, remove the mattress sheet.
• Pullupwardonthewebbingloopnearthecenteroftheplayardoor.Besurethatthecenterispulledupalltheway.See Figure 4.2.
• Withthecenteroftheoorpulledup,locatethebuttononthecenterofoneofthetoprails.
NOTE: The button is sewn inside the fabric near the center of each top rail. See Figure 4.3.
• Pull upward on the top rail and squeeze the button. Then push down until the locking mechanism is released on BOTH sides of the top
rail. See Figure 4.4.
NOTE: Iftherailtubesdonotunlock,donotforcethem.Liftthecenteroftheoorhigherandtryagain.
• Once you have successfully released BOTH tubes and folded that top rail, repeat this procedure on the other top rails until all four top rails
have been folded.
 Loading...