Installation Guide Guide d'installation ご 利 用 ガ イド
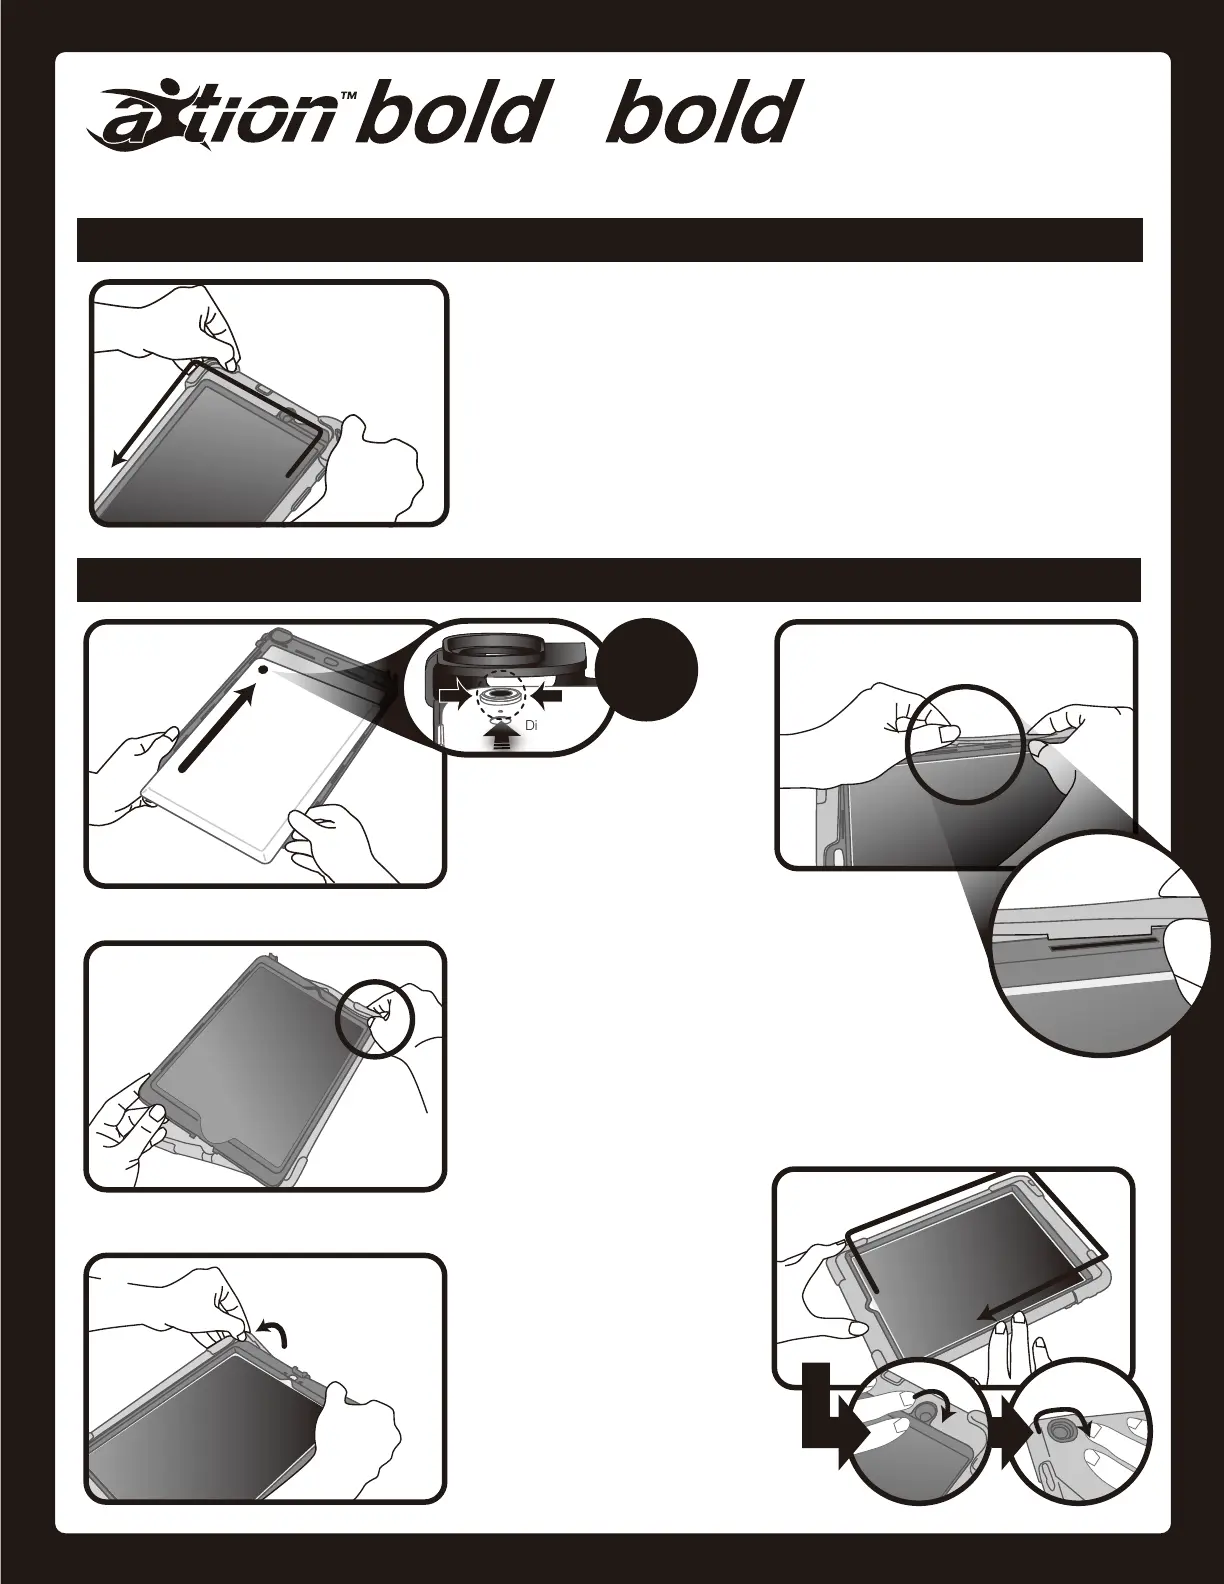
Removal / Retrait /
取り外し
Installation / Installation /
取り付け
Insert each silicone tab
tightly into its corre-
sponding slot in the
plastic frame to ensure
the case is water-resistant.
Insérez chaque languette
en silicone solidement dans
la fente correspondante sur
le cadre en plastique pour
garantir l’étanchéité de l’étui.
耐水性を確実に発揮するために、シリコンカバーの
突起をしっかりとプラスチックフレームにはめ込ん
でください。
& MP
for/pour
iPad Pro
9.7
''
Separate the inner plastic frame from the outer silicone cover by
starting at one corner.
Séparez le cadre intérieur en plastique de la couverture extérieure en
silicone en commençant par un coin.
いずれかの角からカバーを外します。(ケーブルカバー部分を開けてからカバーを外す
と取り外しやすくなります)
Insert device into plastic frame.
Insérez l'dispositif dans le cadre
en plastique.
モバイルデバイスをハードフレーム
に挿 入します。
Insert the plastic frame on
the camera side into the
silicone cover.
Insérez le cadre en plastique
côté caméra dans la couver-
ture en silicone.
カメラ側のフレームをシリコンカバ
ーに挿入します。
Insert the rest of the plastic
frame into the silicone cover.
Insérez le reste du cadre en
plastique dans la couverture en
silicone.
残りの部分を順にカバーに入れてい
きます。
Caution:
Raised
Camera