Tips
1. This machine is not designed to be used on synthetic hair or pet hair. The company will not assume
responsibility for any damage or product failure caused by misuse.
2. This product is designed for professional use only.
Safety precautions
Please store trimmer away from children. Trimmer contains sharp blades and small parts that can be
harmful to minors.
Keep Away from Children:
Safety Use:
1. Unplug the power adapter before cleaning the trimmer.
2. Remove the blade first, then use cleaning brush to remove any hair buildup.
3. Keep away from water in order to avoid shock or damage to the trimmer.
4. If the trimmer is accidentally dropped into water or any other chemicals, discard immediately.
Do not try to dry it and plug it into a power source.
5. To properly store, remove trimmer from dock, unplug adapter, and thoroughly clean your unit.
Do not store the trimmer on the charging dock or leave it attached to the adapter.
6. If the cord on the power adapter is damaged, stop using it immediately and replace right away.
7. Do not disassemble this product on your own. Visit authorized dealers for service and repair.
8
. Choose the correct voltage socket before charging (AC100-240V 50/60Hz).
9. Please do not twist, disassemble or puncture the rechargeable battery within the Trimmer, otherwise
it may cause a short circuit or burn the machine. If the battery is not working do not run the trimmer
and take it to an authorized dealer.
10. Do not disassemble the trimmer blade on your own,
11. Extended use in temperatures below -10 ℃ or above 40 ℃ is not recommended as it may
damage the battery.
To avoid product damage
1. Only use original accessories.
2. Do not sharpen the blade on your own.
3. Only use the original power adapter manufactured by JRL Using any other adapters from a
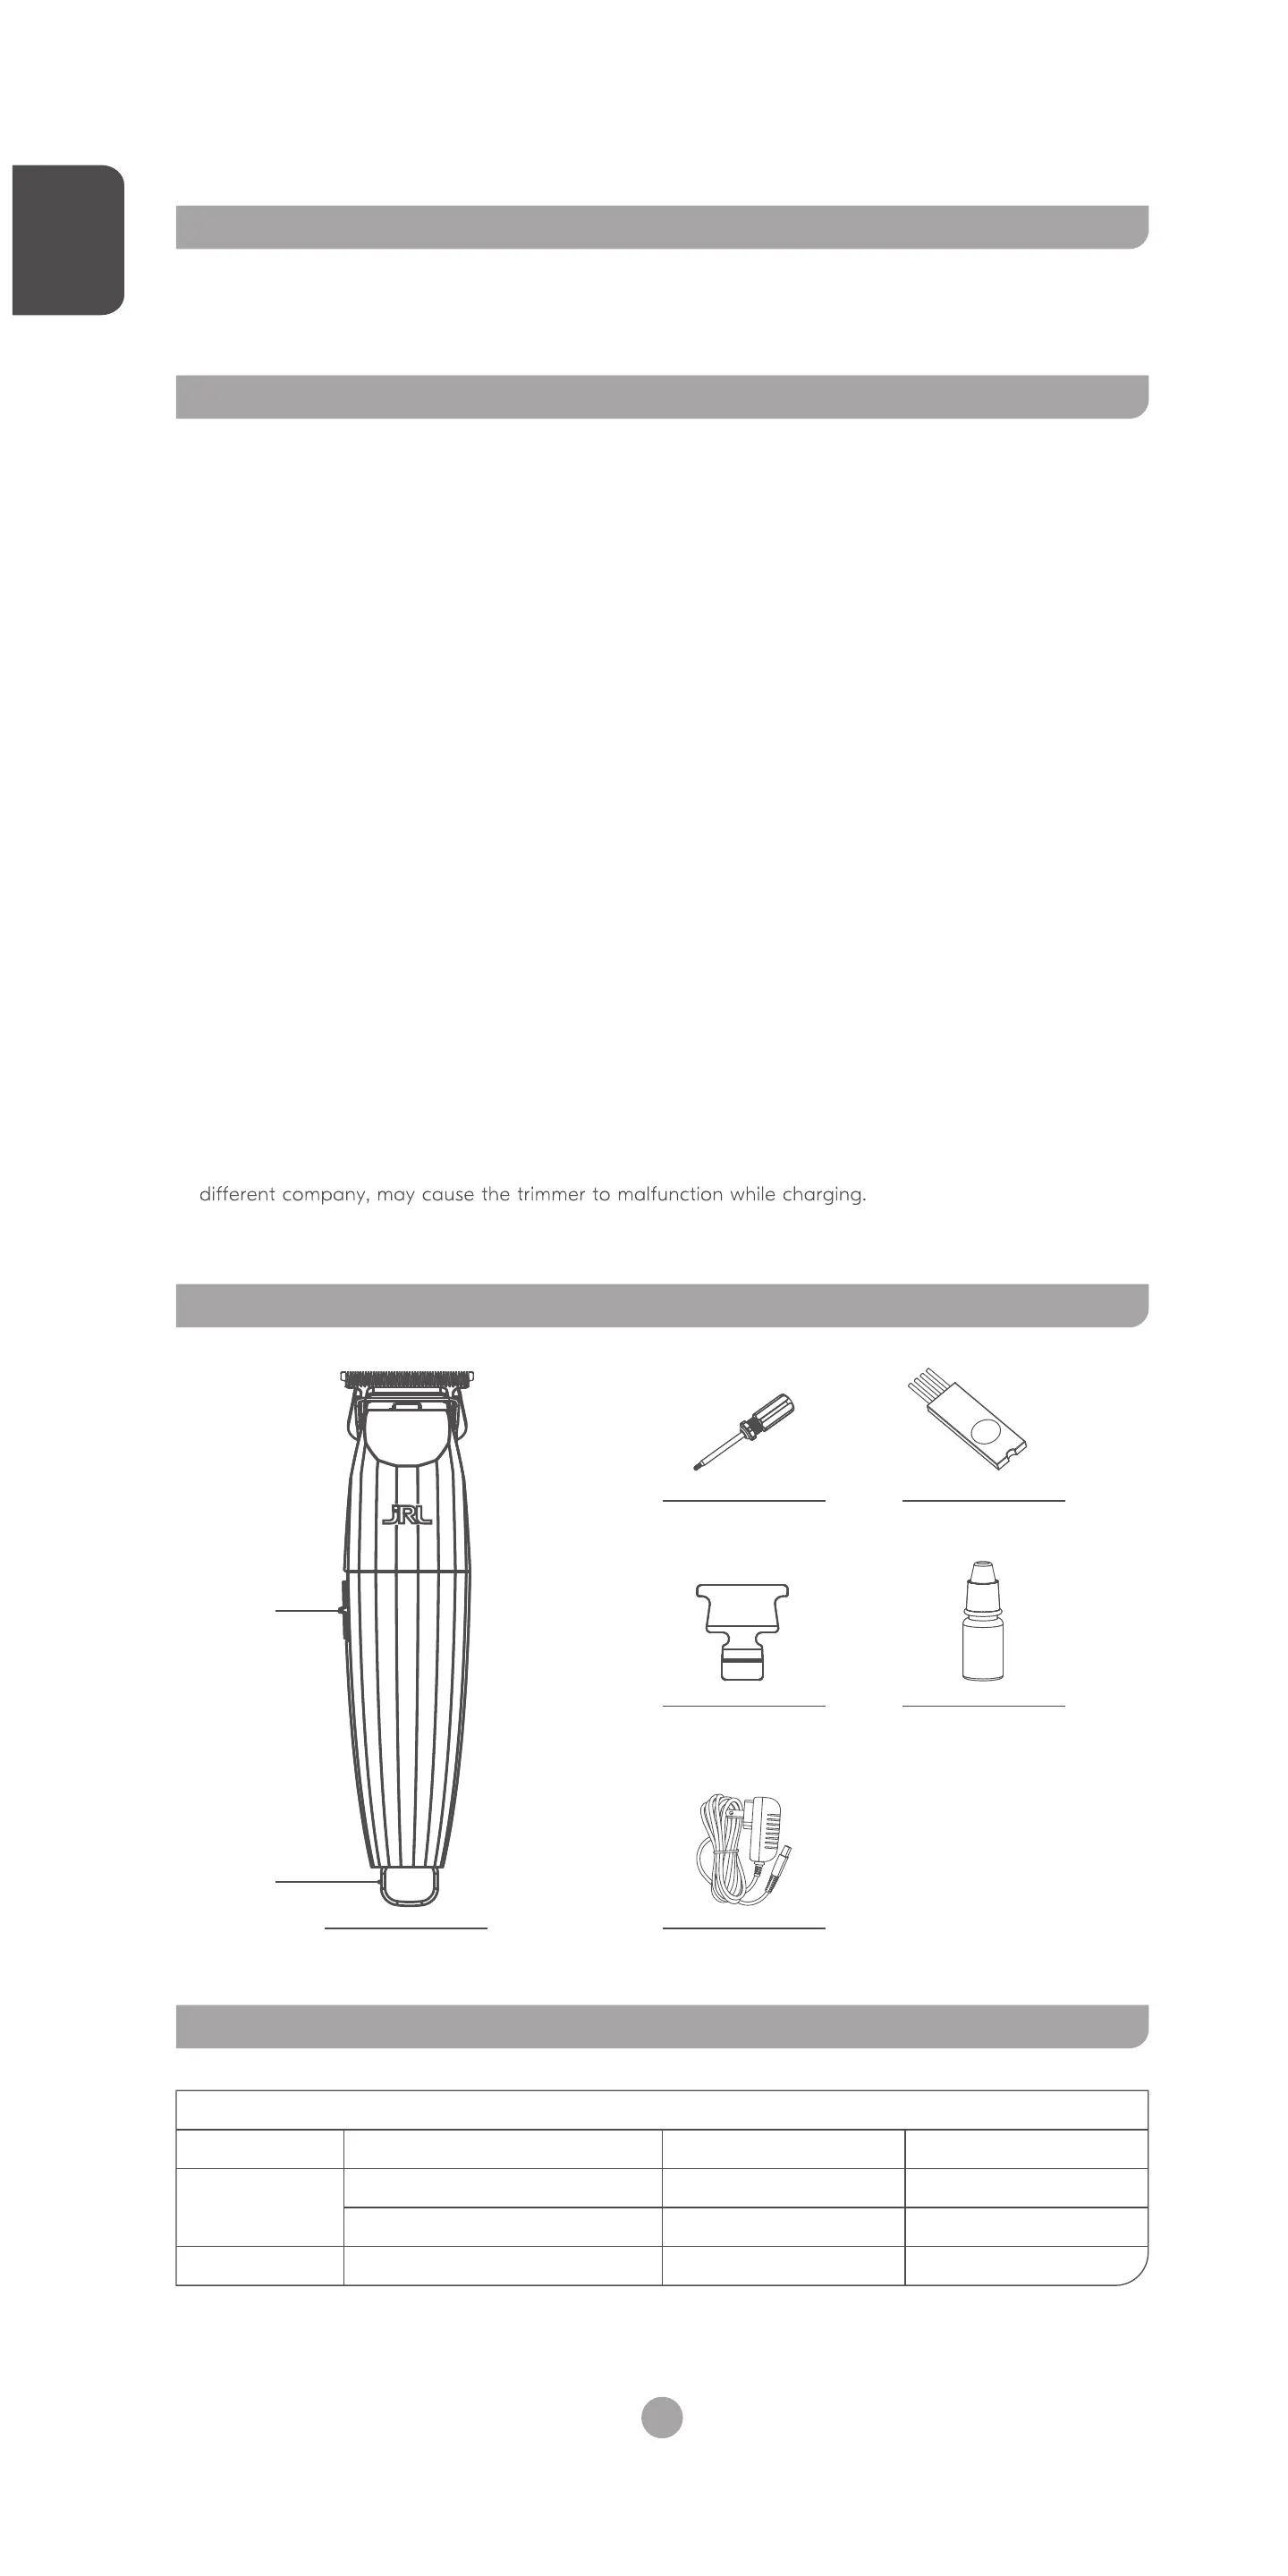
Product overview
Blade adjustment tool Brush
Blade Protector
AdapterTrimmer x1
Lubricant
Product specifications
ItemItem Specifications
Product code: 2020T
Power adapter
Battery capacity
Input AC100-240V 50/60Hz
Output DC5V 1A
3.6V 1400mAh
Type of battery
Charging time
Usage time
Specifications
Lithium ion battery
2 hours
2 hours
Hanging
hook
switch
How to charge your trimmer
Power Adapter
Electrical Outlet
①
②
O: Shutdown
I: Power on, 7,200 RPM
Switching and shifting instructions
Instructional use
Switch
On
Note:When the trimmer is low on charge, the adapter can
be plugged onto the trimmer directly. You may use
the trimmer while it is charging.
As shown in the figure, the power cord can be connected directly
to the trimmer to charge.
When the trimmer has less than 10 minutes of usable time,
the warning light flashes in red.
When the trimmer has more than 10 minutes of usable time,
the warning light flashes in white.
When the trimmer is fully charged, the warning light will stop
flashing and the white JRL light will remain on.
LED functions
The LED light shows the usable time of the trimmer in the
current speed setting.
When the trimmer is in high power mode, the white light is on.
When the trimmer is in medium power mode, the red light is on.
When the trimmer battery is low, the red light will flash.
Trimmer status indication by LED light
After the blade is installed, be sure to carefully check whether the corresponding parts have been
firmly attached.
Do not try to sharpen or alter the blade by yourself to avoid damaging your machine.
How to adjust cutting length to 0mm
Blade maintenance
Note:
1. Please read the blade maintenance Instructions carefully before operating. Follow the instructions
when removing and installing the blade to avoid improper assembly.
2. After the blade is installed, be sure to carefully check whether the corresponding parts have been
firmly attached.
3.
4. When handling the blade, do not try to sharpen or alter the blade by yourself to avoid damaging
your trimmer.
As seen in figure 1, hold the bottom blade with your fingers to avoid the blade from moving. Loosen the
screws and remove the blade. Make sure you hold the blade and the trimmer when disassembling to
prevent parts from falling and getting damaged.
Removing your blade
As shown in the figure 2, align the screw slots corresponding to the blade and main unit of trimmer.
Tighten the screws. Then the installation of the blade is complete.
Installing your blade
Figure 1 Figure 2
Loosen the screws clockwise
to adjust to the gap you need.
1
Check the upper and lower
blades are centered and parallel.
2
EN EN
01 02
 Loading...