– 15 –
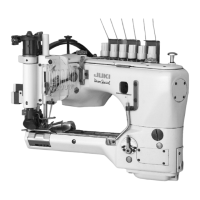
1. Checking procedure of needle entry
(1) Mount 3 needles to the needle clamp and tighten the setscrew
.
(2) Loosen the needle bar holding screw , set the temporary needle
bar height (12.5 mm), and tighten the needle bar holding screw
{6} temporarily (approximately 4 turns of the needle bar ).
(3) Insert the torque rod into the hole at the top of the needle bar
and rotate the needle bar in the right-left direction to adjust the
needle entry position in the front-rear and right-left directions.
(Caution) 1. When the needle position is not in the center of
the needle hole of the throat plate in the right-left
direction, follow the procedure below.
2. For needle entry adjustment, mount the rear needle
guides temporarily and make sure that 3 needles
touch evenly.
2. Needle entry adjustment
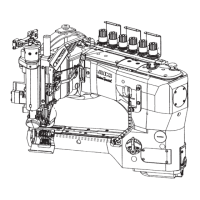
(1) For adjusting the needle entry position in the right-left direction,
remove 6 setscrews securing the front top cover to remove
the front top cover and packing .
(2) Loosen the hexagon head bolt , engage a driver with the eccentric
pin , and rotate the driver in the right-left direction. Then, the
sylinder arm moves in the right-left direction.
(3) Adjust the needle entry position in the right-left direction.
o Rotation of the eccentric pin clockwise moves the cylinder arm
leftward.
o Rotation of the eccentric pin counterclockwise moves the cylinder
arm rightward.
(4) After adjustments, tighten the hexagon head bolt .
(5) After adjusting the needle entry position, put the front top cover
and packing back on and tighten the setscrew .
o Improper needle entry position
adjustment may cause stitch
skipping, needle breakage, or
thread breakage.
Adjustment Procedures Results of Improper Adjustment
 Loading...