10
Innenbeleuchtung
Sollte sich die Beleuchtung beim Öffnen der Türe
nicht einschalten, ist zu überprüfen, ob die
Glühbirne fest eingeschraubt ist; wenn die Störung
dennoch bestehen bleibt, die defekte Glühbirne
durch eine neue Birne gleicher Leistung ersetzen.
Die Innenbeleuchtungslampe im Kühlabteil ist durch
Arbeitsschritte, wie in der Abbildung gezeigt
zugänglich:
Die maximale Leistung ist am Leuchtkörper
angegeben.
WARTUNG
Vor jeder Reinigungsarbeit immer den
Netzstecker aus der Steckdose ziehen.
Achtung
Dieses Gerät enthält im Kältekreislauf Kohlen-
wasserstoff. Aus diesem Grund darf die Wartung
und das Nachfüllen aussschließlich von
autorisiertem Fachpersonal durchgeführt werden.
Regelmäßige Reinigung
Benutzen Sie nie Metallgegenstände um das Gerät
zu reinigen, da es beschädigt werden könnte. Den
Innenraum mit lauwarmem Wasser und Natron
reinigen.
Gut nachwaschen und sorgfältig trocknen.
Den Kondensator und den Motorkompressor mit
einer Bürste oder einem Staubsauger reinigen. Dies
begünstigt den guten Betrieb mit folglicher
Stromersparnis
Stillstandszeiten
Bei längerem Stillstand des Gerätes, müssen Sie
folgendermaßen vorgehen:
den Stecker aus der Steckdose ziehen;
alle Lebensmittel herausnehmen;
Gerät abtauen, Innenraum und Zubehörteile
reinigen;
die Türen offen lassen, um im Innern eine gute
Luftzirkulation zu gewährleisten und somit
Geruchsbildung zu vermeiden.
15
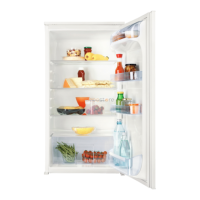
Cleaning the interior
Before using the appliance for the first time, wash
the interior and all internal accessories with luke-
warm water and some neutral soap so as to remove
the typical smell of a brand-new product, then dry
thoroughly.
USE
Do not use detergents or abrasive
powders, as these will damage the finish.
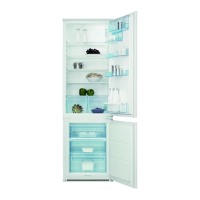
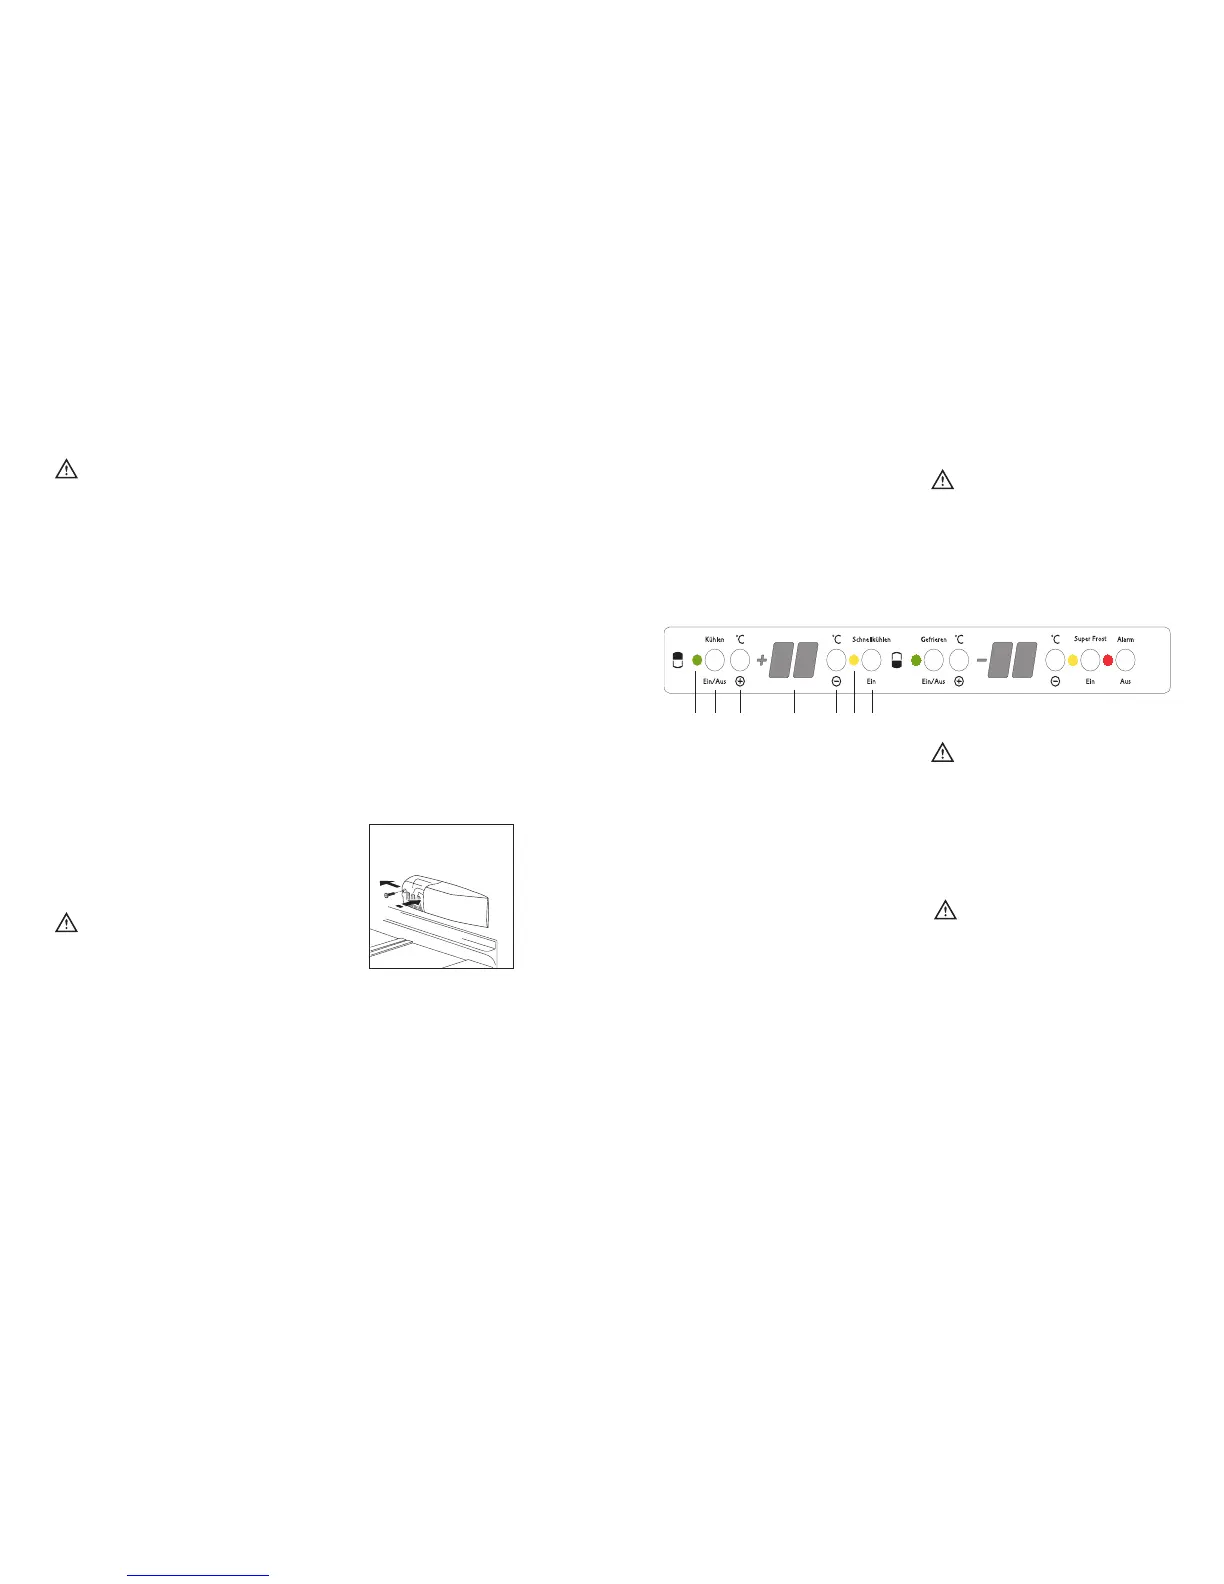
Control Panel
Use of the fridge
A. On/OFF light
B Fridge button ON/OFF
C Temperature setting button (warmest)
D Temperature indicator
E Temperature setting button (coldest)
F Super cooling light
G Super cooling button
A. Light ON/OFF
B. Button ON/OFF
ON: Press the button (B). The pilot light (A)
switches on.
OFF: Keep press the button (B) until the pilot light
(A) and the temperautre indicator switched off.
C - E. Temperature setting buttons
The temperature can be adjusted between +2°C and
+8°C.
By pressing the button (C or E), the current
temperature setting flashes on the indicator. It is
possible to modify the setting temperature only with
flashed indicator. To set a warmer temperature,
press button (C). To set a colder temperature, press
button (E). The indicator display the newly selected
temperature for a few seconds and then shows
again the inside compartment temperature.
The newly selected-temperature must be reached
after 24 hours.
Attention!
During the stability period by the first starting the
temperature displayed can not correspond to the
setting temperature. During this time it is possible
that the temperature displayed is lower than the
setting temperature.
D. Temperature indicator
During normal functioning the indicator shows the
temperature inside the fridge.
Attention!
Difference between the temperature displayed and
temperature setting is normal. Especially when:
- a new setting has recently been selected
- the door has been left open for a long time
- warm food has been placed in the compartment
F. Super cooling pilot light
G. Super cooling button
The maximum performance is obtained by setting
the supercooling function. It’s recommended when
loading large quantities of food.
Press the supercooling button (G).The relevant pilot
light (F) switches on.
The internal temperature goes down to +2°C.
After about 6 hours the supercooling function
switches off automatically.
 Loading...